by Clara Scott | Feb 21, 2026 | Uncategorized
A small kitchen island can completely change how your kitchen works and feels. It gives you extra counter space, more storage, and a spot where people naturally gather. You do not need a huge kitchen to have one. Even a compact island makes cooking easier and the whole room more enjoyable. Here are some ideas to help you find the perfect island for your space.
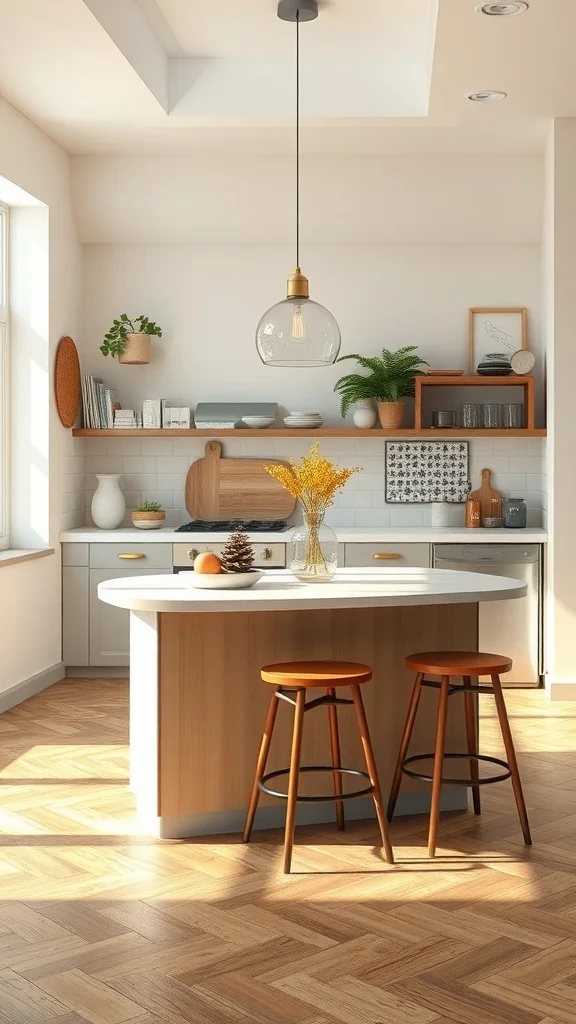
Lighting Ideas for Small Kitchen Islands
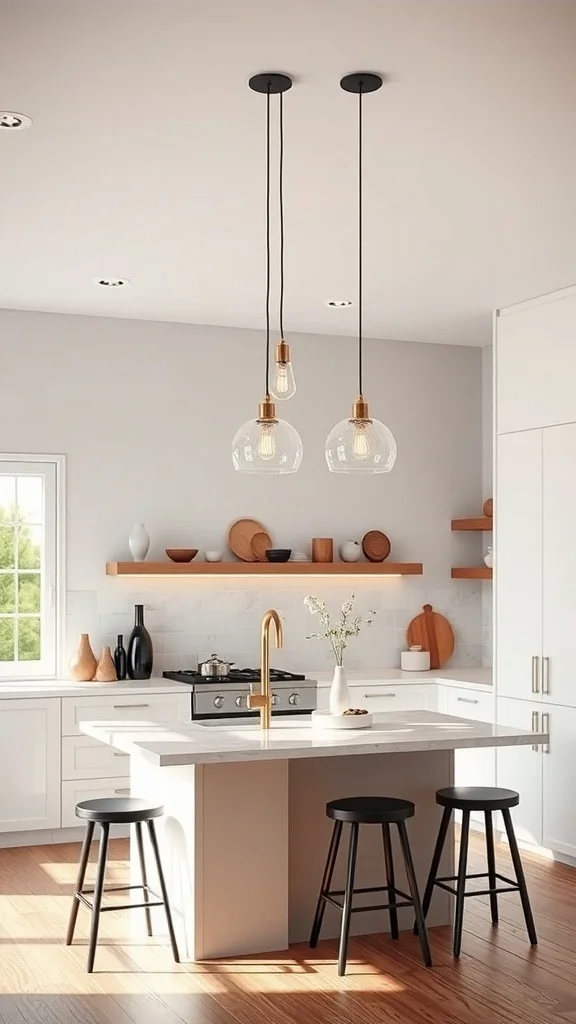
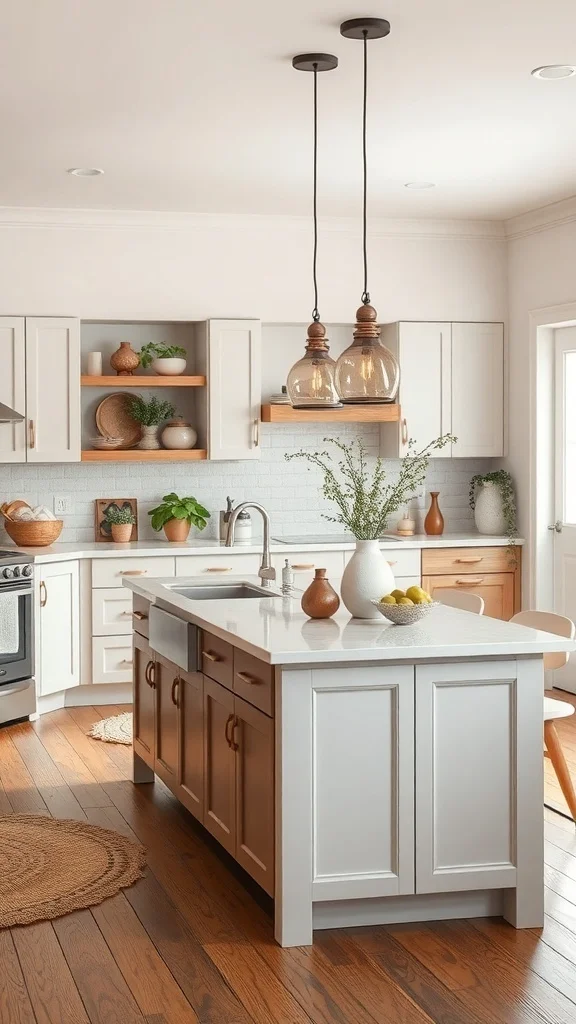
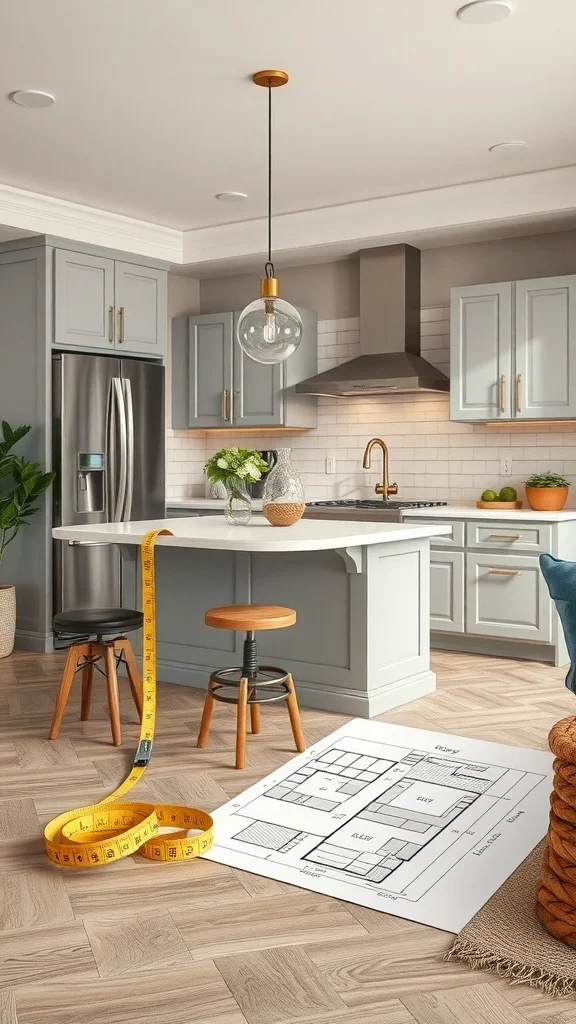
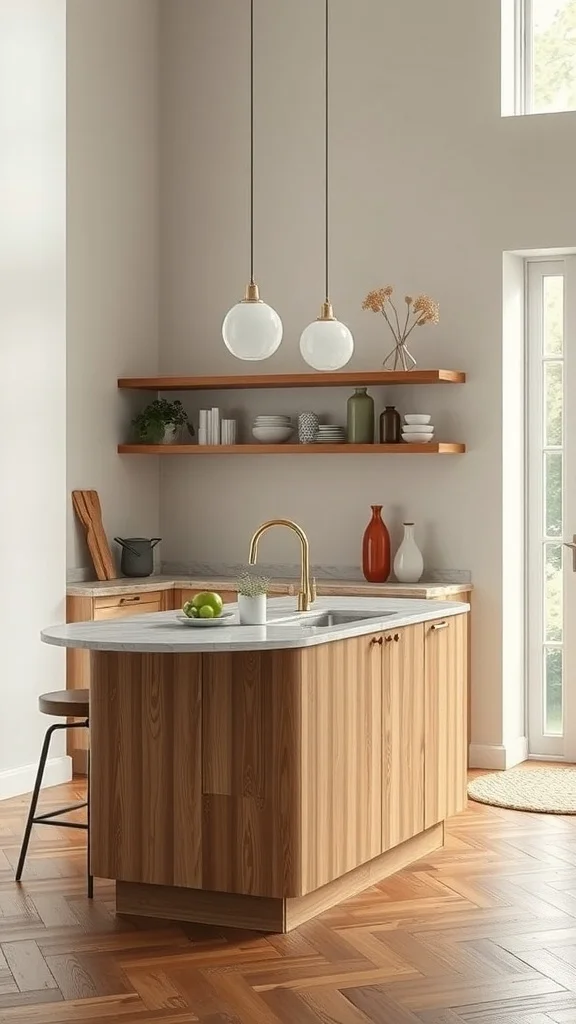
Three pendant lights hanging above the island in a perfect row. Clear glass shades letting the light pour down onto the counter. Black and gold hardware giving the fixtures a modern edge. The island glows and the whole kitchen feels warm and focused.
Good lighting turns a small island from just a surface into the centerpiece of the room. It is one of those upgrades that changes everything.
Hang two or three pendant lights evenly spaced above your island at about 30 to 36 inches from the countertop. Choose clear or open shades so the light spreads fully across the workspace. Match the fixture finish to your cabinet hardware for a pulled-together look. Add under-cabinet lighting along the main counters to brighten the surrounding area and make the whole kitchen feel larger. If you cook a lot consider adjustable pendants so you can direct the light exactly where you need it.
Maximizing Space with a Compact Island
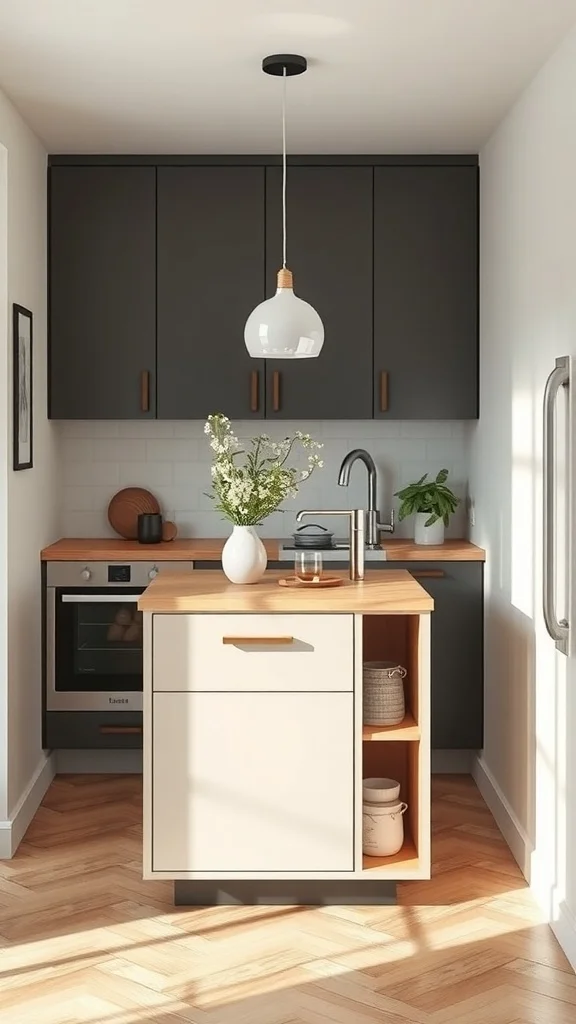
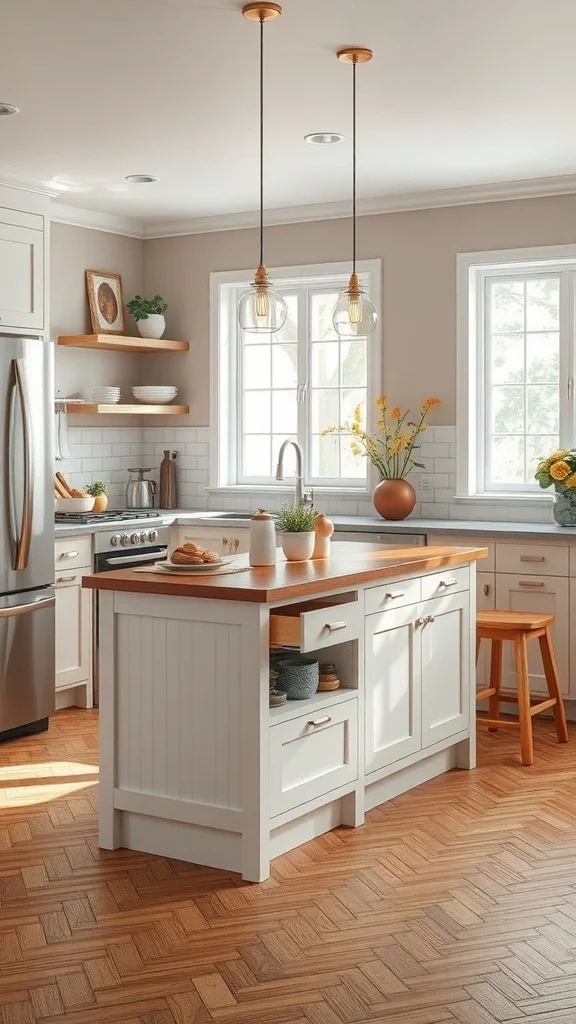
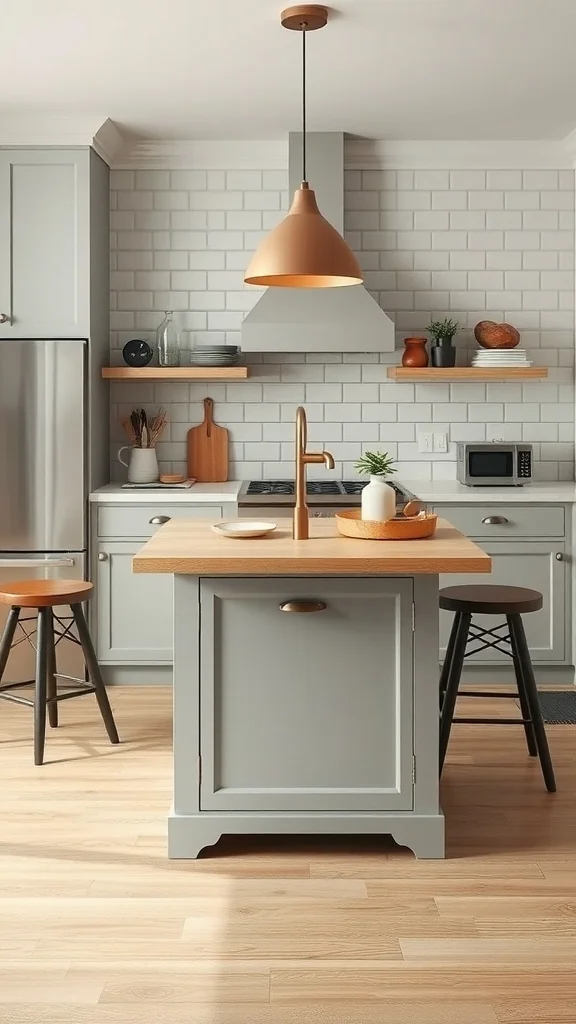
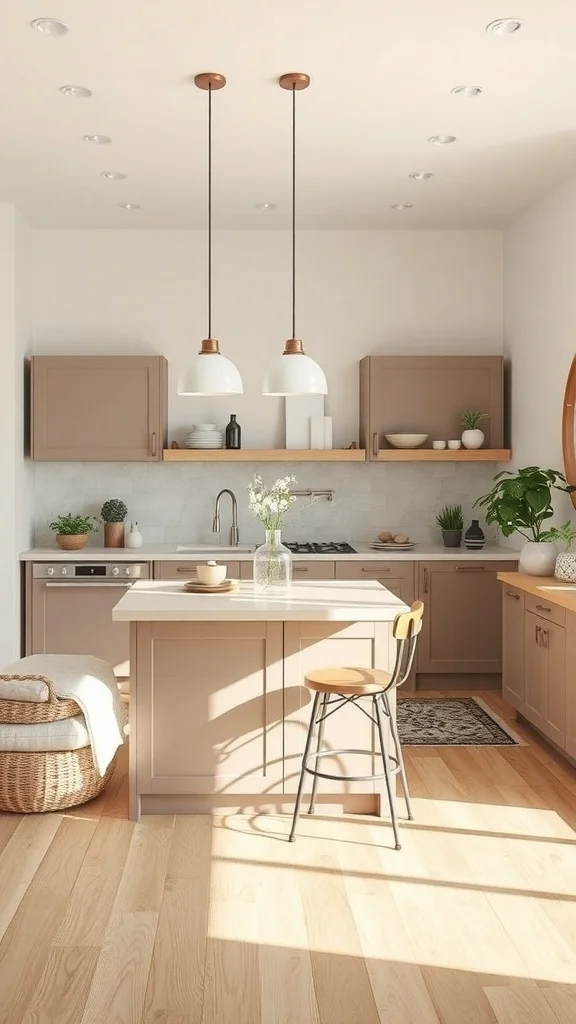
A slim island with clean lines fitting perfectly into a cozy kitchen. Shelves on the side holding dishes and everyday items. A drawer tucked in for hidden storage. A warm wood countertop catching the natural light and a small vase of flowers adding softness.
It takes up so little room but adds so much function. The kitchen feels more complete the moment this island is in place.
Measure your kitchen carefully and choose an island that leaves at least 36 inches of clearance on all sides for comfortable movement. Look for a design with both open shelves and a closed drawer so you get display and hidden storage in one piece. Choose a countertop material that contrasts slightly with your main counters for visual interest. Keep the top clear except for one or two items like a plant or a cutting board. A compact island like this gives you prep space, storage, and a casual dining spot without crowding the kitchen.
Color Schemes to Enhance Your Kitchen Island

A bold pink island standing in the middle of a warm neutral kitchen. Light wood tones and white walls framing it perfectly. The island is the star and every other color in the room supports it.
A colorful island turns your kitchen into something exciting and personal. It is one piece with one color that changes the mood of the entire room.
Choose a color for your island that contrasts with the rest of your kitchen without clashing. Bold options like deep blue, sage green, warm terracotta, or soft pink work beautifully against neutral walls and light cabinetry. Keep the countertop in a neutral tone like white or natural wood so the base color stays the focal point. Match one small accessory like a vase or a towel to the island color to tie the room together. A glossy finish makes the color pop while a matte finish gives it a softer more relaxed feel.
Choosing the Right Materials for Small Islands
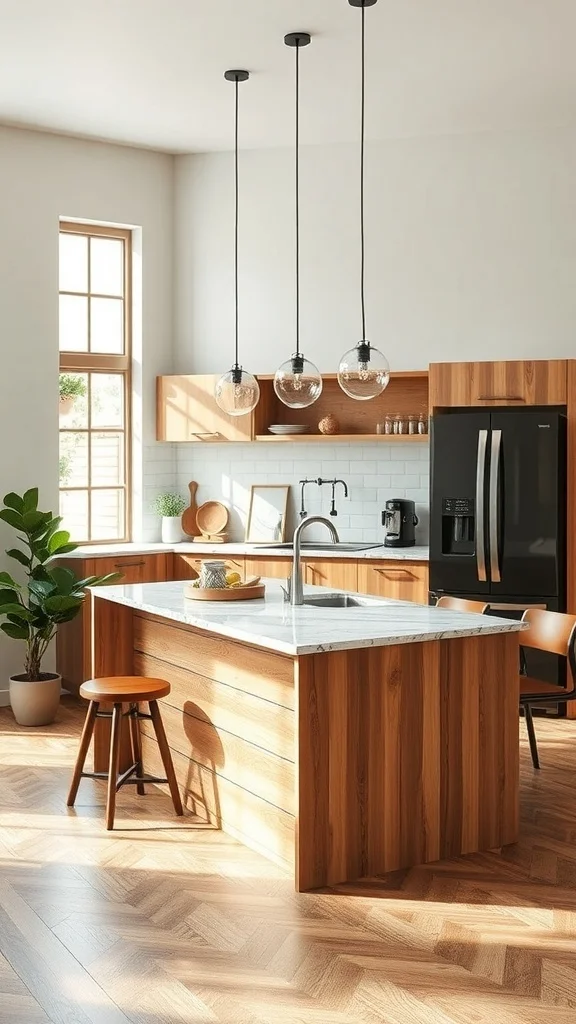
A sleek marble top sitting on warm wooden cabinetry. The veining in the marble catching the light. A herringbone floor tying the whole space together. Pendant lights above finishing the look with style.
The materials you choose define how the island looks and how long it lasts. The right combination of durability and beauty makes all the difference.
Pair a warm wood base with a stone or quartz countertop for a classic combination that balances warmth and durability. Choose a wood species that can handle daily kitchen use like oak, walnut, or maple. For the top go with marble for elegance or quartz for low-maintenance toughness. Make sure the countertop overhang is at least 10 to 12 inches if you plan to add stools for seating. Consider how the island materials work with your flooring and cabinets so the whole kitchen reads as one cohesive design.
Incorporating Seating into Your Island Design
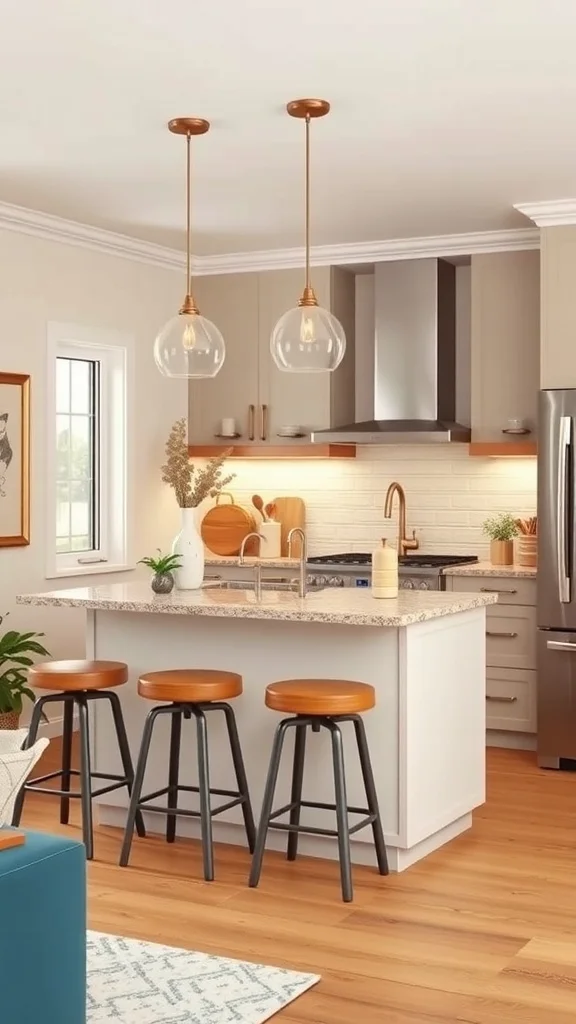
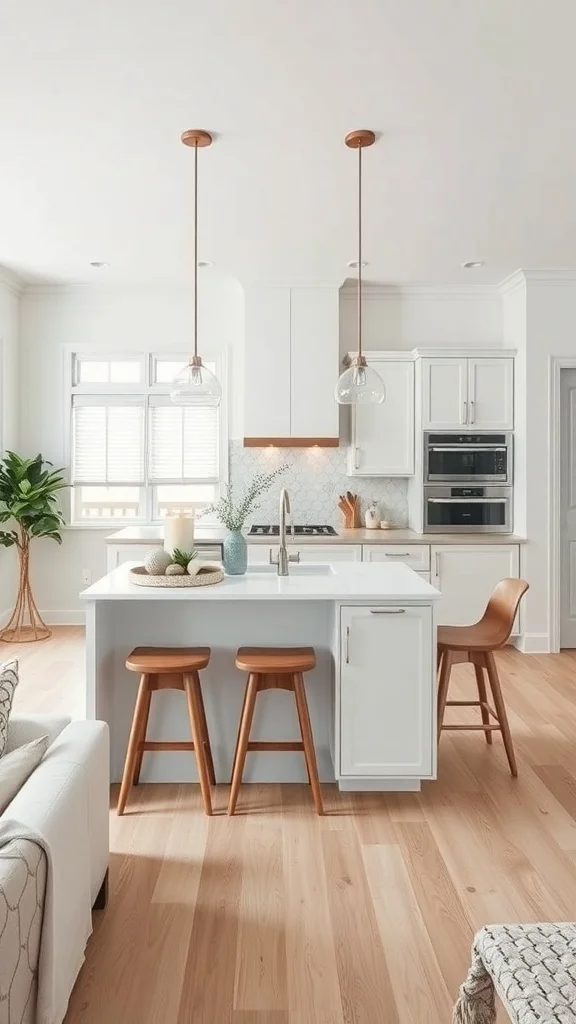
Three stools tucked under the island overhang. Warm wood seats matching the kitchen tones. Enough room for everyone to sit comfortably and chat while dinner is being made. The island becomes the social center of the kitchen.
Seating turns your island into more than a prep surface. It becomes the place where people actually want to hang out.
Choose stools that match the height of your island counter which is typically 36 inches for standard or 42 inches for bar height. Pick stools with a slim profile so they tuck completely under the overhang when not in use. Go with backless designs for tight spaces or low-back stools for added comfort. Leave about 24 inches of width per seat so everyone has enough elbow room. Stools in warm wood or metal with clean lines keep the seating looking integrated rather than added on as an afterthought.
Multi-Functional Kitchen Islands
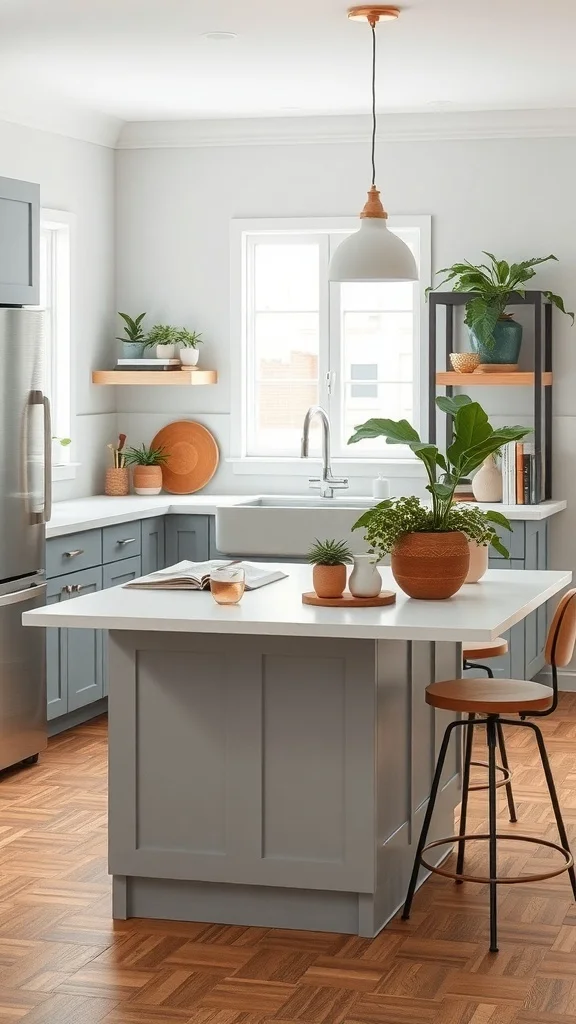
A white countertop ready for rolling dough or setting up a spread. Warm wood cabinetry with plenty of storage underneath. Open shelving above displaying plants and beautiful objects. A sink built right into the island. Pendant lights making the whole area glow.
This island does everything. Prep, cooking, storage, display, and gathering all in one piece of furniture. It is the true heart of the kitchen.
Look for an island with a combination of drawers, cabinets, and open shelving to handle different storage needs. If possible add a small prep sink so you can wash and chop in the same spot. Use the countertop for meal prep during cooking and as a serving surface when guests arrive. Mount a shelf or a small rack above for decorative items or frequently used ingredients. Pendant lights above ensure the workspace is well-lit and visually anchored. A multi-functional island replaces the need for several separate pieces and keeps the kitchen feeling open.
Integrating Appliances into Your Kitchen Island
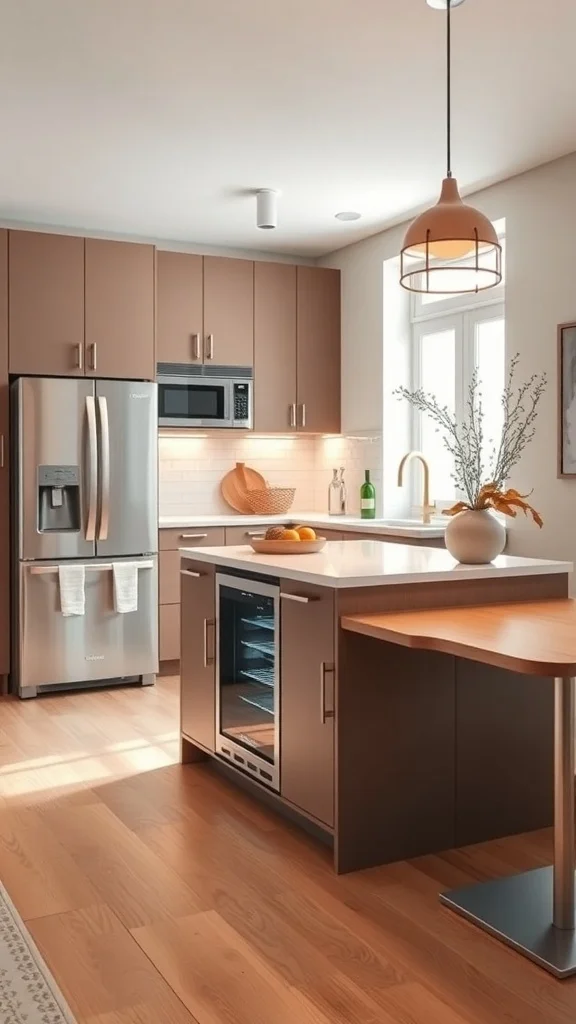
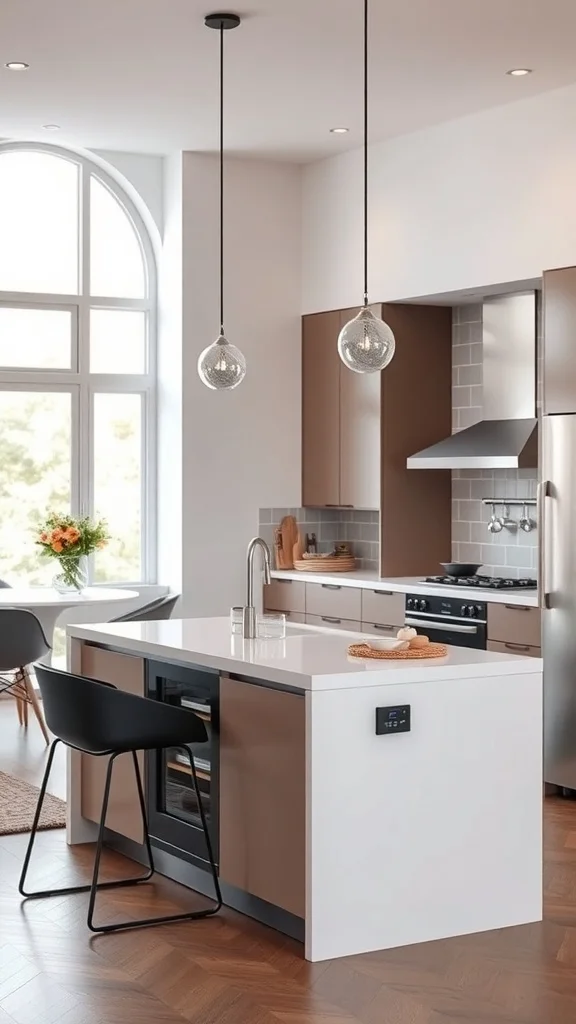
A wine cooler built right into the side of the island. Seamlessly integrated so it looks like it was always part of the design. The countertop stays clear for cooking while the appliance hides below doing its job.
Built-in appliances save counter space and give the island a custom high-end feel. Everything stays within reach without creating clutter.
Decide which appliances you use most and plan the island around them. A small wine cooler, a compact dishwasher, or a microwave drawer can all be built into the base of the island. Make sure the appliance dimensions fit the island cabinetry and that there is proper ventilation for anything that produces heat. Match the appliance panels to the cabinetry for a seamless look. Keep the countertop completely free of appliances so you have maximum workspace above while everything functional lives below.
Creative Storage Solutions for Small Islands
Drawers holding utensils and linens. Open shelves displaying cookbooks and baskets. A light wood top contrasting with white cabinetry below. A stool tucked underneath for casual seating. Every inch of the island working hard.
Smart storage in a small island keeps the kitchen clutter-free and makes everything easy to find during the busiest cooking moments.
Choose an island with a mix of deep drawers for pots and pans, shallow drawers for utensils, and at least one open shelf for items you reach for every day. Use decorative baskets on the open shelves to keep smaller items organized and visually neat. Keep the countertop minimal with just a cutting board or a small plant. Add hooks on the side of the island for towels or oven mitts. This layered storage approach turns a small island into the most organized piece of furniture in your kitchen.
Using an Island as a Room Divider
The island standing between the kitchen and the living area creating a natural boundary without a wall. Two wooden stools on the living side inviting people to sit and chat. A clean countertop on the kitchen side ready for prep work. The open floor plan stays open but each zone feels defined.
An island as a divider gives you separation without isolation. You cook on one side and everyone else is right there on the other.
Position the island perpendicular to the main kitchen counter so it creates a clear line between the cooking area and the living space. Add stools on the living room side so guests naturally face you while you cook. Keep the kitchen-facing side clear for prep with storage below. Choose a countertop that matches or complements both spaces so the island feels like a bridge rather than a barrier. This layout works beautifully in open floor plans where you want defined zones without closing anything off.
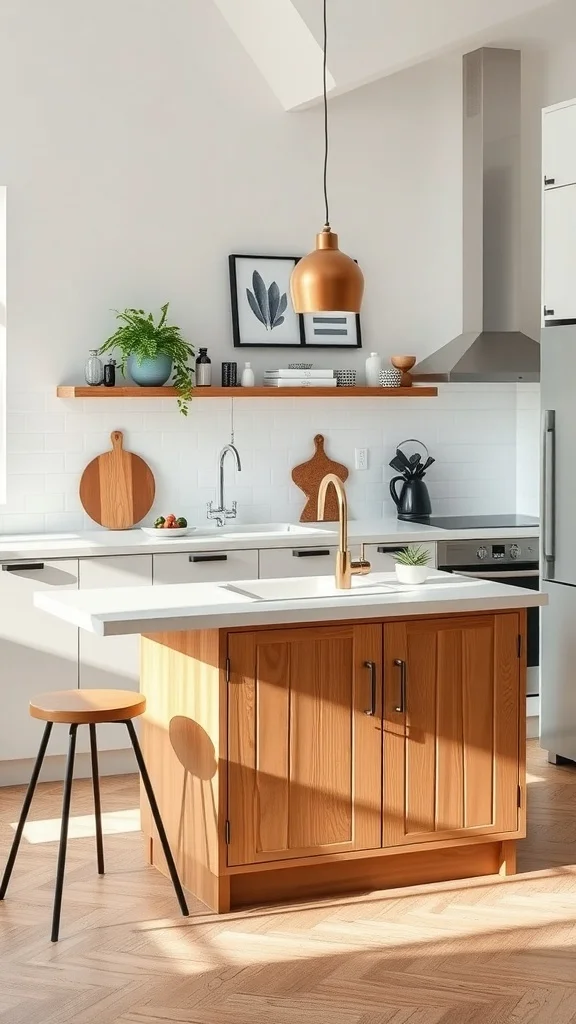
Using Color and Texture to Define Your Island
A light wood finish on the island base giving it warmth and character. A white countertop on top keeping things clean and bright. Sleek bar stools that complement without competing. A vase with flowers and a small decorative object finishing the scene.
The contrast between the wood grain and the smooth white surface creates visual interest that makes the island stand out. Texture and color working together quietly but powerfully.
Choose an island base in a natural wood finish with visible grain for texture and warmth. Top it with a smooth solid surface in white, light quartz, or marble for contrast. Pick stools in a material that bridges both tones like metal with wood seats or all-wood in a complementary shade. Add one decorative item on the counter like a small vase or a bowl of fruit to give the island personality. This combination of warm base and cool top makes the island feel designed and intentional.
Incorporating a Wine Rack into Your Island
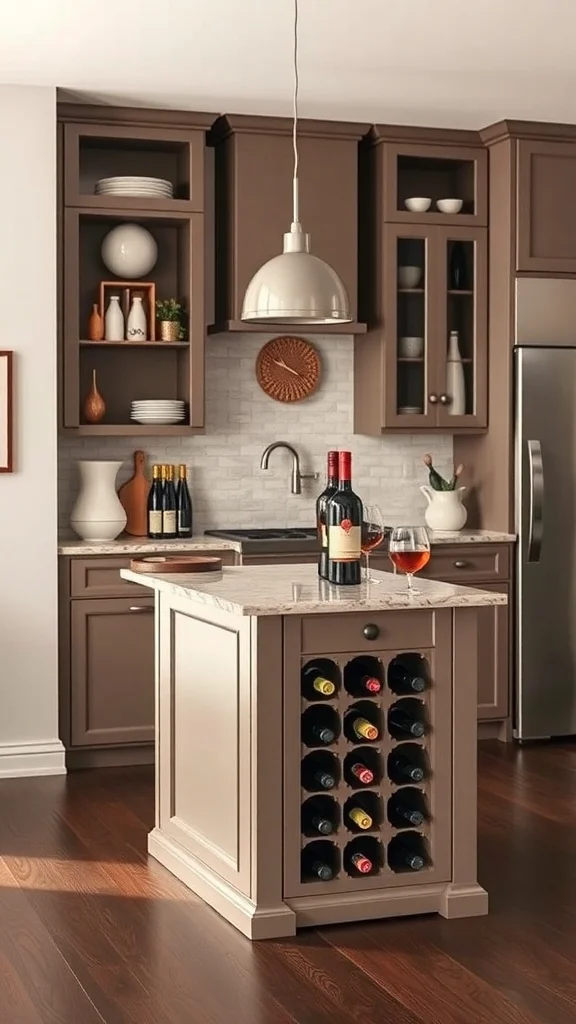
A built-in wine rack on one side of the island holding bottles in neat rows. Warm cabinetry surrounding it. An elegant marble top above. The wine is stored perfectly and always within reach when you are cooking or entertaining.
A wine rack built into the island saves space, looks beautiful, and turns your kitchen into the kind of place where people want to gather.
Choose an island design with a built-in wine rack section on one end that holds six to twelve bottles. Position the rack on the side facing the dining or living area so it doubles as a display feature. Keep the rest of the island base for standard drawers and cabinets. Use a stone or marble countertop above the wine rack for an elevated look. Make sure the rack slots are sized for standard bottles and keep the area away from heat sources like the stove. This addition gives your island a sophisticated feature that wine lovers will appreciate every day.
Incorporating a Breakfast Bar into Your Island
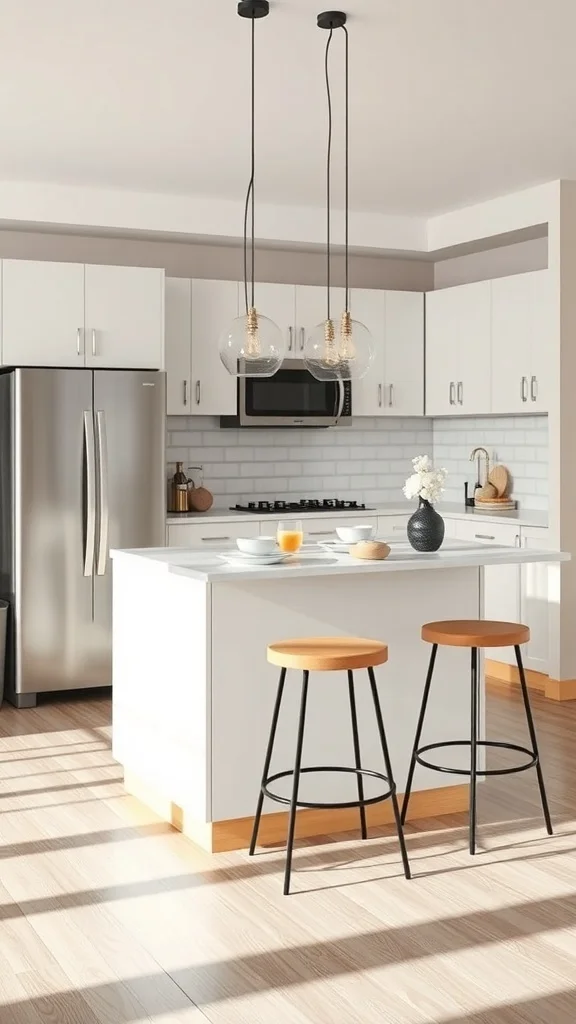
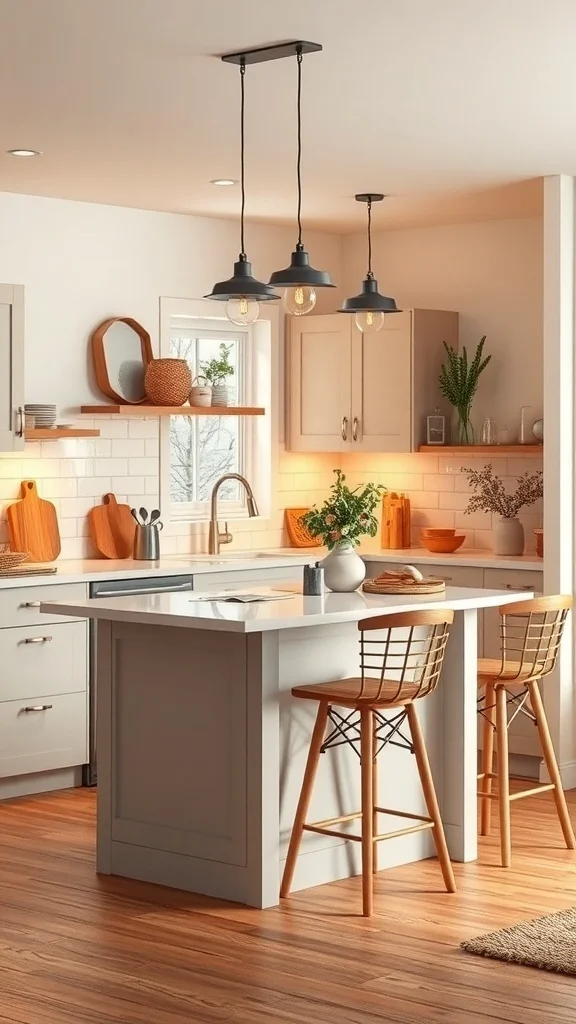
A clean white countertop with an overhang on one side. Two stylish stools with warm wooden seats pulled up. Pendant lights glowing above. This is where morning coffee happens, where quick lunches feel special, and where everyone ends up sitting during a dinner party.
A breakfast bar built into your island replaces the need for a separate dining table. It is casual, social, and perfectly practical.
Extend the countertop on one side of the island by 10 to 15 inches to create a comfortable overhang for seating. Choose counter-height stools that tuck underneath when not in use. Keep the bar side facing the living area or the window so sitting there feels pleasant. Place a small bowl of fruit or a single plant on the counter for warmth. Hang a pendant light or two directly above the bar seating to define the zone. This breakfast bar makes your kitchen island the favorite eating spot in the house.
Designing an Island with a Sink
A modern sink set into the island countertop with a sleek high-arc faucet. Warm wood tones on the base. A clean white surface surrounding the basin. A pendant light above illuminating the whole workspace. Cabinets below holding everything you need.
A sink in the island changes the way you cook. You wash, chop, and prep all in the same spot without turning around. Everything flows.
Work with a plumber to run water and drainage to the island before installation. Choose a sink size that fits the countertop without overwhelming it. A single basin works best for small islands. Pick a faucet with a high arc and a pull-down sprayer for maximum function. Keep the area around the sink clear with just a small dish soap dispenser and a towel nearby. Use the cabinets below the sink for cleaning supplies. This built-in sink makes the island a true cooking workstation.
Choosing the Right Size for Your Space
A sleek island that fits perfectly into the kitchen without crowding anything. Stools tucked underneath. Enough counter space for real cooking. Enough room around it for easy movement. The proportions feel just right.
The right size island makes the kitchen work better. Too big and the room feels cramped. Too small and it does not do enough. Measuring first saves everything.
Start by measuring your kitchen floor space and leave at least 36 inches of clearance on all walkable sides of the island. For a small kitchen aim for an island between 24 and 48 inches long and 24 to 30 inches deep. If you want seating on one side add extra depth for the overhang and make sure the stools do not block the walkway when pulled out. Consider the height carefully. Standard counter height is 36 inches and bar height is 42 inches. Choose based on how you plan to use the island most. A perfectly sized island makes a small kitchen feel twice as functional.
DIY Ideas for Custom Kitchen Islands
A custom island with light gray cabinetry and a warm wood countertop. Open shelving below for cookbooks and baskets. A pendant light above pulling the look together. Everything about it feels personal and one of a kind.
Building your own island means it fits your kitchen perfectly and costs a fraction of a custom-built piece. It is a weekend project that changes your kitchen for good.
Start with a base cabinet or a sturdy table and add a wood countertop cut to size. Use reclaimed wood, butcher block, or a live-edge slab for a unique surface. Paint or stain the base in a color that complements your kitchen like soft gray, white, or a bold accent tone. Add open shelving on one side for display and closed storage on the other. Install casters if you want the island to be mobile. Finish with a pendant light above and a couple of stools. This DIY approach gives you a custom island with character and purpose.
Personalizing Your Kitchen Island with Decor
A couple of potted herbs on the counter adding green and fragrance. A pendant light that matches the style of the room. Stylish bar stools inviting people to sit. A clean countertop with just enough on it to feel warm without looking cluttered.
Personal touches turn an island from a generic kitchen feature into something that feels like yours. A few small choices make a big impact.
Place one or two small potted plants or herbs on the countertop for life and color. Add a decorative tray to corral items like salt, pepper, and olive oil. Choose a pendant light that reflects your personal style whether that is industrial, modern, or farmhouse. Pick stools that are comfortable enough for lingering and styled to match the kitchen aesthetic. Keep the surface mostly clear so it stays functional. These personal details make your island the most inviting part of the kitchen.
Creating a Cozy Atmosphere with Your Island
Warm wood floors. Soft lighting from above. A light-colored island with clean lines. Bar stools pulled up and ready for someone to sit. A plant on the counter. The kitchen feels like a gathering place not just a cooking space.
A cozy island invites people in. It is the reason friends drift into the kitchen during a party and never leave.
Choose warm-toned materials for the island like natural wood or a creamy painted finish. Use warm white pendant lights above instead of cool-toned fluorescents. Add a small plant or a vase of fresh flowers on the counter for life. Keep stools comfortable with cushioned seats or contoured wood. Place the island close enough to the main work area that the cook can chat with anyone sitting there. This warmth-focused approach makes the island the emotional center of the kitchen where everyone wants to be.
Sustainable Materials for Eco-Friendly Islands
A beautiful island built from natural wood with a durable stone top. Clean finishes that are safe for the home. Materials chosen for their longevity so they last for years without replacement. It looks elegant and it is kind to the planet.
Eco-friendly choices in your kitchen do not mean giving up style. Sustainable materials often look the most beautiful because they come from nature.
Choose a base made from FSC-certified wood or reclaimed lumber for an eco-conscious foundation. Top it with sustainably sourced stone, recycled glass composite, or bamboo for a durable surface. Use low-VOC paints and finishes to keep indoor air quality healthy. Look for locally made cabinetry to reduce the environmental footprint of shipping. Add a couple of plants to the countertop to echo the natural ethos. These sustainable choices create an island that feels good to use and good to live with.
Designing for Accessibility in Small Islands
An island at a comfortable height for everyone. Clear space all around for easy movement. A lightweight stool that slides in and out without effort. Good lighting above so the whole workspace is visible and safe.
Accessible design makes the kitchen work for everyone who uses it. It is thoughtful and practical and it looks just as beautiful as any other layout.
Make sure there is at least 42 inches of clearance around the island if someone uses a wheelchair or mobility aid. Choose a counter height that works for the primary users and consider a multi-level surface if different heights are needed. Use pull-out drawers instead of deep cabinets for easier access to contents. Select lightweight stools that are easy to move and tuck away. Install bright even lighting above the workspace so everything is clearly visible. Smooth countertop surfaces are easier to clean and maintain for all users. Accessible design creates a kitchen that works beautifully for every member of the family.
Incorporating Technology into Your Island
A built-in wine cooler humming quietly below the countertop. Smart pendant lights that adjust to your mood. A clean surface with no cords or clutter. The island looks simple but it is packed with modern features underneath.
Technology built into the island keeps the surface clean and the kitchen running smoothly. It is modern living hidden inside beautiful design.
Add a built-in charging station with USB ports on the side of the island so devices charge without cluttering the counter. Install a touchless faucet if your island has a sink for hands-free convenience while cooking. Consider a built-in wine cooler or a compact beverage fridge below the counter. Use smart bulbs in your pendant lights so you can adjust brightness and color temperature from your phone. Route all cords and wires through the interior of the island for a completely clean look. These tech additions make your small kitchen island feel like the smartest piece of furniture in the house.
by Clara Scott | Feb 21, 2026 | Uncategorized
Got it. Same content but different image URL pattern. Let me rewrite it with headings closer to the originals.
A tiny backyard is full of possibilities you might not even realize yet. With the right furniture, plants, and a few creative touches, even the smallest outdoor space can become your favorite place to be. Morning coffee in the sunshine. Dinner under string lights. A garden that actually produces something you can eat. Here are some ideas to help you turn your little backyard into something truly special.
Decorative Privacy Screens
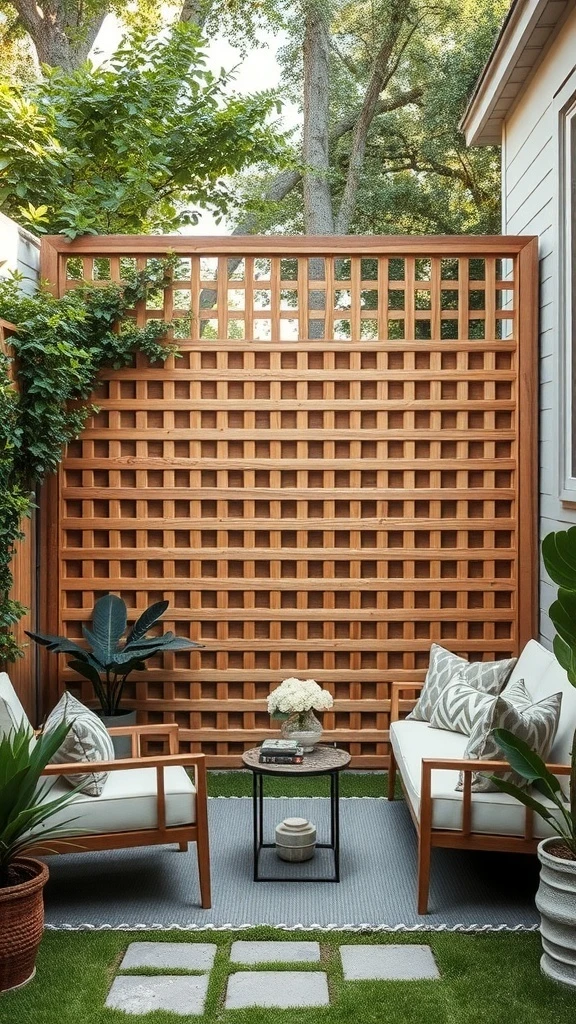
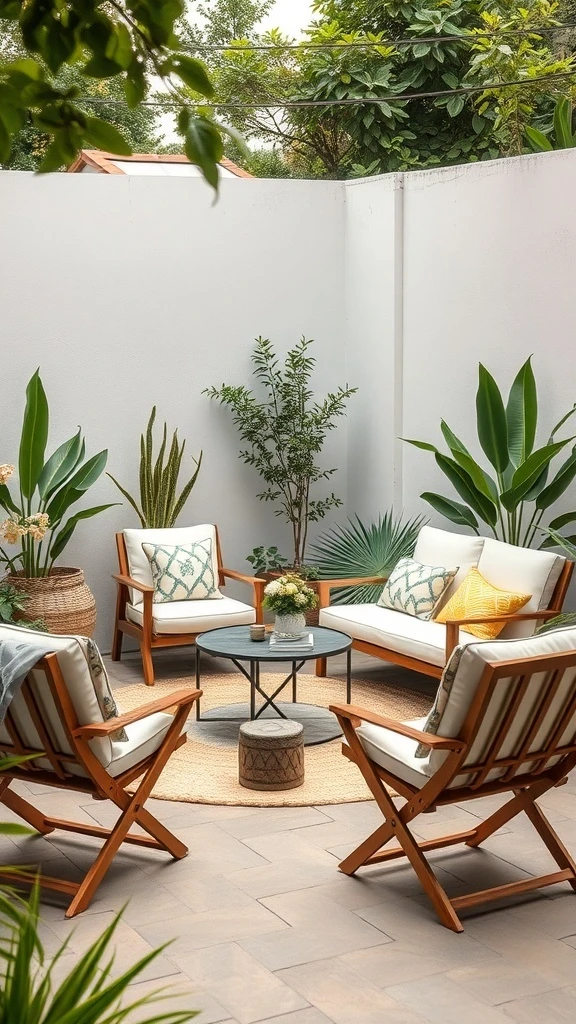
A wooden lattice screen along one side of your backyard creates instant privacy without closing the space in. Sunlight filters through the pattern. The area behind it feels hidden and cozy like your own little outdoor room.
Comfortable seating arranged in front with plants all around. It becomes the spot where you sit with a book and forget you have neighbors.
Choose a lattice or slatted wood screen that lets light and air pass through while blocking direct sightlines. Position it along the side of your backyard where you want the most privacy. Place your main seating area right in front of it so it creates a natural backdrop. Add a couple of climbing plants at the base that will grow through the lattice over time. One screen can completely transform how private and styled your tiny backyard feels.
Space-Saving Furniture
Folding chairs and a low-profile table that tuck away in seconds when you need the space back. Light colors and natural materials keeping everything feeling open and airy. A few plants around the edges softening the whole look.
The backyard feels spacious when the furniture is stored and cozy when it is out. That flexibility is everything in a small outdoor area.
Choose folding or stackable chairs in a lightweight material like acacia wood or powder-coated metal. Pair with a slim round or square table that does not dominate the space. Store them against the wall or in a narrow shed when not in use. Add a couple of potted plants beside the seating area for a natural frame. Keep cushions in a waterproof storage bench so you can pull them out on nice days and tuck them away when it rains.
Vertical Gardening Solutions
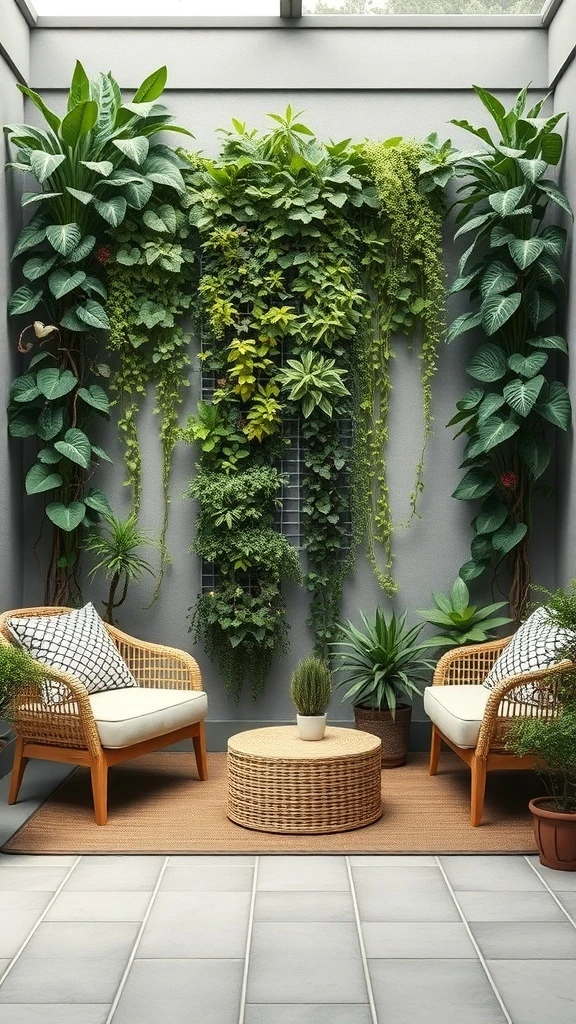
Plants climbing the walls and trailing from every surface. Lush green covering what used to be plain fence or concrete. A cozy chair tucked underneath making you feel like you are sitting in a hidden garden.
Vertical gardening uses zero floor space and creates the most dramatic effect in a tiny backyard. It goes from bare to breathtaking.
Install a trellis, a vertical planter system, or simple wire supports on your tallest wall or fence. Plant fast-growing climbers like jasmine, ivy, or climbing hydrangea at the base. Add wall-mounted planters at staggered heights with trailing plants like pothos or creeping jenny. Mix in a couple of upright ferns for variety. Place seating below the green wall so you feel surrounded by nature. This approach turns a blank wall into the most beautiful feature in your entire outdoor space.
Compact Outdoor Dining

A small round table set for two right near a window or doorway that connects to the kitchen. A vase of fresh flowers in the center. Light wooden chairs that look as good inside as they do outside.
Every meal feels special when you eat it outdoors. Even a tiny backyard table turns breakfast into an event and dinner into a date night.
Pick a round bistro table that seats two comfortably without blocking the walkway. Place it close to the door for easy trips back and forth from the kitchen. Add a small vase or a single potted herb in the center as a simple centerpiece. Use chairs that are lightweight and easy to move when you need floor space. Hang a string light above or set a small lantern on the table for evening dining. This setup makes outdoor meals a daily ritual instead of a rare occasion.
Hanging Planters
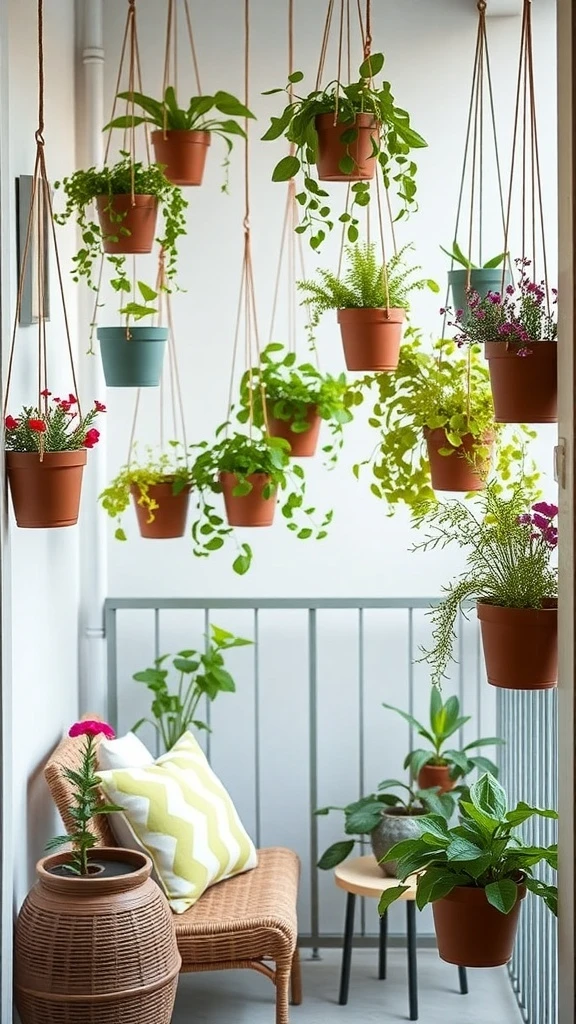
Pots hanging from hooks and brackets at different heights above your head. Terracotta and green trailing down in every direction. The floor stays completely open for walking and sitting while the garden lives above you.
It is like having a canopy of plants. The backyard feels lush and layered without a single pot touching the ground.
Attach sturdy hooks to your pergola, fence top, or ceiling overhang for hanging planters. Use a mix of terracotta, ceramic, and macrame holders for visual variety. Plant trailing varieties like string of pearls, ferns, or trailing petunias that cascade down beautifully. Hang them at staggered heights so they create depth and movement. Water them in the morning before the heat sets in so they stay hydrated all day. This overhead garden transforms a tiny backyard into a lush green escape.
Miniature Water Features

A tiny pond with a bubbling fountain in the center. Water lilies floating on the surface. Lush plants framing the edges. The gentle sound of water filling the backyard with peace.
It masks city noise and makes the whole space feel like a private retreat. You sit beside it and everything slows down.
Choose a compact preformed pond liner or a large ceramic bowl as the base for your water feature. Add a small solar-powered or electric pump for that gentle bubbling sound. Float one or two water lilies or water lettuce on the surface for natural beauty. Frame the edges with tall grasses, ferns, or low-growing ground cover to blend it into the garden. Place a chair or a bench beside it so you have a front-row seat to the most relaxing spot in your backyard.
Colorful Container Gardens
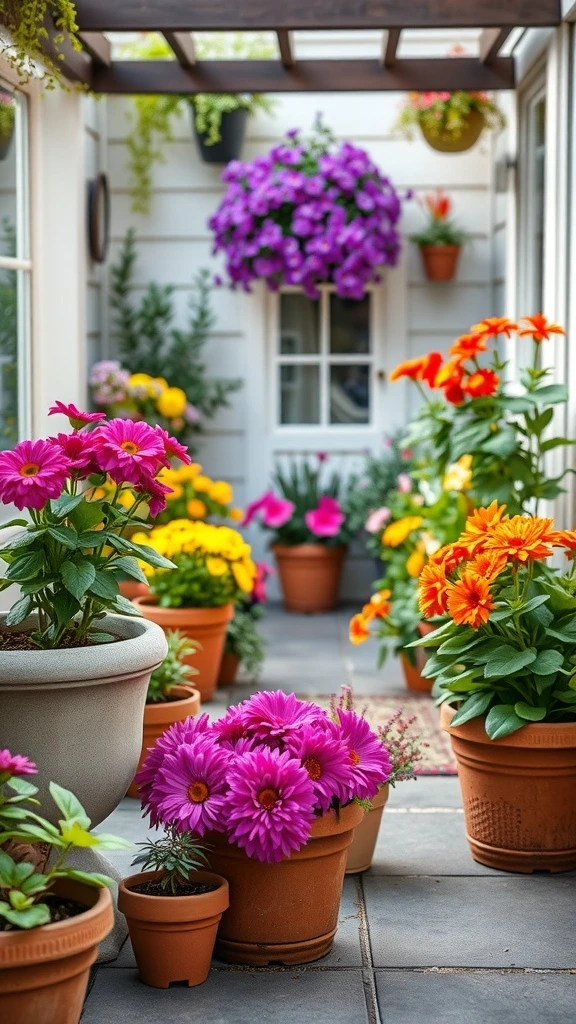
Pots of every size filled with bright pink, orange, and purple flowers. Lined up along a wall. Clustered in a sunny corner. Hanging from a railing. The backyard explodes with color and energy.
Container gardens let you have a gorgeous flower display without any garden beds at all. Just pots, soil, sun, and blooms.
Gather a mix of pots in different sizes but in a coordinating color family like terracotta, white, or glazed blue. Fill the largest ones with statement flowers like petunias, geraniums, or dahlias. Use medium pots for herbs and the smallest ones for trailing plants. Group them in clusters of three or five for impact. Rearrange or swap plants seasonally to keep the display fresh. This portable garden can move with the sun and change whenever you want a new look.
Cozy Fire Pit Area
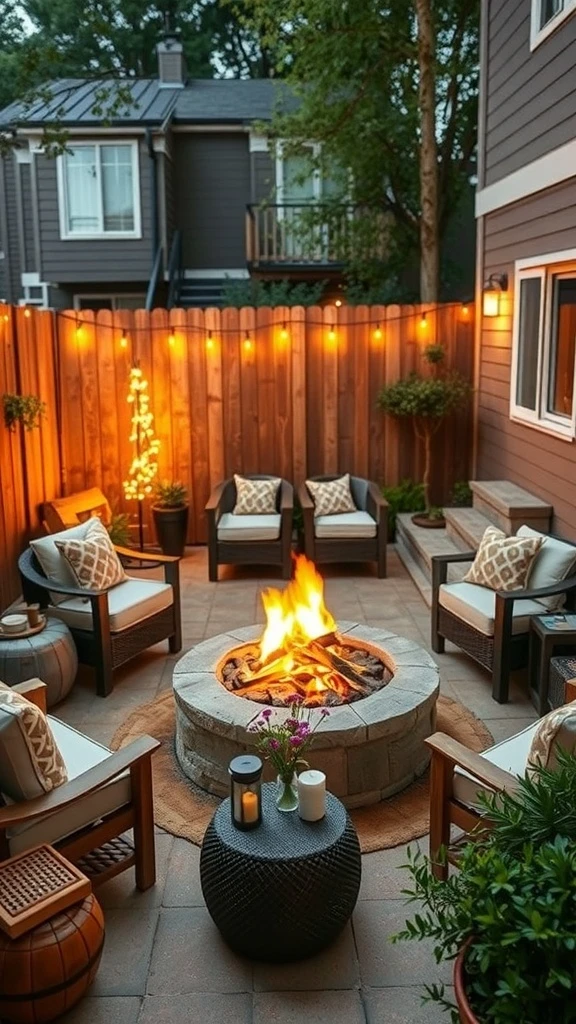
A stone fire pit in the center with chairs arranged around it in a circle. String lights glowing above. Blankets draped over the seats. The fire crackling and warming everyone on a cool evening.
It turns your tiny backyard into the best hangout spot on the block. Friends gather, stories get told, and no one wants to go inside.
Choose a compact fire pit in stone, steel, or concrete that fits the scale of your backyard. Place it in the center with at least three feet of clearance on all sides. Arrange three or four outdoor chairs around it with cushions and blankets for comfort. Hang string lights overhead for added warmth and atmosphere. Keep a small side table nearby for drinks and snacks. Check local regulations for fire pit usage and always keep a fire-safe surface underneath. This setup gives your backyard a social heart that draws everyone outside.
Small Scale Play Areas
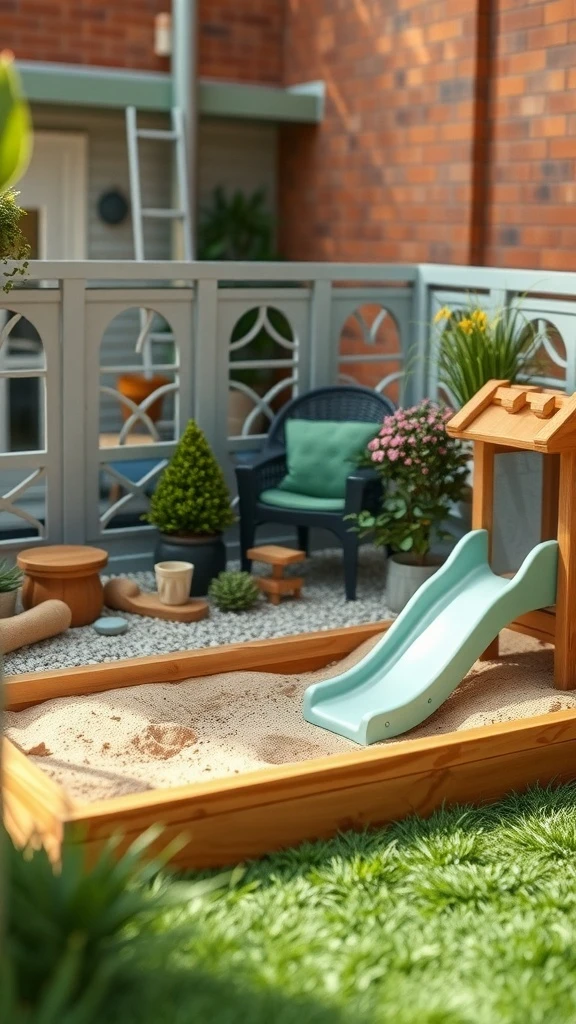
A small sandbox tucked into one corner. A compact slide beside it. Plants and decorations around the edges keeping it charming. The kids play and explore while you sit nearby and relax.
You do not need a huge yard for a play area. A little corner with the right pieces creates hours of fun and imagination.
Dedicate one corner of your backyard as the play zone. Set up a small sandbox with a cover for keeping it clean between uses. Add a compact slide or a climbing frame that fits the space without overwhelming it. Surround the area with potted plants and soft ground cover or rubber mulch for safety. Place a chair or a bench nearby so you can supervise comfortably. Keep the play area simple and contained so the rest of the backyard stays open for adult use.
Herb Spiral Gardens
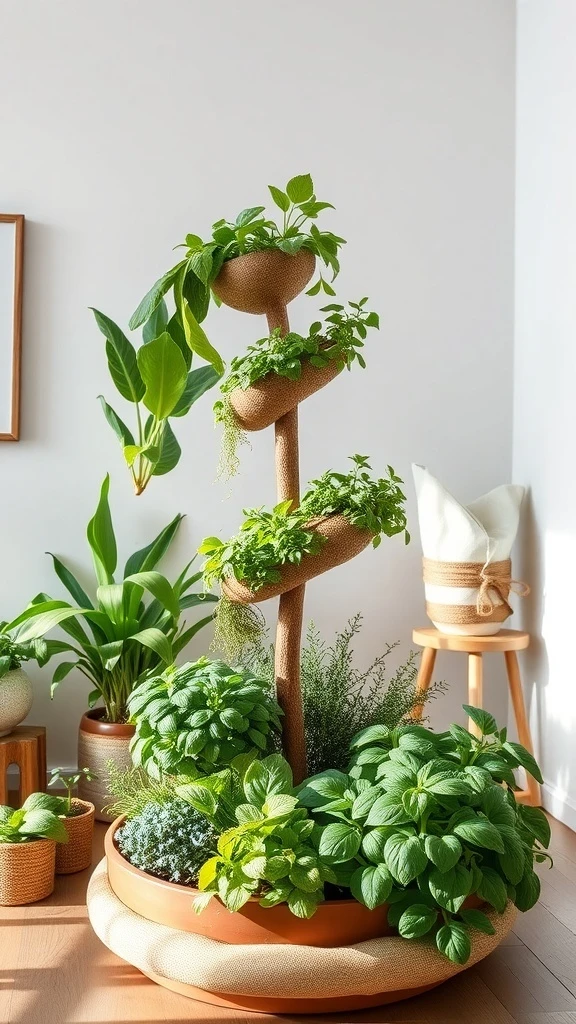
A spiral of stacked stones rising from the ground with herbs planted at every level. Basil near the top where it is warmest and driest. Mint at the base where moisture collects. Different conditions on every tier so every herb gets exactly what it needs.
It is a garden, a sculpture, and a kitchen supply station all in one compact structure.
Build the spiral using stacked stones, bricks, or recycled materials in a circle about three to four feet wide. Start with moisture-loving herbs like mint and cilantro at the bottom and work your way up with basil, rosemary, and thyme toward the top. Fill with good quality soil mixed with compost. The spiral shape naturally creates different microclimates so a variety of herbs thrive together. Harvest regularly to encourage fresh growth. This is one of the most beautiful and practical things you can build in a tiny backyard.
Efficient Lighting Solutions
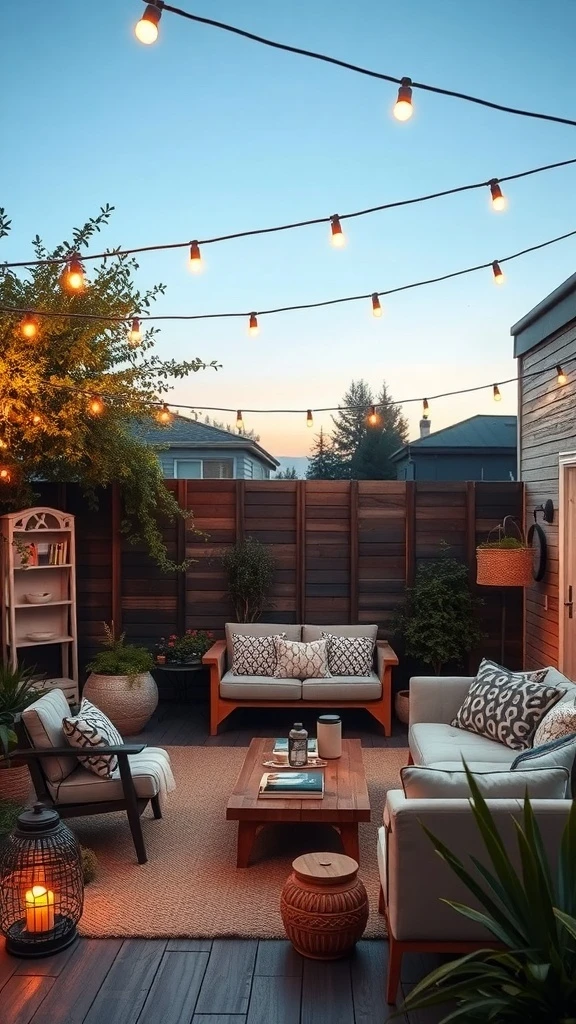
Warm string lights draped across the backyard from fence to fence. Lanterns on the table adding another layer of glow. Potted plants catching the light and casting soft shadows. The whole space transforms the moment the sun goes down.
It is the cheapest, easiest upgrade and it makes the biggest difference. Your backyard goes from ordinary to magical in minutes.
Hang warm white string lights in a zigzag pattern using poles, hooks, or your fence posts as anchor points. Choose solar-powered or plug-in depending on your setup. Add one or two lanterns with battery-operated candles on your table or a nearby surface for layered light. Keep the bulbs at a consistent height so the glow is even across the space. Turn them on every evening even when you are not outside so the view from your window feels special too. This lighting transforms a tiny backyard into the coziest spot in your home.
Edible Landscaping

Bright orange tomatoes ripening beside cheerful flowers in the same patch. Herbs tucked in between. The backyard garden is beautiful and productive at the same time. You pick dinner ingredients right from the same spot where butterflies land.
Edible landscaping mixes food and flowers so your garden looks gorgeous while actually feeding you.
Plant tomatoes in pots or a raised bed in the sunniest part of your backyard. Tuck marigolds and nasturtiums around the base because they attract pollinators and deter pests naturally. Add basil, parsley, or chives between the flowers for a kitchen herb supply. Keep everything watered consistently and stake your tomatoes as they grow taller. This mixed planting approach gives you a garden that is as pretty as it is practical. You get fresh food and a beautiful view from the same small patch of ground.
Outdoor Rugs for Comfort

A vibrant outdoor rug spread across the patio floor anchoring the seating area. Colorful cushions playing off the rug’s tones. Plants in every corner. The backyard suddenly feels like an extension of the living room.
One rug changes how the whole space reads. It goes from bare patio to styled outdoor room in seconds.
Choose a durable outdoor rug in a bold color or pattern that complements your furniture. Make sure it is rated for weather and easy to hose off. Place it under your main seating area to define the zone. Add outdoor cushions in coordinating tones to tie the look together. Anchor the edges with furniture legs so it stays flat in the wind. This one addition makes your tiny backyard feel intentional and finished like someone actually designed it.
Utilizing Wall Space
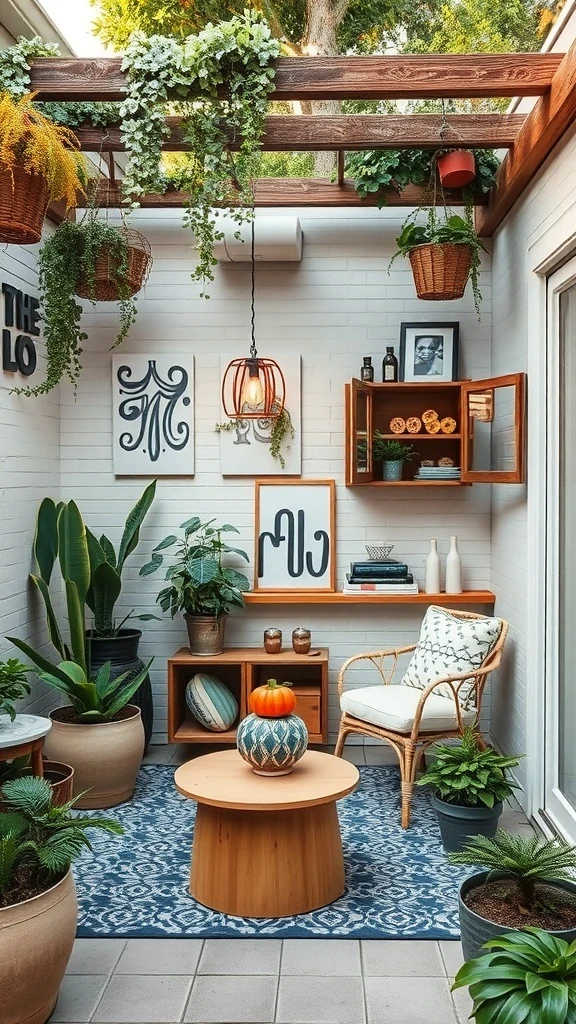
Art hung on the back wall. Shelves holding plants and candles. A hanging planter draping down from above. A pendant light illuminating the whole scene. Your backyard wall becomes as styled as an indoor living room.
When floor space is limited your walls become your canvas. Use them for beauty and for function at the same time.
Mount weather-resistant shelves on your back fence or exterior wall. Display small potted plants, a candle, and one or two outdoor-safe decorative pieces. Hang a mirror or an outdoor art print to add depth. Add a hanging planter from a hook above for a vertical green element. Install a simple outdoor pendant light or a wall-mounted sconce to make the display visible in the evening. This wall styling turns a plain fence into the most interesting feature in your tiny backyard.
Creative Pathways
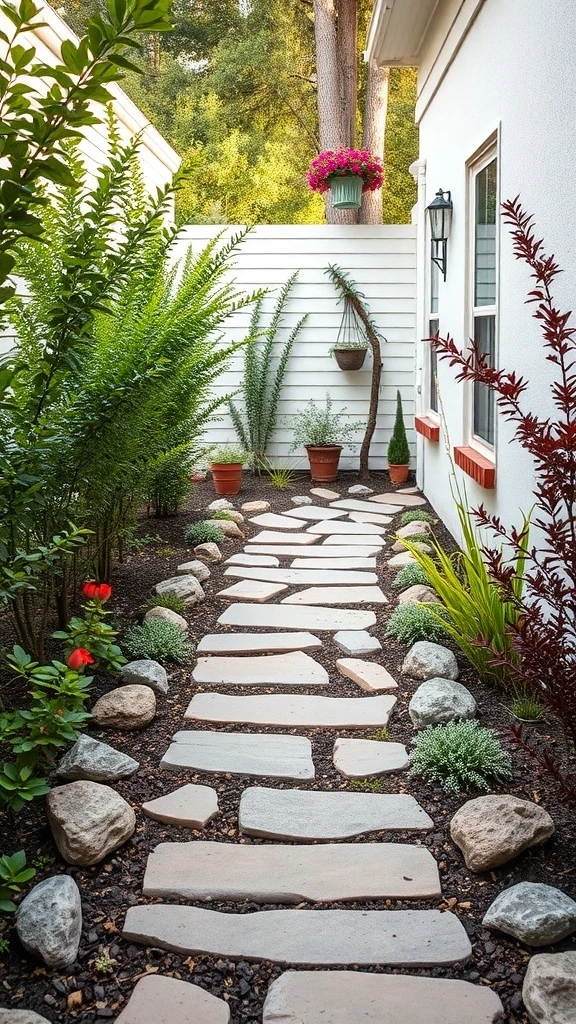
Stepping stones laid in a natural winding pattern through lush plants and ground cover. Flowers and foliage spilling over the edges. Hanging baskets adding color overhead. Every step takes you deeper into your own private garden.
A path through your tiny backyard makes the space feel larger because it gives you a journey instead of just a destination.
Lay flat stepping stones or pavers in a gently curving path rather than a straight line to make the backyard feel bigger than it is. Fill the gaps with low ground cover like creeping thyme or Irish moss for a soft natural look. Plant flowers and greenery along both sides of the path so you walk through a tunnel of color. Add a hanging basket or two from an overhead structure near the path for another layer of green. This winding pathway transforms even the smallest yard into a garden you want to explore.
Garden Art Installations
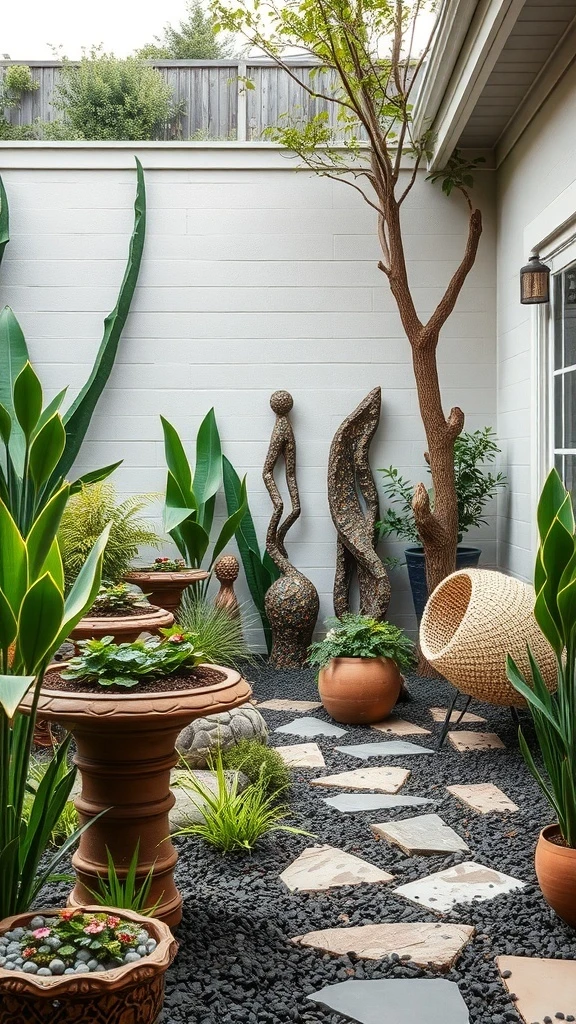
A tall sculpture standing among the plants. Stepping stones leading the eye through the space. Terracotta pots with bright flowers scattered throughout. The backyard feels like a personal art garden where nature and creativity meet.
Art installations outdoors give your backyard a personality that plants alone cannot. They make the space uniquely yours.
Choose one or two outdoor sculptures or art pieces that reflect your taste whether that is modern, whimsical, or rustic. Place the tallest piece as a focal point visible from your seating area. Surround it with plants so it feels integrated into the garden rather than dropped in. Use stepping stones to create a path that leads toward the art for a sense of discovery. Add a few colorful pots nearby to round out the display. This artistic approach gives your tiny backyard a gallery feel that surprises and delights every time you step outside.
Raised Garden Beds
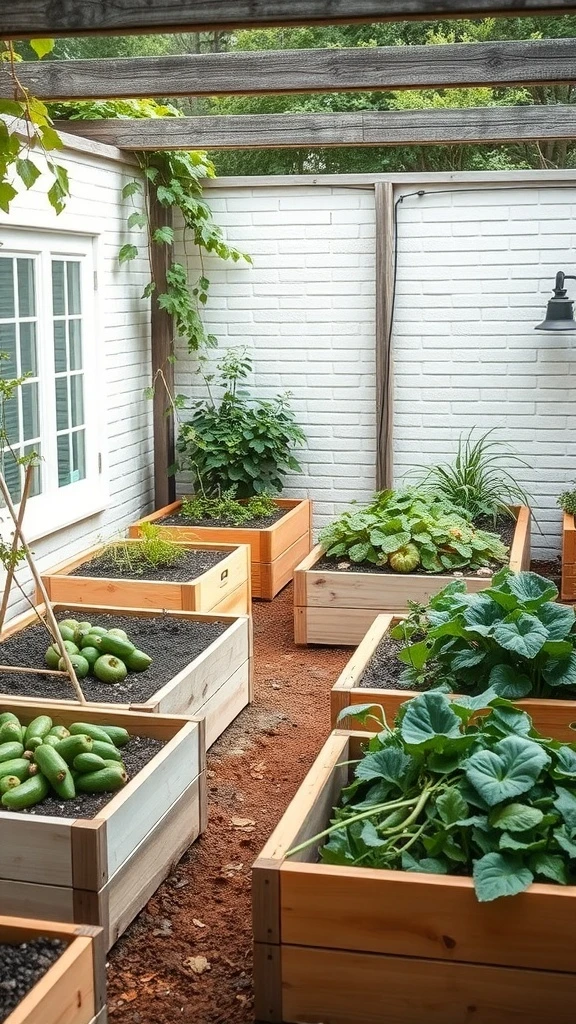
Wooden raised beds neatly arranged and filled with leafy greens, cucumbers, and herbs. Everything growing in organized rows. The garden looks tidy and productive at the same time.
Raised beds bring the soil up to a comfortable level so you garden without bending over. They keep things contained and beautiful even in the smallest spaces.
Build or buy raised beds in a size that fits your backyard with enough walking space between them. Fill with quality garden soil mixed with compost for the best growing results. Plant a mix of fast-growing vegetables like lettuce, radishes, and herbs alongside longer-season crops like tomatoes and peppers. Water consistently and mulch the top of the soil to retain moisture. Place the beds in the sunniest part of your yard and consider adding a small trellis to one bed for climbing plants. Raised beds are the most efficient and beautiful way to grow food in a tiny backyard.
Outdoor Storage Solutions
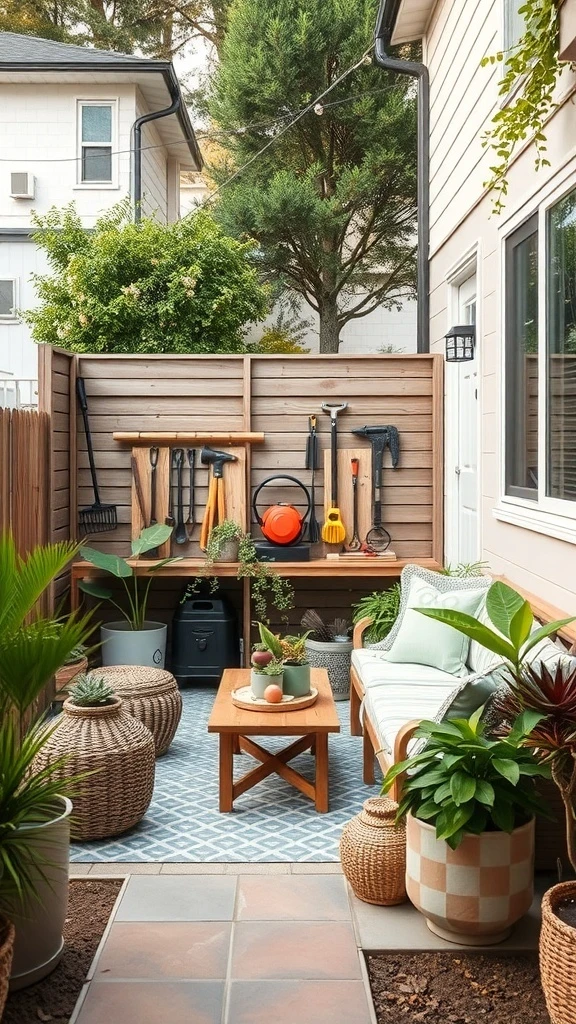
Garden tools hanging neatly on a wooden wall. Rakes, trowels, and shears each on their own hook. Plants and cozy seating right beside the storage area. The backyard stays organized and charming at the same time.
When your tools have a home they stop creating clutter. The space looks intentional and cared for every single day.
Mount a piece of reclaimed wood or a pallet on your fence or exterior wall as a tool display board. Add hooks at different heights for rakes, shovels, trowels, and watering cans. Keep smaller items in a hanging basket or a wall-mounted bin. Place a potted plant beside the tool wall to soften the look. Add a small bench or a storage box nearby for cushions and gloves. This open-display approach keeps your tools accessible and your backyard looking styled instead of scattered.
Small Greenhouses
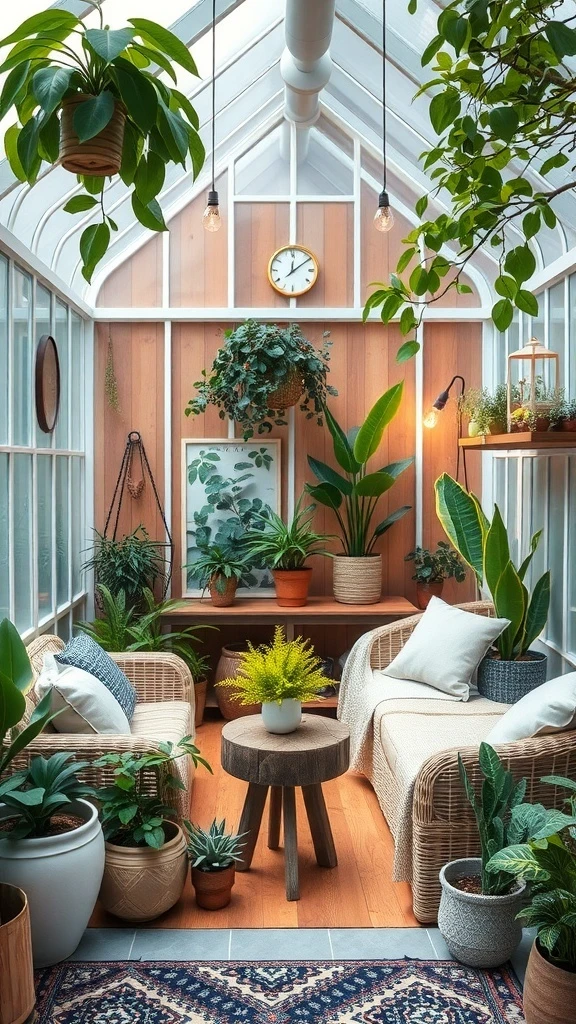
A small greenhouse glowing with warm light and filled with green from floor to ceiling. Shelves lined with pots. A comfortable chair inside for sitting among the plants. It is part garden and part retreat.
A tiny greenhouse lets you grow all year long regardless of the weather outside. It becomes the coziest corner of your backyard.
Choose a compact freestanding greenhouse or a lean-to model that attaches to your house or fence. Add shelves inside to maximize vertical growing space. Fill with a mix of seedlings, herbs, flowers, and indoor plants that love the warmth. Place a small chair or a stool inside so you have a spot to sit and enjoy the green. Use a small fan for airflow and monitor temperature on hot days. This tiny greenhouse extends your growing season and gives you a peaceful sanctuary steps from your back door.
Layered Planting Techniques
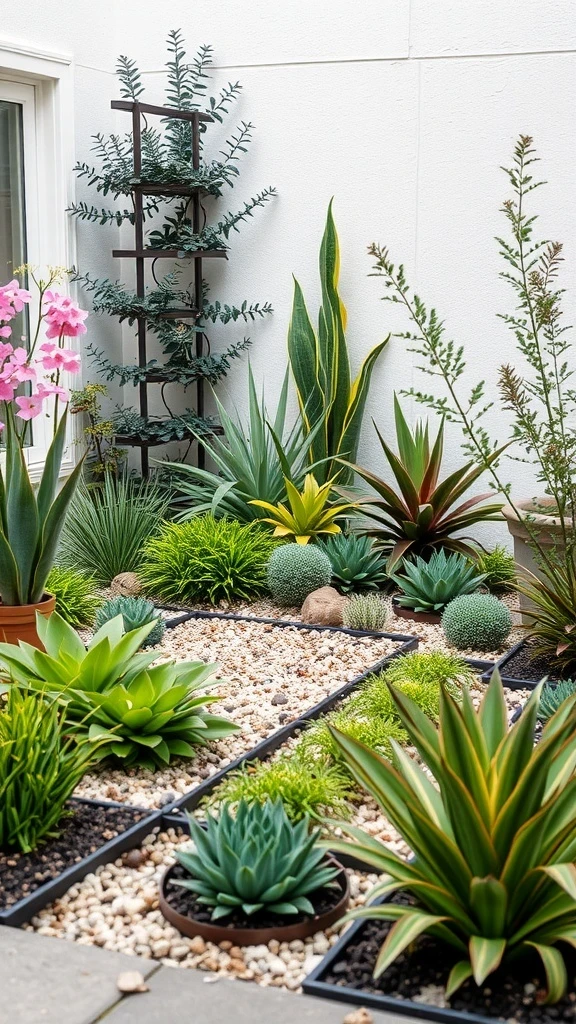
Tall plants in the back. Medium ones in the middle. Low groundcover in the front. Every level filled with different textures and shades of green. The backyard looks wild and full and beautiful like a miniature botanical garden.
Layered planting creates depth that makes a tiny space feel so much bigger than it really is. Every angle has something new to discover.
Start with your tallest plants like a snake plant, a bird of paradise, or ornamental grasses against the back wall or fence. Add medium-height plants like ferns, lavender, or hostas in front of those. Fill the lowest level with ground-hugging plants like creeping thyme, succulents, or low grasses. Mix in a few flowering plants at each level for pops of color. Group plants with similar water and light needs together for easy maintenance. This layered technique makes a tiny backyard feel deep, lush, and endlessly interesting.
by Clara Scott | Feb 21, 2026 | Uncategorized
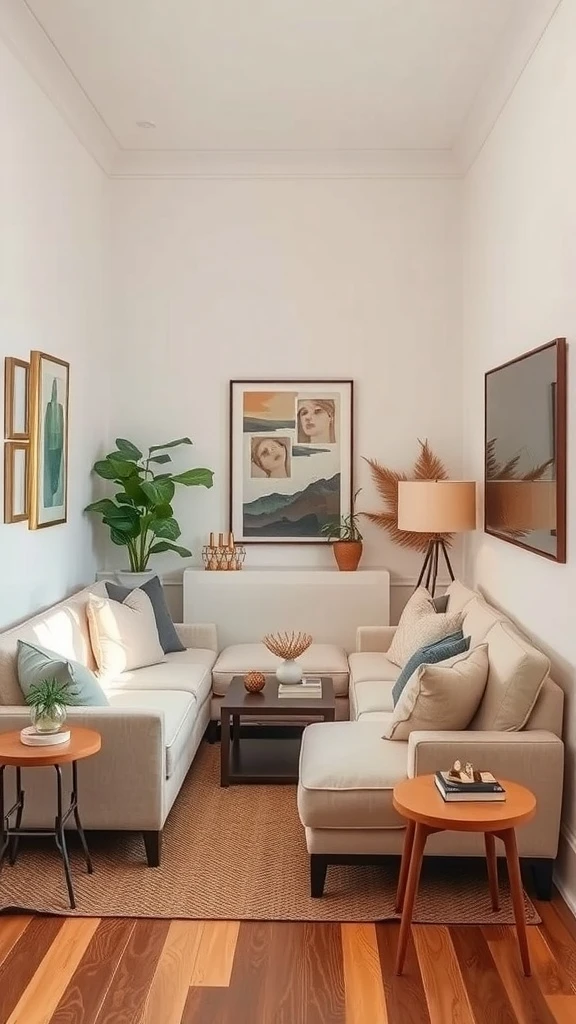
A narrow living room can feel tricky to design but it is full of potential. The right layout, smart furniture choices, and a few clever tricks can make it feel open, cozy, and completely functional. You do not need a wide room to have a beautiful one. Here are some ideas to help you get the most out of your narrow living space.
Vertical Shelving That Opens the Room Up
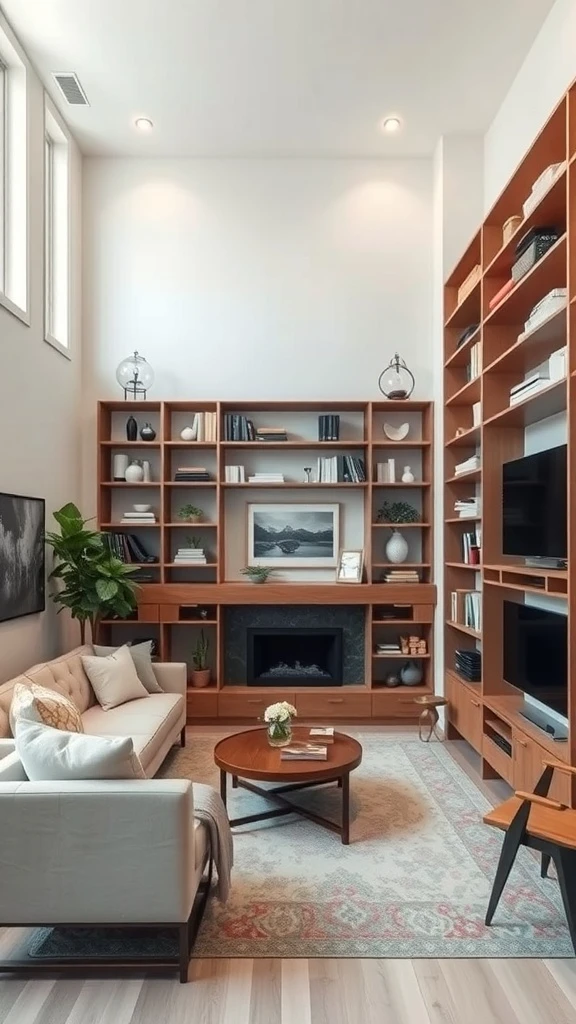
Tall shelving units flanking a fireplace filled with books, plants, and personal items. The eye travels upward and the room instantly feels taller. Warm wooden tones adding character while a cozy sofa invites you to sit down and stay.
Vertical storage turns your walls into the hardest working feature in the room. The floor stays open and the space feels twice as big.
Install tall bookshelves on either side of a focal point like a fireplace or a TV unit. Fill them with a mix of books, framed photos, small plants, and decorative objects. Keep the lower shelves for heavier items and the upper ones for lighter decorative pieces. Match the shelf tone to your other wood finishes for a cohesive feel. This vertical approach gives you serious storage and display space without pushing any furniture further into the narrow room.
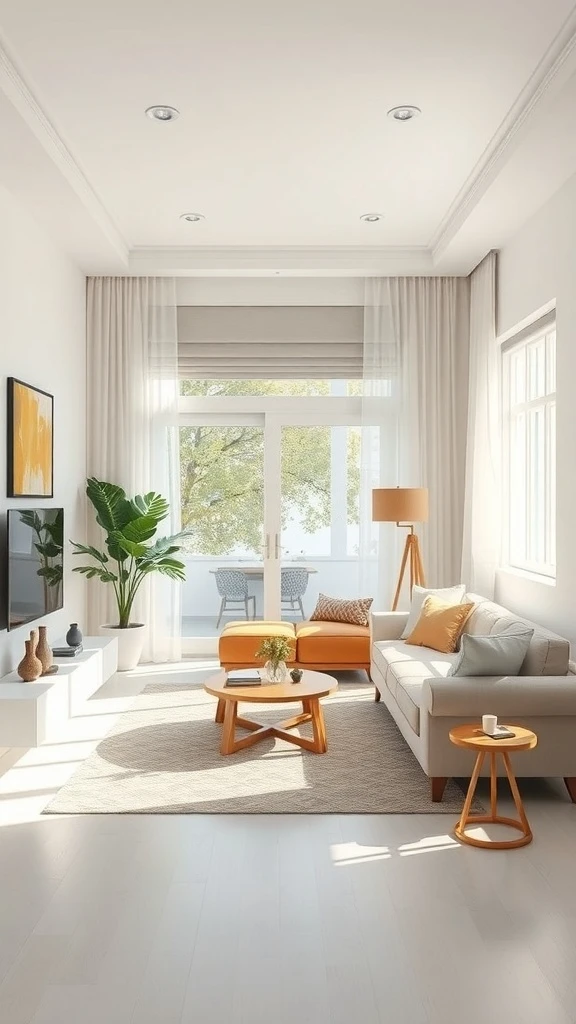
Light Color Schemes That Make It Feel Bigger
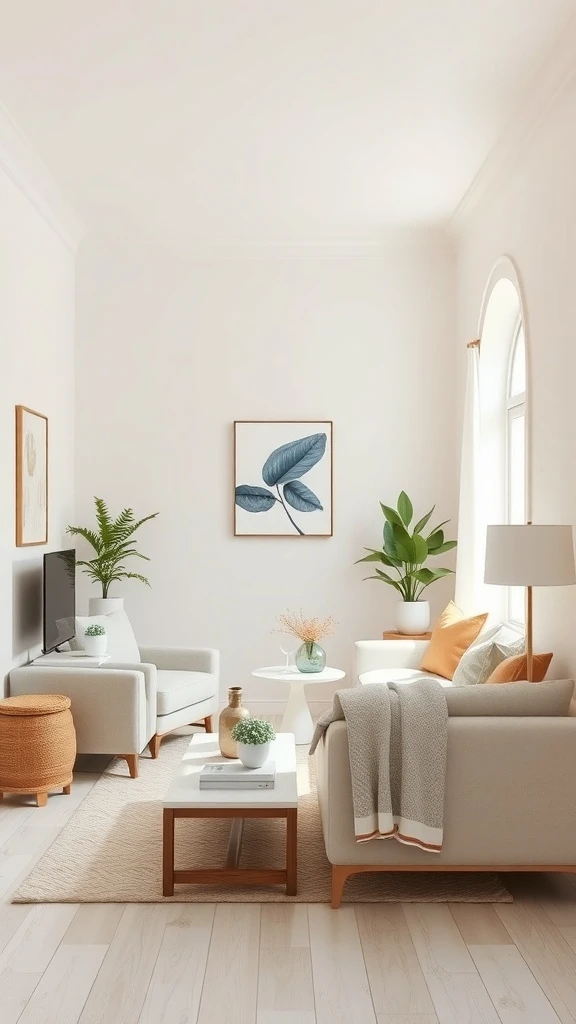
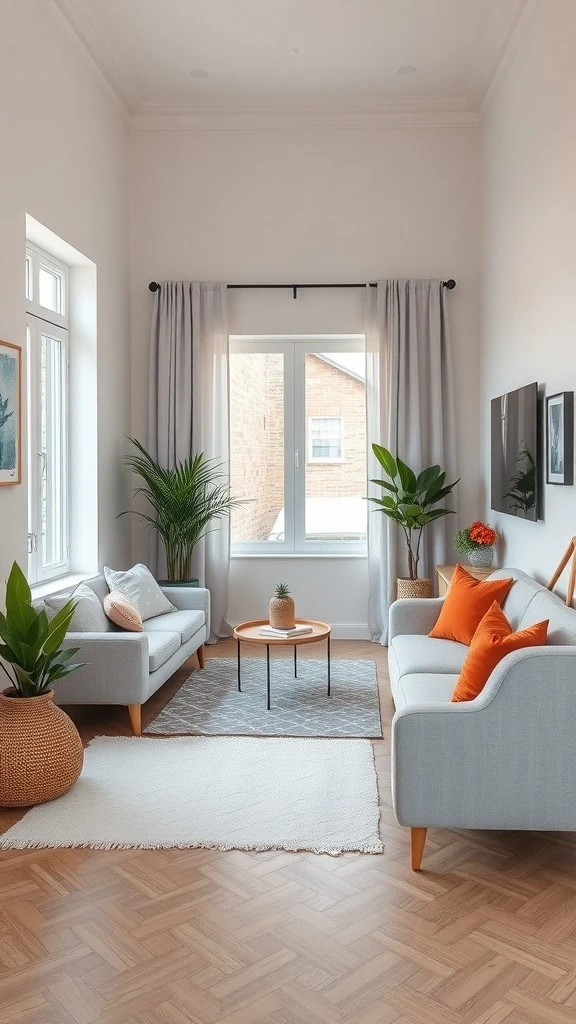
Soft whites on the walls. Pale furniture blending into the background. A couple of warm orange cushions and green plants adding just enough color to keep things interesting. Natural light bouncing off every pale surface and filling the room from end to end.
A light palette does most of the heavy lifting in a narrow room. It erases visual weight and makes everything feel airy and open.
Paint your walls in a soft white or warm cream and choose your largest furniture pieces in similar light tones. Add warmth through two or three accent colors in cushions, throws, or a small piece of art. Keep the flooring light or add a pale rug to extend the brightness across the floor. Let natural light in through sheer curtains or no coverings at all. This monochromatic-with-accents approach visually stretches the room without any structural changes.
Area Rugs That Create Zones
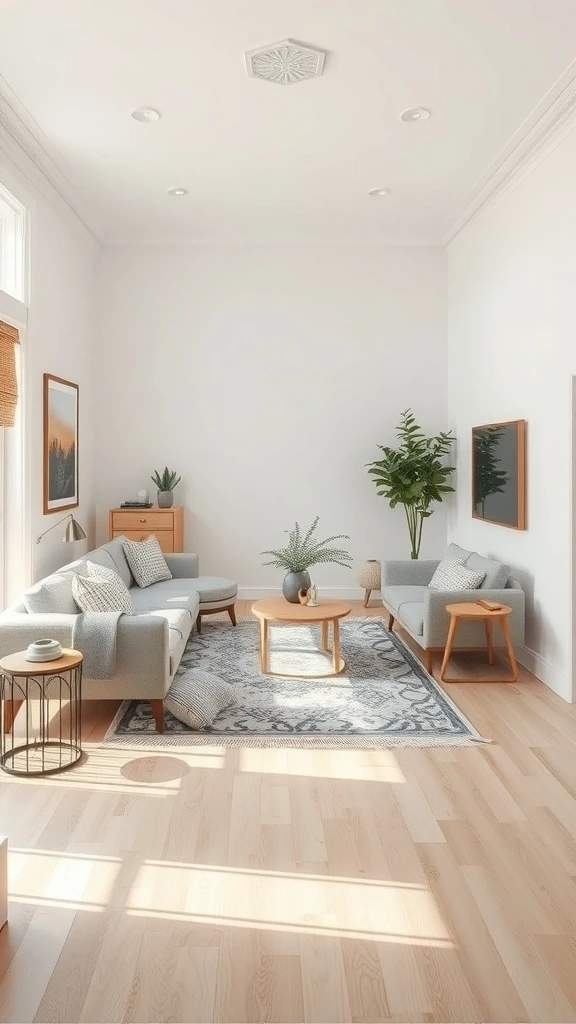
A soft rug placed under the coffee table anchoring the seating area. The space immediately feels defined and intentional. Furniture grouped on top of the rug reads as one cohesive living zone even in a long narrow room.
Rugs tell your eyes where one area ends and another begins. They divide a narrow room without walls and make every zone feel purposeful.
Choose a rug large enough to fit under the front legs of your sofa and chairs so the seating area feels unified. Pick a subtle pattern or a warm neutral that complements your flooring. If your room is long enough for two zones, use a second smaller rug to define a reading corner or a dining area. Make sure both rugs coordinate in tone so the room still flows. This zoning trick breaks up the length of a narrow room and gives each area its own identity.
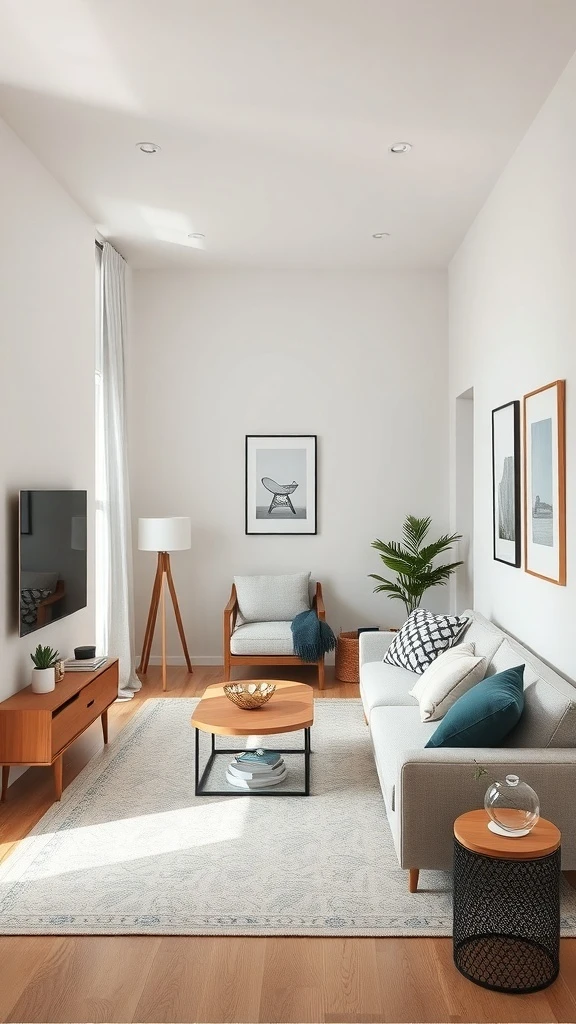
Furniture Scaled to Fit the Space

Sofas that are comfortable but not bulky. A round coffee table that softens the straight lines of the room. An accent chair in a fun color that adds personality without overwhelming the layout. Tall windows and wall art drawing the eye upward.
Choosing furniture that fits the scale of a narrow room makes everything feel balanced. Nothing crowds the walkway and the room breathes.
Avoid oversized sectionals and choose a slim-profile sofa that leaves at least 18 inches of clear walkway on each side. Use a round or oval coffee table instead of a rectangular one to eliminate sharp corners and improve flow. Add one accent chair in a lighter frame that can be moved easily. Keep side tables slim and tall rather than wide. Place your largest piece against the longest wall so the center of the room stays open for movement.
Layered Lighting for Depth and Warmth
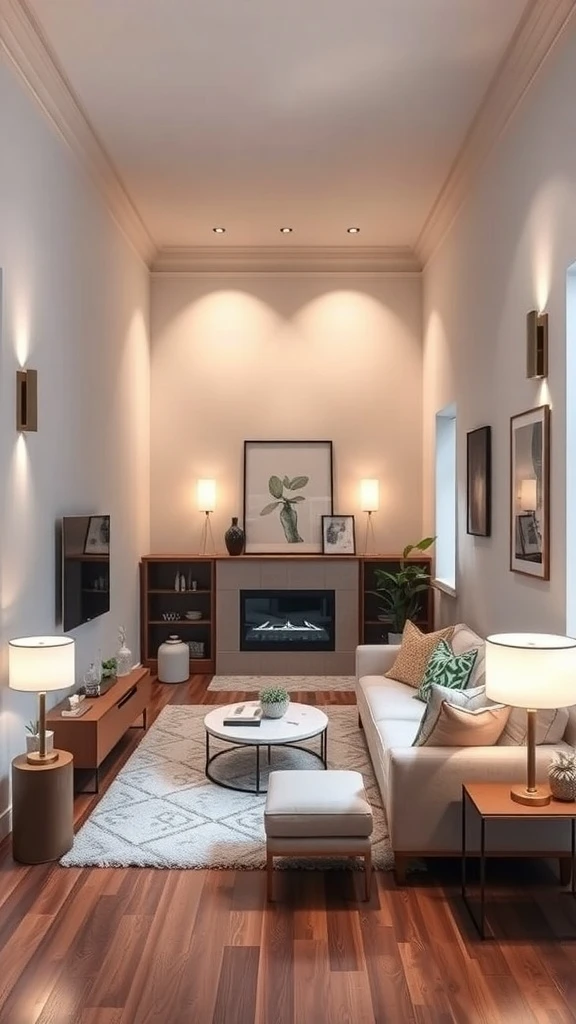
Recessed ceiling lights providing overall brightness. Table lamps casting warm pools of light in the seating area. Wall sconces highlighting artwork and adding depth to the walls. Each light source working together to make the narrow room feel full and alive.
Good lighting makes a narrow room feel wider because it eliminates dark corners where the walls seem to close in.
Start with your overhead or recessed fixtures for general ambient light. Add a table lamp on a side table or a console for warm focused light near the sofa. Mount a wall sconce or picture light above your art to create a visual focal point. Use warm white bulbs in every fixture for a consistent cozy tone. Install dimmers so you can shift from bright and functional during the day to soft and relaxing at night. This layered approach adds dimension and keeps the narrow room from ever feeling flat.
Mirrors That Add Depth and Light
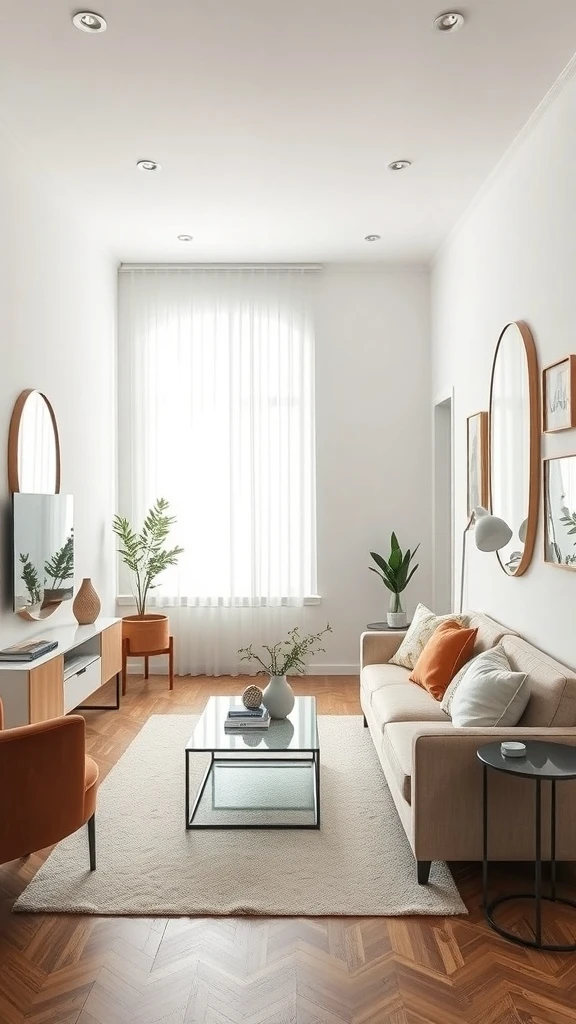
Round mirrors on the wall reflecting light and making the room feel like it extends beyond the walls. Warm-toned furniture contrasting beautifully with the reflective surfaces. The whole room feels deeper and brighter than its actual dimensions.
Mirrors are the oldest trick for making narrow spaces feel wide open. They double the light and trick the eye into seeing more room.
Hang one or two mirrors on the longest wall or opposite a window where they will reflect the most natural light. Choose round or organic shapes to soften the straight lines of a narrow room. Use frames that complement your existing decor in gold, wood, or black. Position them at eye level or slightly higher so they reflect the brightest part of the space. One well-placed mirror can change how the entire room feels without moving a single piece of furniture.
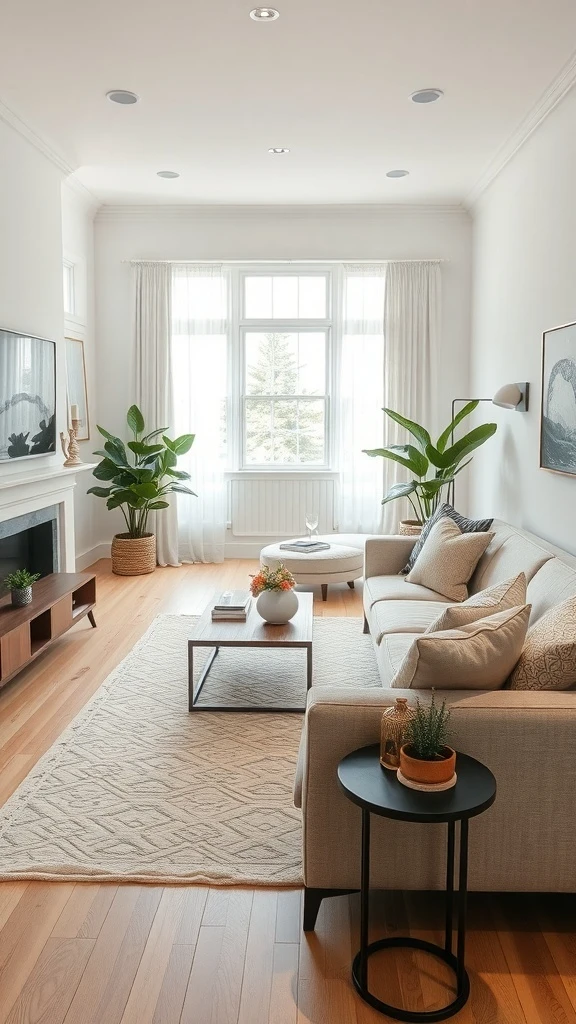
Flexible Seating That Adapts
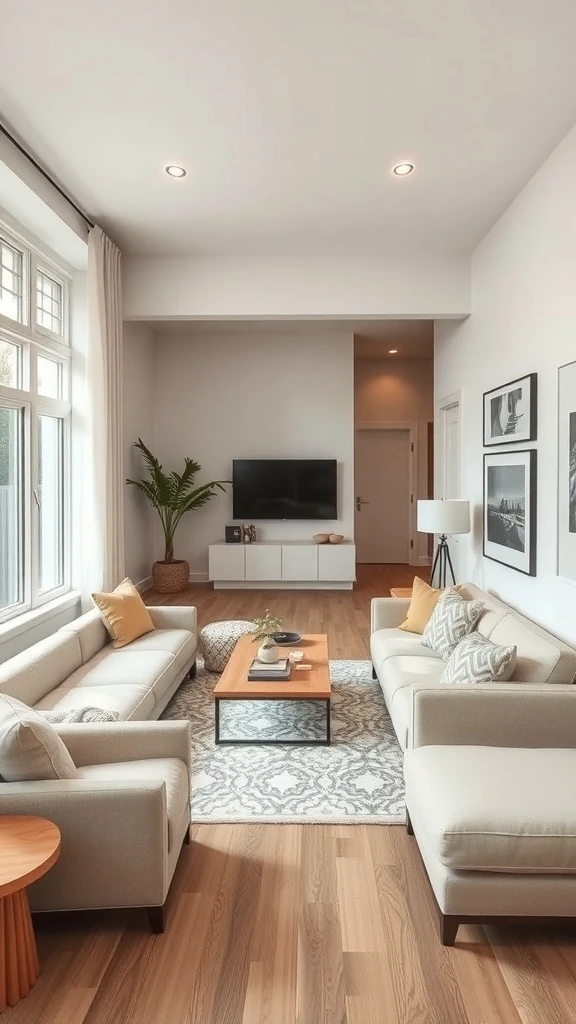
Two sofas facing each other creating a conversation-friendly layout. A small accent chair tucked in the corner for extra seating. A round side table softening the lines. Natural light flooding in from large windows and plants adding freshness.
Flexible seating means you can rearrange for movie night, a gathering, or a quiet evening without the room feeling wrong. It adapts to how you live.
Position two slim sofas facing each other with a coffee table in between for an open conversational layout. Add one lightweight accent chair that can be moved easily when you need more floor space. Use a round side table instead of a bulky end table. Place a plant in the corner to fill vertical space without adding furniture weight. This symmetrical face-to-face arrangement works perfectly in a narrow room because it uses the length while keeping the width clear.
Smart Layout That Maximizes Every Inch
The sofa against the longest wall. A round coffee table in the center allowing easy navigation. Tall art and a floor lamp drawing the eye upward. A plant in the corner filling empty space with life instead of furniture.
Every piece is placed with purpose. Nothing blocks the flow and nothing wastes space. The room feels bigger than it actually is because the layout is so thoughtful.
Push your main sofa against the longest wall to open up the floor. Choose a round or oval coffee table so you can walk around it easily from any angle. Place a tall floor lamp behind the sofa for light that does not take up table space. Hang art at a height that draws the eye upward. Keep the opposite wall minimal with just one slim console or a floating shelf. This streamlined approach makes a narrow room feel spacious and effortlessly styled.
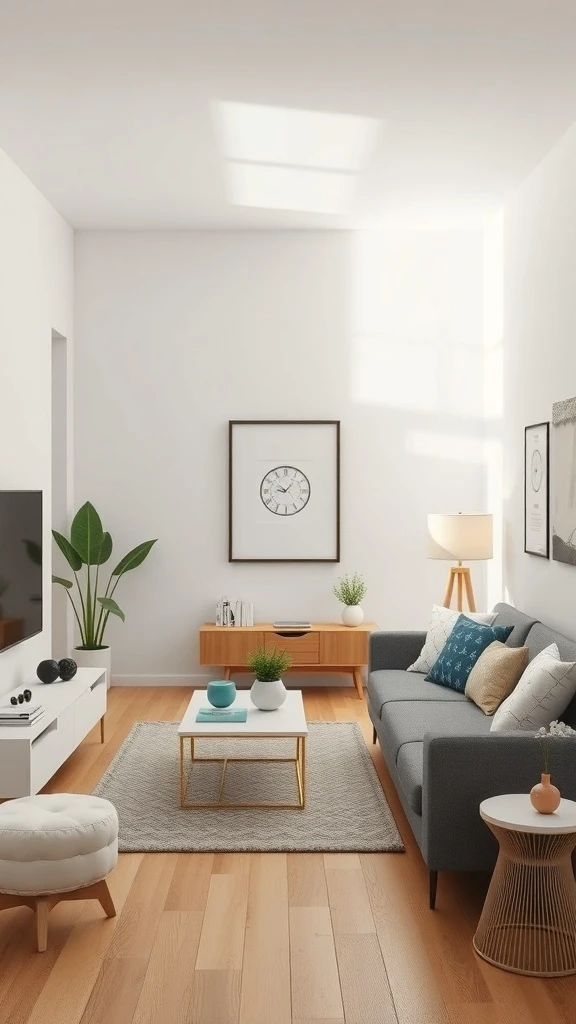
Technology That Blends Right In
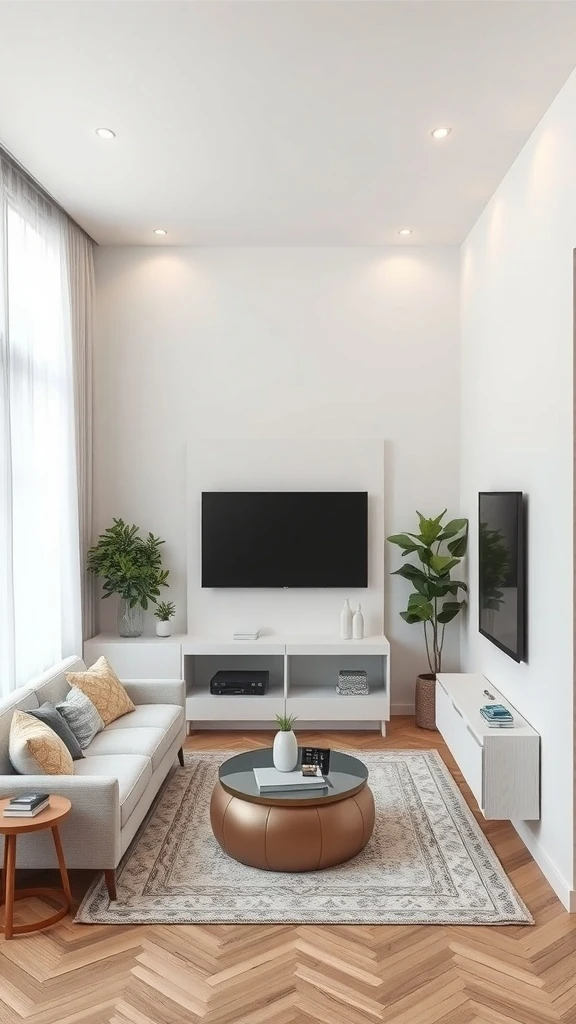
A wall-mounted TV freeing up the floor where a stand used to be. A sleek media console below it keeping everything organized. Recessed lighting and plants softening the tech-heavy look. The room feels modern and clean.
When technology disappears into the design the room feels like a living space first and an entertainment center second. That balance matters in a narrow room.
Mount your TV on the wall to eliminate a bulky TV stand and free up valuable floor space. Use a slim floating media console below for a streaming device, remotes, and a couple of decorative items. Route cables behind the wall or through a cord cover for a clean look. Add a plant or two near the media area to soften the technology with natural texture. Use recessed or ambient lighting so the TV wall does not dominate the room visually. This integrated approach keeps the room feeling balanced and open.
Window Treatments That Let the Light In
Sheer curtains filtering soft light throughout the room. Hung high above the window frame making the ceiling seem taller. The fabric is light and airy and never blocks the brightness coming through.
Natural light is the best friend of a narrow room. The right window treatment lets it pour in while still giving you softness and privacy.
Hang your curtain rod as close to the ceiling as possible and extend it a few inches beyond the window frame on each side. Choose sheer or lightweight linen curtains in white or a very pale tone. Let them brush the floor for an elegant look that elongates the wall. Pull them open fully during the day to let maximum light in. For more control layer sheer panels with a simple roller blind behind them. This approach makes windows look bigger and ceilings look taller which is exactly what a narrow room needs.
Plants That Fill the Room with Life
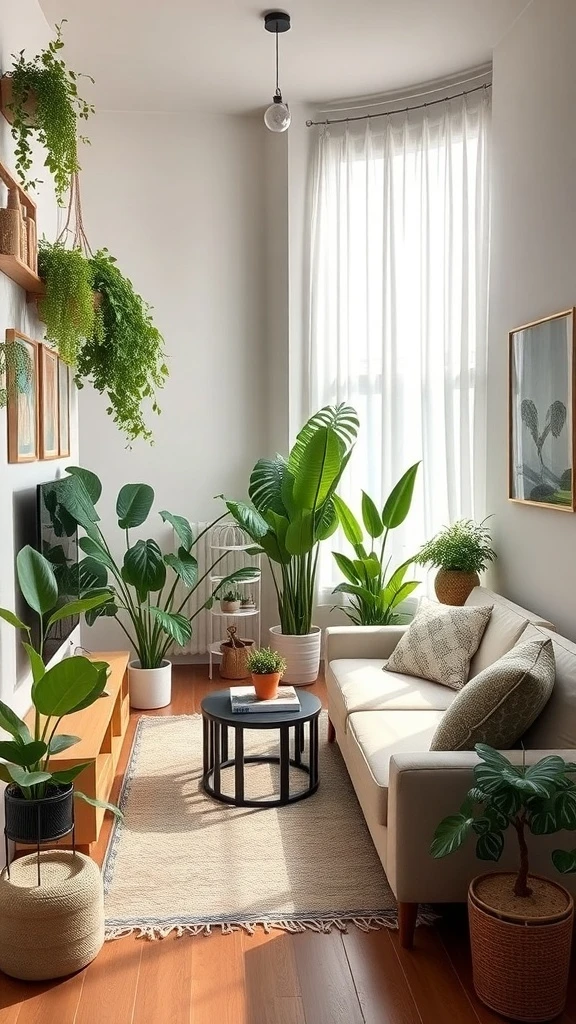
Tall plants reaching toward the ceiling in the corner. Smaller pots on shelves and side tables. Hanging greenery trailing from a high spot. The narrow room feels lush and alive without a single extra piece of furniture being added.
Plants fill vertical space beautifully. They add color and texture and make the air feel fresher. A narrow room with green in every corner feels open and natural.
Place one tall floor plant like a fiddle leaf fig or a bird of paradise in the corner where it draws the eye upward. Set smaller pots on shelves, side tables, or the windowsill to spread green throughout the room. Hang a trailing plant from a high hook or a tall shelf for dramatic effect. Choose low-maintenance varieties that handle indoor conditions well. Three to five plants at different heights gives a narrow room the perfect amount of life without competing with your furniture for floor space.
Built-In Features for a Clean Look
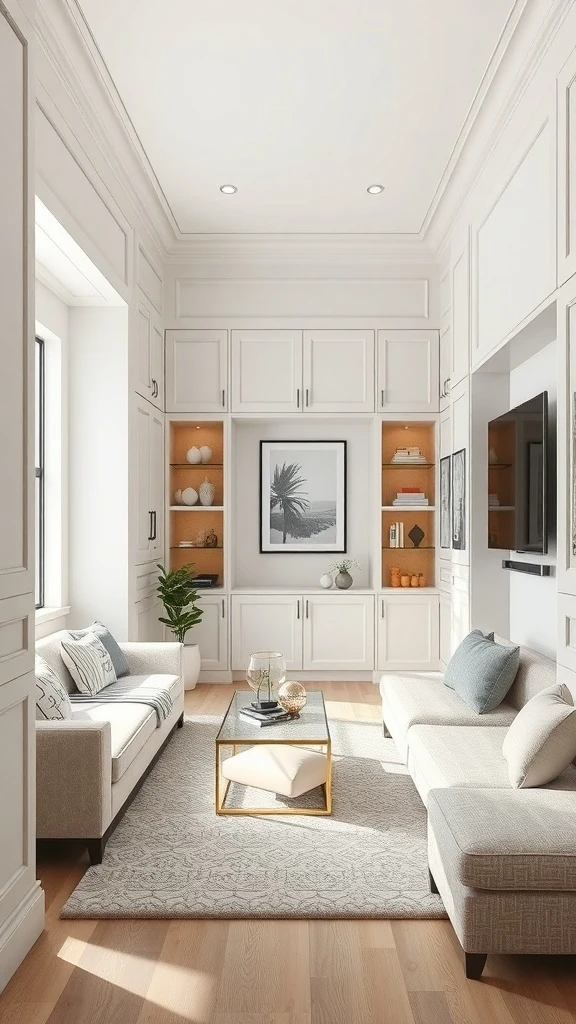
Built-in shelves and cabinets running along one wall in a light finish. Everything stored neatly behind closed doors or displayed on open shelves. The floor stays completely clear. The room reads as one smooth designed space.
Built-ins turn your wall into both storage and decor. They eliminate the need for separate bookcases and cabinets that push into the narrow walkway.
Install built-in cabinetry along one wall from floor to ceiling in a light color that matches or blends with your walls. Use the lower section for closed storage and the upper shelves for display pieces, books, and plants. Keep the furniture on the opposite wall slim and simple so the room does not feel closed in. A built-in unit can also frame a TV or a fireplace to create a polished focal wall. This custom look gives you maximum storage in minimum depth which is exactly what a narrow room needs.
Decluttering for a Clean Streamlined Feel
A sleek sofa against the wall. A simple coffee table with nothing extra on it. One plant in the corner. A clock and a piece of art on the wall. That is it. The room feels calm and spacious because nothing unnecessary is competing for attention.
In a narrow room, less truly is more. Every item you remove opens the space up a little further.
Start by removing anything from the room that does not belong or serve a purpose. Choose a coffee table with hidden storage for remotes and magazines. Use decorative baskets or boxes for small items you want accessible but hidden. Limit surface decor to one or two items per surface. Keep the walls clean with just a couple of well-placed pieces of art. A narrow room that is free of clutter instantly feels bigger, calmer, and more welcoming.
Multi-Functional Furniture That Works Harder
A coffee table that stores blankets inside. A sofa that converts for sleeping. A round side table that moves easily from one spot to another. Light curtains letting the sun pour in. Plants reaching up to fill the vertical space.
When every piece of furniture does double duty you need fewer items in the room. Fewer items means more space and a narrow room that actually breathes.
Choose a coffee table with a lift top or interior storage for hidden organization. Pick a sofa with a pull-out bed if you host guests. Use nesting tables that tuck together when not needed and spread out when you are entertaining. Add a storage ottoman that serves as both seating and a hidden supply closet. Keep everything in light tones with clean lines so nothing feels heavy. Multi-functional pieces are the key to making a narrow living room work without ever feeling crowded.
Art and Decor That Show Your Style
Framed pieces on the wall adding personality. A stylish lamp casting warm light over the sofa. A coffee table with carefully chosen accessories. A green plant softening one corner. Every item feels intentional and personal.
Art and decor are what turn a narrow living room from just a space into your space. A few meaningful pieces go further than a room full of stuff.
Hang two or three pieces of art that you genuinely love on the most visible wall. Keep frames coordinated in tone for a cohesive gallery feel. Place one statement lamp beside the sofa for warm focused light and visual interest. Style your coffee table with just a candle, a small plant, and one decorative object. Add a plant in the corner that does not block the walkway. Choose quality over quantity with every item and let the room stay open while still feeling full of personality.
A Layout That Encourages Flow
Two sofas facing each other with a round coffee table between them. A large window filling the room with natural light. Layered rugs defining the seating area. Plants in the corners keeping the space alive.
The layout lets you walk from one end of the room to the other without bumping into anything. Everything flows and nothing blocks the path. That is the goal in a narrow room.
Keep your main walkway at least 18 inches wide from the furniture to the opposite wall. Position sofas parallel to the long walls facing each other for a natural conversation layout. Use a round coffee table in the center so movement flows easily in every direction. Place a rug under the seating area to anchor it visually. Keep the ends of the room light with just a plant or a slim side table. This layout prioritizes movement and openness while still being comfortable and inviting.
A Room Designed for Family Time
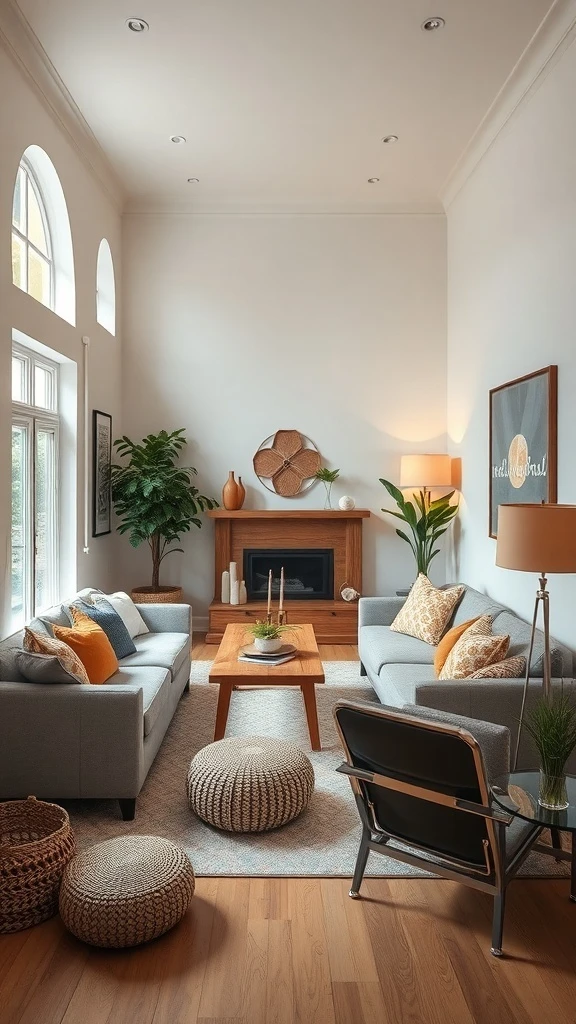
Two cozy sofas facing each other so everyone can talk and connect. A coffee table in the middle perfect for snacks and games. Soft cushions and poufs adding extra comfort. Natural light flooding through tall windows and plants bringing life to every corner.
The narrow room becomes a gathering space where the family actually hangs out together. That is what good design does. It brings people closer.
Arrange your sofas face to face with a sturdy coffee table between them that can handle board games and snacks. Add a couple of poufs or floor cushions for extra seating when the kids have friends over. Keep the coffee table low enough for little ones to sit around comfortably. Use soft durable fabrics that can handle daily family life. Place plants near the windows where they get light and add a warm blanket on each sofa for movie nights. This family-centered layout makes a narrow room the most social space in the house.
An Entryway That Sets the Tone
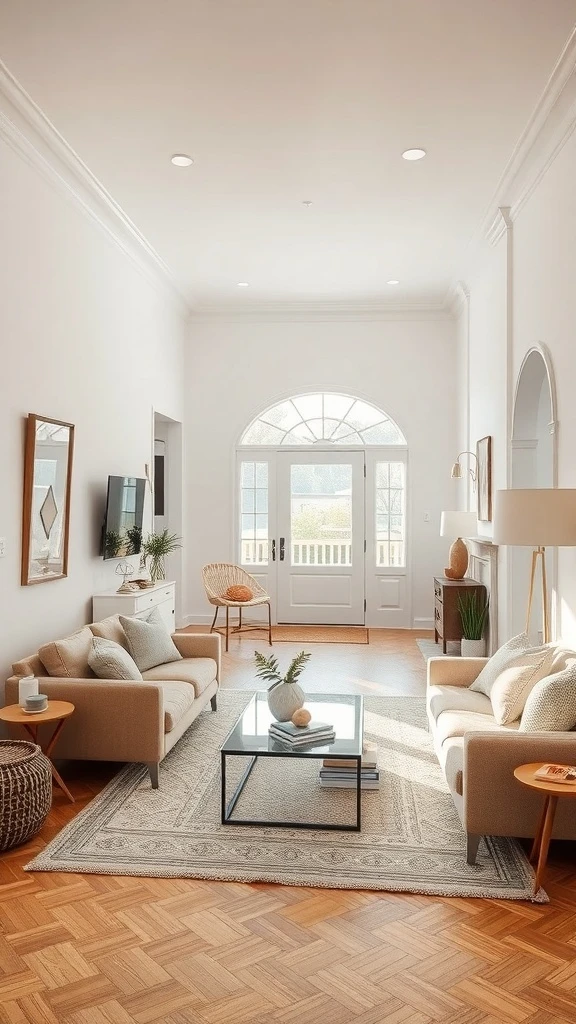
Stepping into the room and immediately feeling welcomed. Light walls and wooden floors. Two sofas with a coffee table between them. Framed photos and a plant giving the room personality right from the first glance.
The entrance of a narrow living room matters because it is the first thing you and your guests see. Make it count.
Keep the area nearest the door clear of bulky furniture so the entrance feels open. Place your first piece of furniture at least a couple of feet from the doorway. Use a small console table or a slim bench near the entrance for keys and a plant. Hang a mirror or a piece of art on the wall facing the door so there is something beautiful to see the moment you walk in. This first impression sets the mood for the entire room.
Textured Layers That Add Warmth
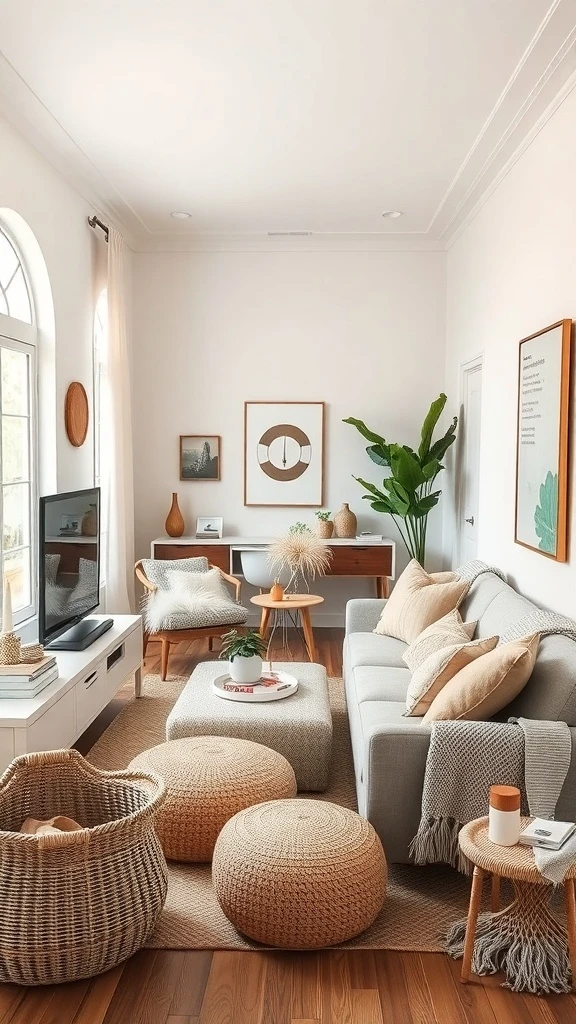
A soft knitted throw on the sofa. Woven poufs on the floor. A natural fiber basket beside the couch. Plush cushions in different fabrics piled up. Wooden accents and green plants rounding out the warmth.
Textiles and textures make a narrow room feel rich and inviting instead of cold and tight. They soften every hard edge and add depth to every surface.
Start with a cozy throw blanket draped over the sofa arm in a chunky knit or soft cotton. Add three or four cushions in mixed textures like linen, velvet, and woven fabric. Place a natural fiber rug under the seating area for warmth underfoot. Add a woven basket beside the sofa for blanket storage that doubles as decor. Use a wooden side table and a couple of ceramic pots for plants. These layered textures make a narrow living room feel like a warm embrace the moment you sit down.
A Cozy Nook Within the Room
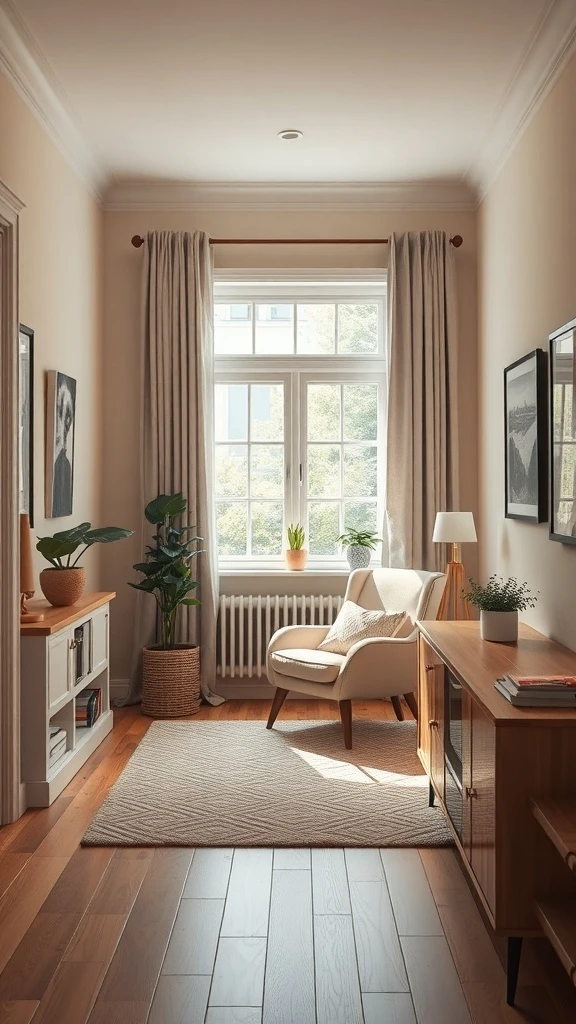
A comfortable chair placed beside the window catching the best light. A small side table holding a coffee cup. A low cabinet with a plant and a couple of personal items. A soft rug defining the little zone. It is a room within a room.
Creating a cozy nook inside a narrow living room gives you a spot that feels completely your own. A place to read, think, or just breathe.
Choose the end of the room with the best natural light and place a comfortable armchair there. Add a small round side table for your drink and a book. Lay a soft rug underneath to define the nook as its own zone. Place a low cabinet or a floating shelf nearby for a plant and a candle. Keep this corner separate from the main seating area so it feels like a private retreat within the larger room. This dedicated nook adds function and soul to your narrow living room.
Bold Color Blocking for Visual Interest
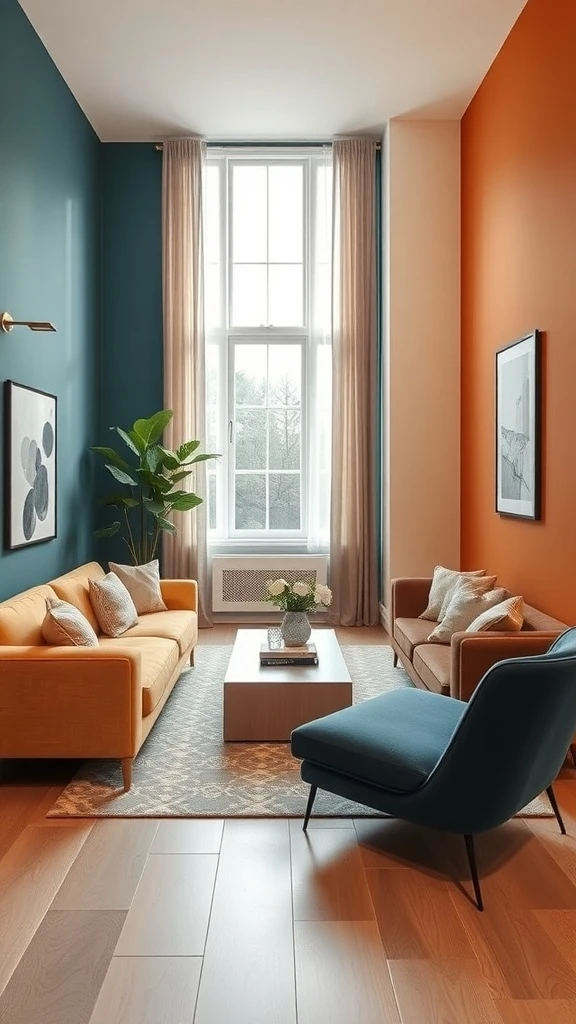
A deep teal wall on one side. A warm orange on the other. An orange sofa and a blue accent chair playing off the colors around them. Natural light streaming in and making every bold shade glow. Plants breaking up the color blocks with fresh green.
Color blocking in a narrow room is unexpected and exciting. It gives the space energy and personality that neutral walls alone cannot achieve.
Paint two opposite walls in contrasting bold colors like teal and warm orange or navy and mustard. Keep the ceiling and floor light so the bold walls do not close in the room. Choose one piece of furniture that echoes one wall color and one accessory that echoes the other. Add plants to soften the bold tones with natural green. Let the large window light amplify the colors naturally. This brave approach turns a narrow living room into the most visually dynamic space in your home.
by Clara Scott | Feb 21, 2026 | Uncategorized
A tiny reading nook is one of the most personal spaces you can create in your home. It does not need to be big. Just a cozy chair, good light, and your favorite books are enough to build a little retreat where the rest of the world fades away. Here are some beautiful ideas to help you design a reading nook that makes you want to sit down and stay awhile.
Floating Shelves and a Bean Bag
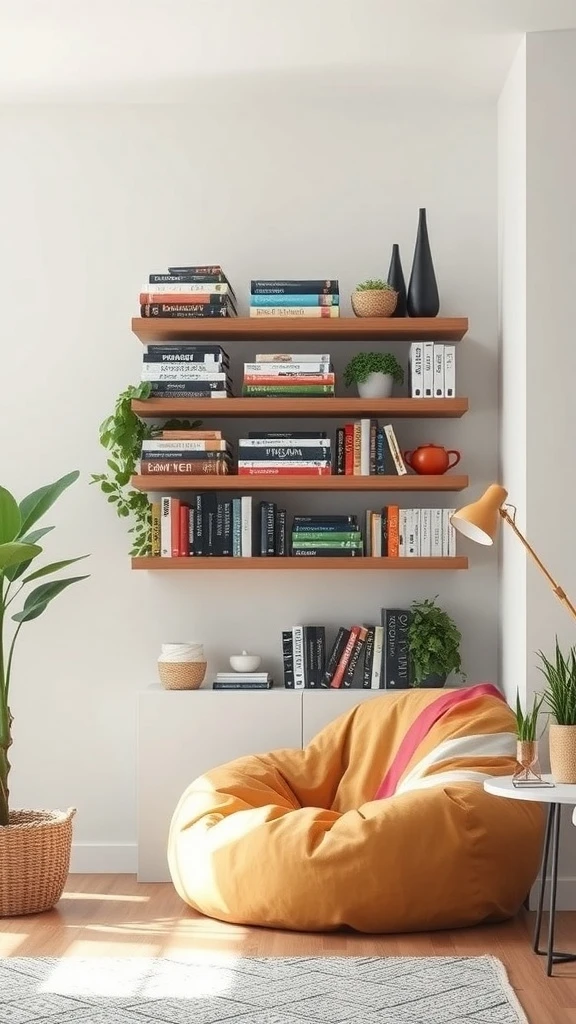
Floating shelves climbing the wall filled with books in every color and size. A big soft bean bag right below waiting for you to sink in. A plant on the shelf adding a little life to the whole display.
You grab a book, drop into the bean bag, and the afternoon disappears. It is simple, fun, and completely irresistible.
Mount two or three floating shelves at staggered heights on a blank wall. Arrange your books with the spines facing out so the colors create a natural display. Place a large bean bag directly below in a bold or cozy fabric. Add a small potted plant on one shelf for freshness. Keep a throw blanket draped over the side of the bean bag for chilly reading sessions. This setup takes up barely any floor space and gives you a full reading corner that looks and feels amazing.
Hammock Chair Haven
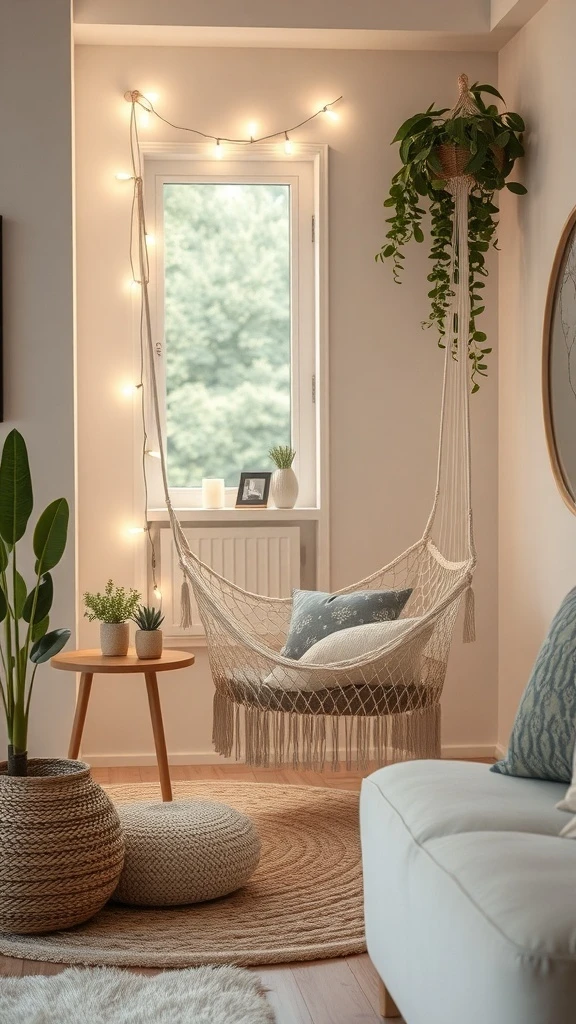
A woven hammock chair hanging gently in the corner swaying just enough to be relaxing. A small table beside it with a plant and a cup of tea. String lights above casting a warm dreamy glow. A textured rug below and a soft pouf for resting your feet.
You sit down, start swinging, and every worry melts away. It is reading in its most relaxed form.
Install a strong ceiling hook rated for your weight and hang a woven or macrame hammock chair from it. Place a small round side table next to it for your drink and book. Drape string lights along the wall or ceiling above for soft ambient light. Add a plush rug underneath and a pouf for your feet. Keep a small plant on the table to bring nature into the scene. This hanging reading spot feels like a little vacation every time you settle in.
Vintage Suitcase Coffee Table
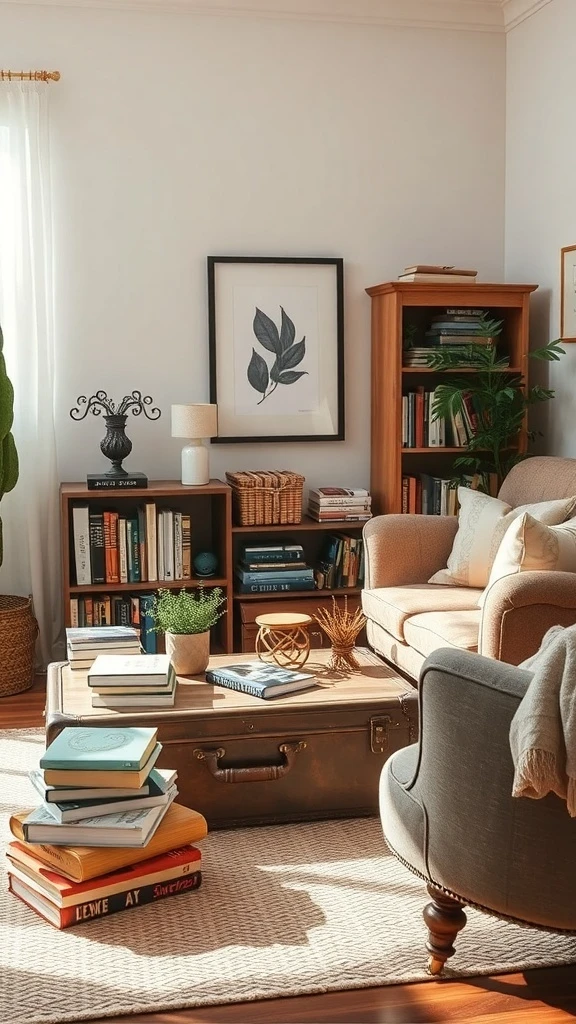
An old suitcase sitting in the center of your reading nook serving as a coffee table. Warm leather tones and vintage hardware giving the space character. Books stacked on top and tucked inside. Decorative pieces around it tying the whole corner together.
It is practical and full of personality. Every guest asks about it and every reading session feels like an adventure.
Find a vintage suitcase at a thrift store or flea market with a flat enough top to hold a cup and a book. Place it at a comfortable height near your reading chair on a small stand or stacked on another suitcase. Store magazines, extra blankets, or reading accessories inside to keep the nook tidy. Surround it with a cozy chair and a soft rug. Add a small lamp nearby for reading light. This one-of-a-kind piece gives your nook a story before you even open a book.
Book-Laden Bookshelf Nook
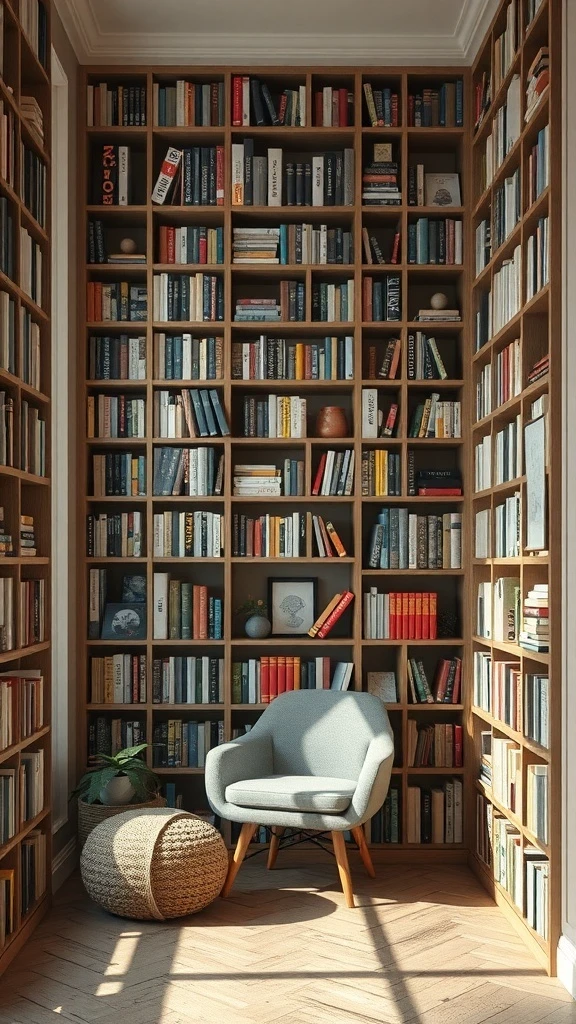
A tall bookshelf packed with titles from top to bottom. Every shelf filled with stories waiting to be discovered. A light-colored chair beside it catching the sunlight from a nearby window. A round pouf at your feet for extra comfort.
You are surrounded by books on all sides and the only decision you have to make is which one to read next. That is the best kind of problem.
Position a tall bookshelf against the wall and fill it with your collection organized however feels right to you. Place a comfortable reading chair right beside it angled toward the light. Add a small round pouf or ottoman for propping up your feet. Set a plant on one of the shelves to break up the rows of books with a touch of green. Let natural light from the nearest window do most of the work during the day. This floor-to-ceiling library feel makes your nook the most inspiring corner in the house.
Window Seat with Soft Lighting
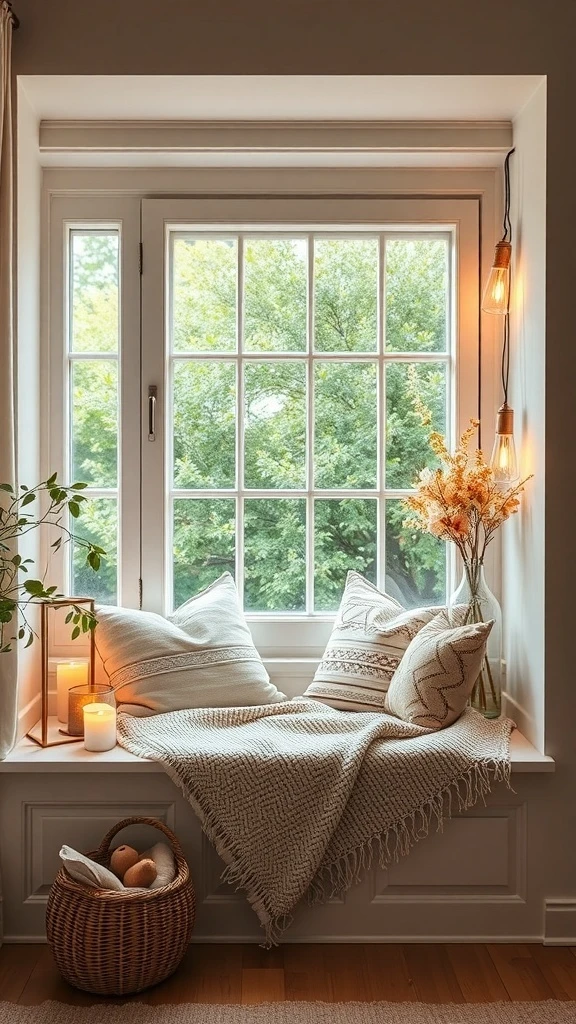
A cushioned window seat with plush pillows piled up. A textured throw blanket draped across the middle. Candles flickering gently on the sill. The view outside filled with green trees and soft light.
This is the kind of spot where you sit down for a chapter and end up staying for the whole book. The light, the comfort, and the view make it impossible to leave.
Build or install a window seat bench at the base of your best window. Top it with a thick cushion and two or three soft pillows for back support. Drape a cozy throw blanket across the seat for chilly afternoons. Place a couple of candles on the sill or nearby surface for evening ambiance. Keep a small stack of books within reach on the bench or a nearby shelf. This window seat reading nook uses space that often goes ignored and turns it into the most loved spot in your home.
Cozy Corner with Floor Cushions
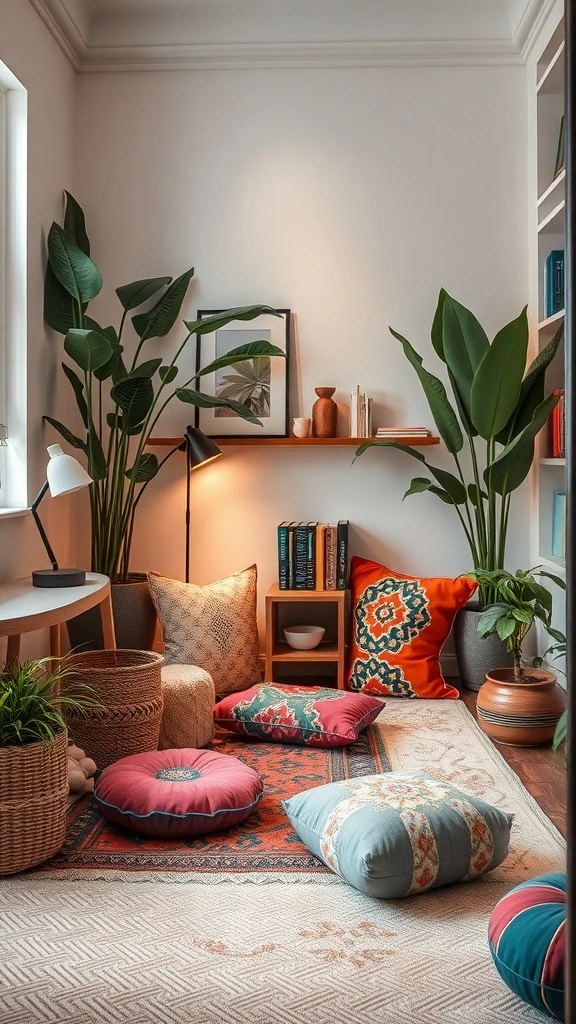
Big floor cushions in different patterns and colors piled in a corner. Lush plants all around creating a little green cocoon. A shelf of books within arm’s reach. A soft light warming the whole area.
No chair needed. You just drop down onto the cushions, lean back, and disappear into a story. It is casual, comfortable, and completely charming.
Stack three or four large floor cushions in a quiet corner of your room. Mix patterns and colors that complement each other for a relaxed eclectic feel. Place a low side table or a small tray beside the cushions for your tea and snacks. Add two or three potted plants around the area to create a natural frame. Mount a small shelf on the wall above for your current reads. This no-furniture reading spot is perfect for small spaces and feels incredibly inviting.
Garden View Reading Alcove
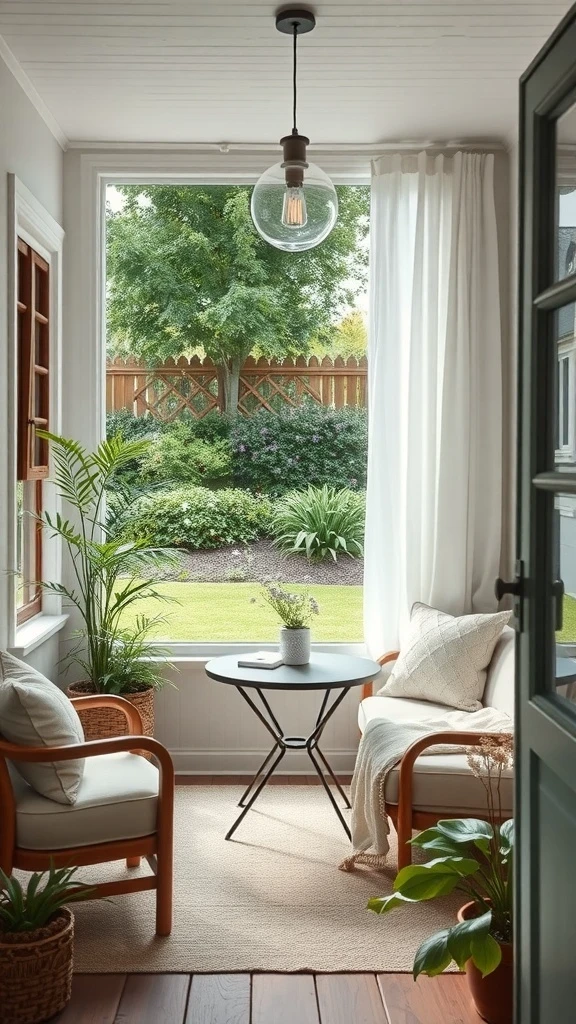
A pair of comfortable chairs facing a large window that looks out onto a garden. Soft natural light filling the room. A small table between the chairs holding a book and a plant. Neutral tones keeping everything calm and quiet.
The view outside becomes part of the reading experience. You look up between chapters and the green just recharges you.
Position two cozy chairs facing your best window with a small round table between them. Keep the decor simple and neutral so the garden view stays the focal point. Place a single plant on the table to echo the greenery outside. Use sheer curtains or none at all so light flows in freely. Add a small basket beside the chairs for books and a blanket. This garden-facing alcove makes reading feel like a peaceful escape into nature without ever leaving the room.
Under-Stairs Reading Retreat
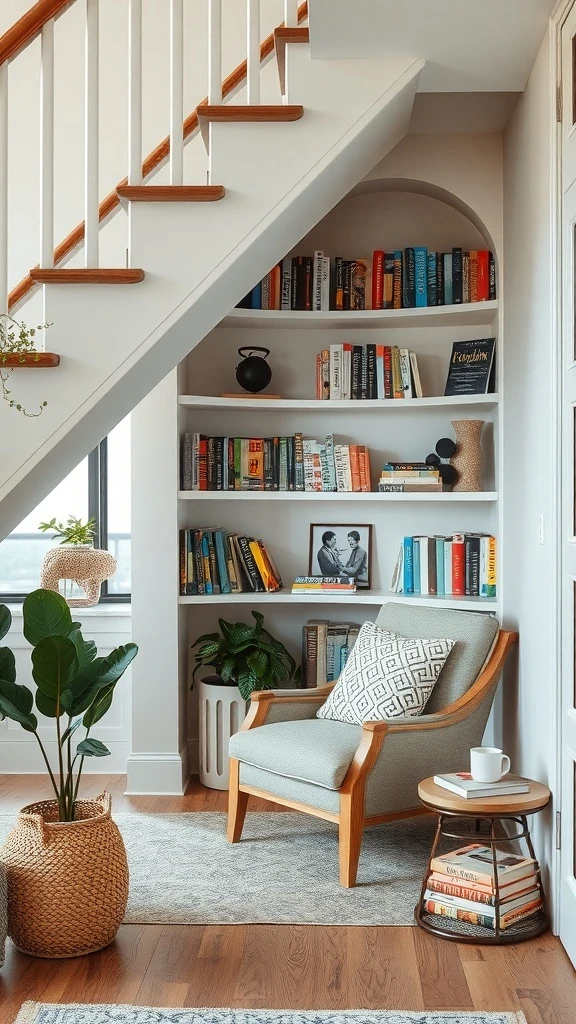
A soft chair tucked right underneath the staircase. Shelves built into the wall filled with books. A small table beside the chair holding a warm cup of tea. A plant in the corner adding life. Warm wood tones and soft walls wrapping around you.
This little hideaway under the stairs is a secret reading room that feels completely separate from the rest of the house.
Clear out the space under your stairs and measure for a compact armchair or a built-in bench with a cushion. Install floating shelves on the back wall for your book collection. Add a small side table or a wall-mounted fold-down shelf for your drink. Place a plant in the corner and hang a small reading light above or clip one to the shelf. Paint the interior a warm light color to keep it feeling open. This under-stairs nook transforms forgotten space into the coziest reading spot in the house.
Soft Rug and Low Table
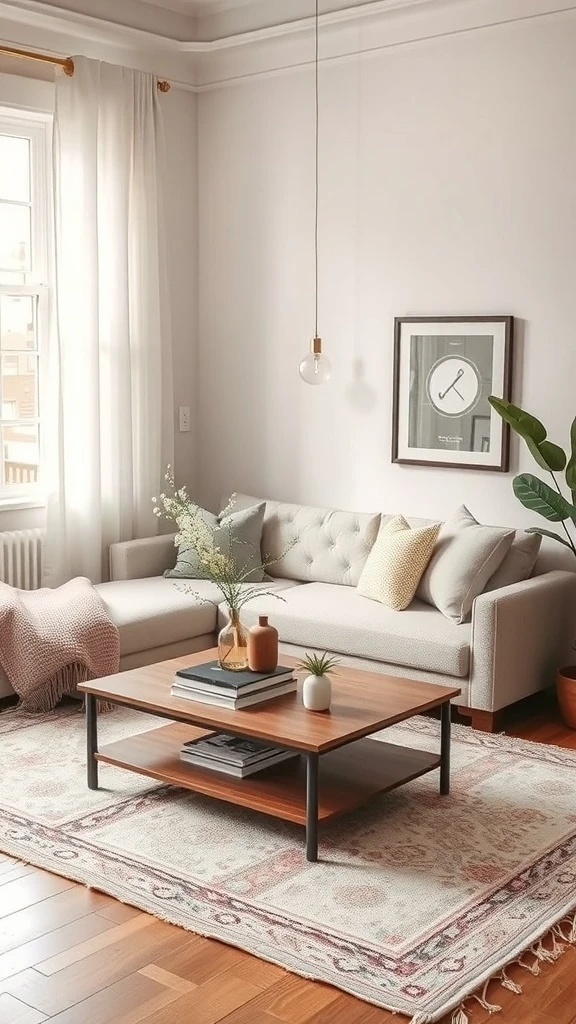
A plush rug spread across the floor making every step feel soft. A low table in front of the sofa holding a couple of books and a small plant. The space feels grounded and warm. Simple and inviting.
You kick off your shoes, settle onto the rug or the sofa, and let the quiet take over. This nook is all about slowing down.
Lay a thick soft rug in a neutral or warm tone across your reading area floor. Place a low coffee table or a wooden tray table in front of your seating for books and a drink. Keep the surface minimal with just two or three items so it stays clean and calming. Add a couple of cushions to the sofa or the floor for extra comfort. A small plant on the table rounds out the natural grounded feel. This combination of a soft rug and a low table creates a relaxed reading atmosphere that draws you in.
Narrow Balcony Reading Spot
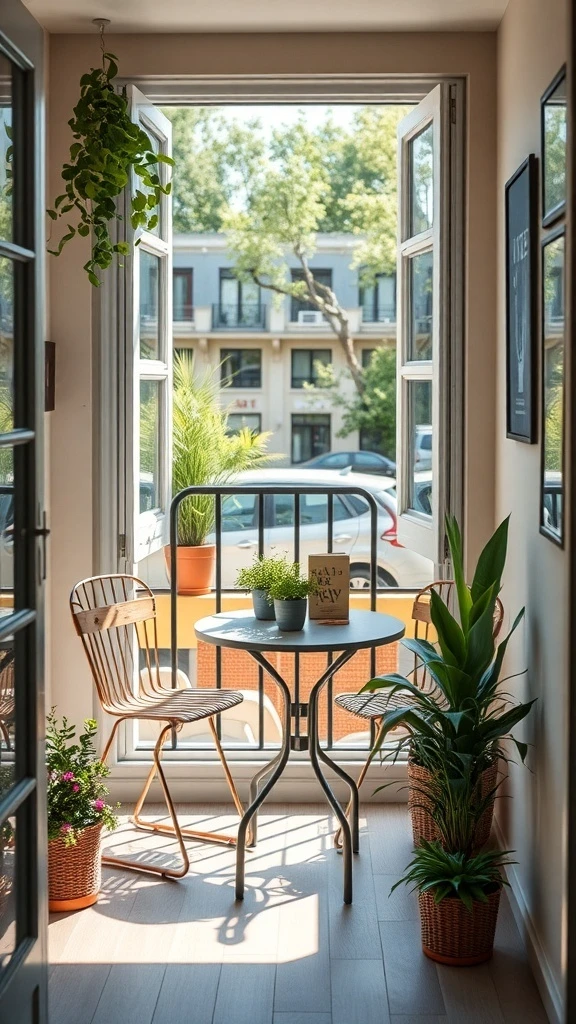
Two charming chairs on a narrow balcony with a small table between them. Open doors letting in fresh air and sunlight. Potted plants lining the railing. The gentle sounds of the world outside as your soundtrack while you read.
Reading outdoors on your own little balcony feels like a luxury. Even a narrow one becomes the perfect escape when you set it up right.
Place two slim chairs on your balcony facing each other or side by side with a tiny table between them. Add a couple of potted plants on the railing or the floor to frame the space with green. Keep a small basket under the table for your current books. Use a lightweight throw for cooler days. Leave the balcony doors open while you read to let fresh air flow through. This outdoor reading spot adds a whole new dimension to your daily reading routine.
Colorful Mismatched Furniture
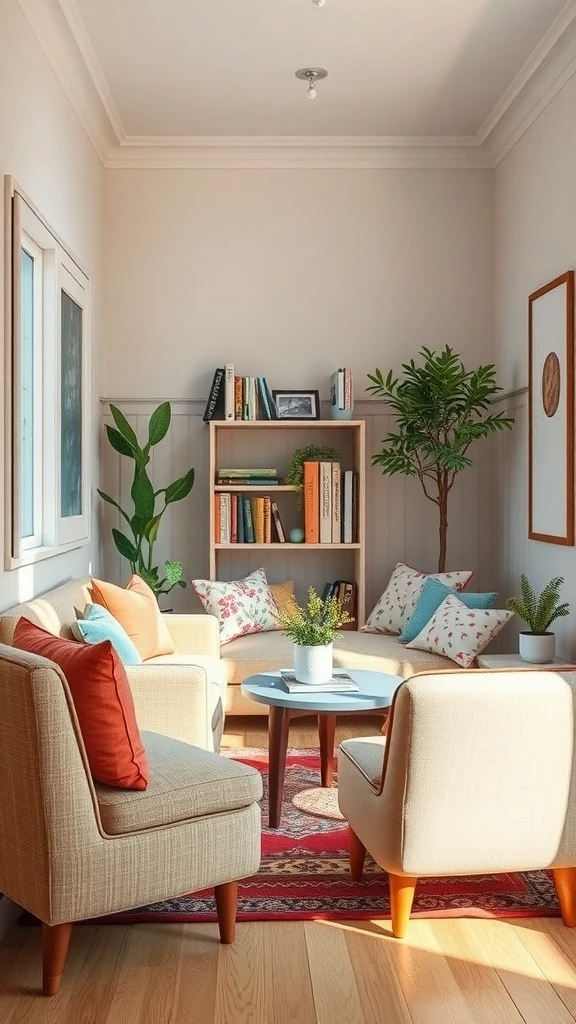
Light-colored chairs with bright orange and blue cushions that do not match but somehow look perfect together. A round modern coffee table in the middle. A simple bookshelf behind filled with titles ready to be grabbed. Plants adding life to every surface.
The mix of styles and colors makes this nook feel playful and alive. It is a space with real personality that makes reading feel fun.
Choose two or three seating pieces in different styles and tie them together with coordinating colorful cushions. Place a small round table in the center for your coffee cup and current read. Position a bookshelf or a couple of floating shelves behind the seating for easy book access. Add a plant or two on the shelf or beside the chairs for freshness. Let the mismatched styles create an eclectic collected-over-time look that feels personal and joyful.
Curtained-Off Cozy Space
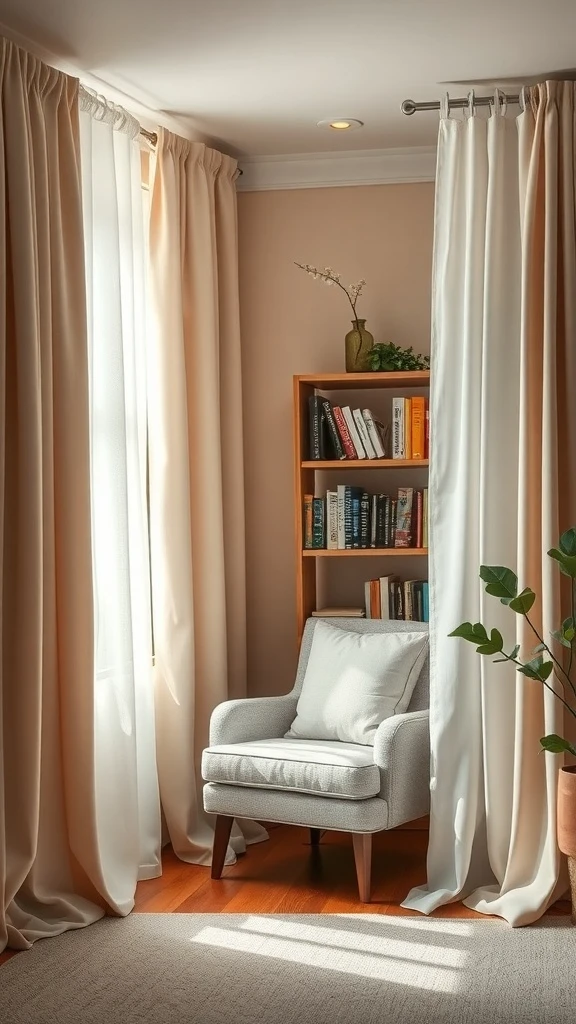
Light curtains hanging from a ceiling rod creating a soft barrier around a cozy armchair. Natural light filtering through the fabric. A small bookshelf right inside the curtained area. A plant beside the chair keeping things fresh.
Pull the curtains closed and you are in your own little world. Open them up and the room feels whole again. It is private when you want it to be and open when you do not.
Install a simple ceiling-mounted curtain rod in a half-circle or straight line around the corner where your reading chair sits. Hang lightweight sheer or linen curtains that let light through while creating a sense of enclosure. Place your reading chair inside with a small shelf or stack of books beside it. Add a plant and a soft throw to complete the nook. Draw the curtains when you want total quiet and pull them back when you are done. This curtained reading spot creates privacy without walls.
Small Space with a Loft Bed
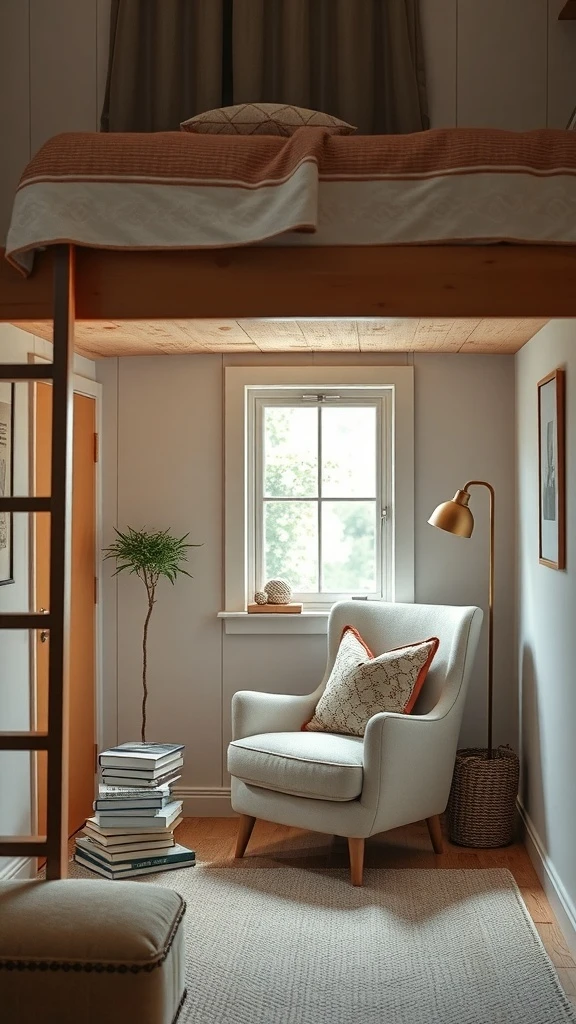
A loft bed above opening up the entire floor below for a reading nook. A comfortable armchair tucked underneath. A decorative pillow adding personality. Natural light from a nearby window brightening everything. A stack of books and a small plant finishing the scene.
The loft bed creates a room within a room. Your reading nook lives underneath like a cozy little cave with everything you need.
If your ceilings are high enough a loft bed instantly doubles your usable space. Place a comfortable reading chair directly underneath with a small side table for your drink. Add a floor lamp or a clip-on reading light since the loft may block some overhead light. Stack your favorite books on the table or a small shelf beside the chair. Use a soft rug underfoot to define the nook and add warmth. This vertical approach gives you a bedroom and a reading retreat in the same footprint.
Tucked Away in a Hallway

A simple chair with soft cushions placed in a quiet hallway. A small bookshelf against the wall filled with your favorites. A warm lamp casting a gentle glow. The narrow space feels purposeful and cozy instead of forgotten.
You pass through this hallway every day but now you actually stop and sit. It becomes a pause point in your home that invites you to slow down.
Find the widest section of your hallway and place a slim armchair or a small bench with a cushion against the wall. Mount a narrow bookshelf or a couple of floating shelves beside it for your books. Add a small table lamp on a shelf or a wall-mounted sconce for reading light. Place a soft rug under the chair to define the nook. Keep the surrounding decor minimal so the hallway stays open. This unexpected reading spot turns unused space into a charming little retreat.
Corner Desk with Reading Light
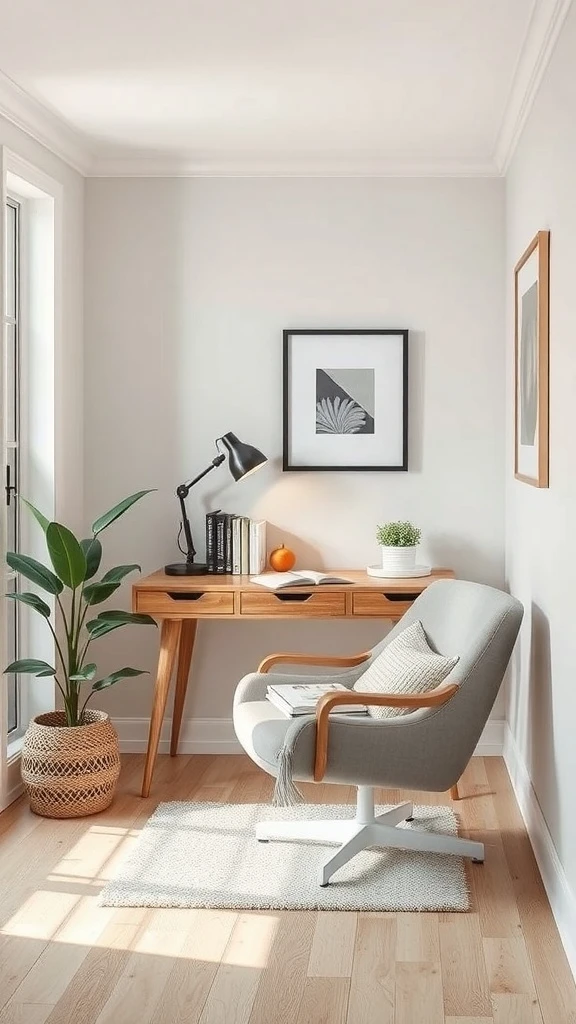
A warm wooden desk in the corner with a tall sleek reading lamp beside it. A few books neatly arranged on the surface. An orange adding a pop of color. A small plant keeping things fresh. A comfortable chair designed for sinking in.
This is a reading nook that doubles as a work spot. The lamp makes late-night reading sessions feel special and focused.
Choose a compact desk with a warm wood finish and place it in a corner that gets good light. Add a tall adjustable reading lamp with a warm bulb for evening sessions. Keep the desk surface clean with just your current book, a small plant, and one personal item. Use a comfortable chair that supports long sitting sessions. Place a soft rug underneath to define the area and add warmth. This desk-based reading nook works perfectly for people who love reading and writing in the same spot.
Creative Use of a Closet
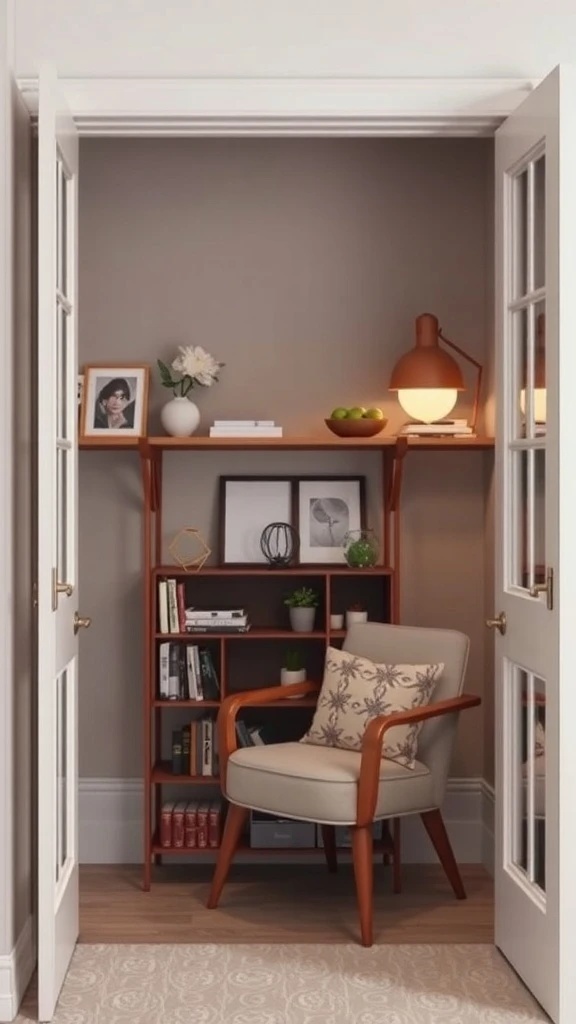
A closet transformed into a reading nook with a cozy patterned chair inside. A small bookshelf built into the wall. A warm light fixture above. Framed photos and a plant adding personality. It is a complete little world hidden behind what used to be closet doors.
Open the doors and step into your private reading room. Close them and it disappears. It is the ultimate hidden retreat.
Remove the closet doors or fold them back and clear the interior completely. Place a compact armchair or a cushioned bench inside that fits the width. Install a small shelf on the back wall for books and a couple of decorative items. Mount a warm light fixture above since closets lack natural light. Add a framed print and a small plant for personality. Paint the interior walls a light warm color to make it feel open. This closet reading nook is one of the most creative uses of small space and becomes a secret sanctuary in your home.
Natural Light from Skylights
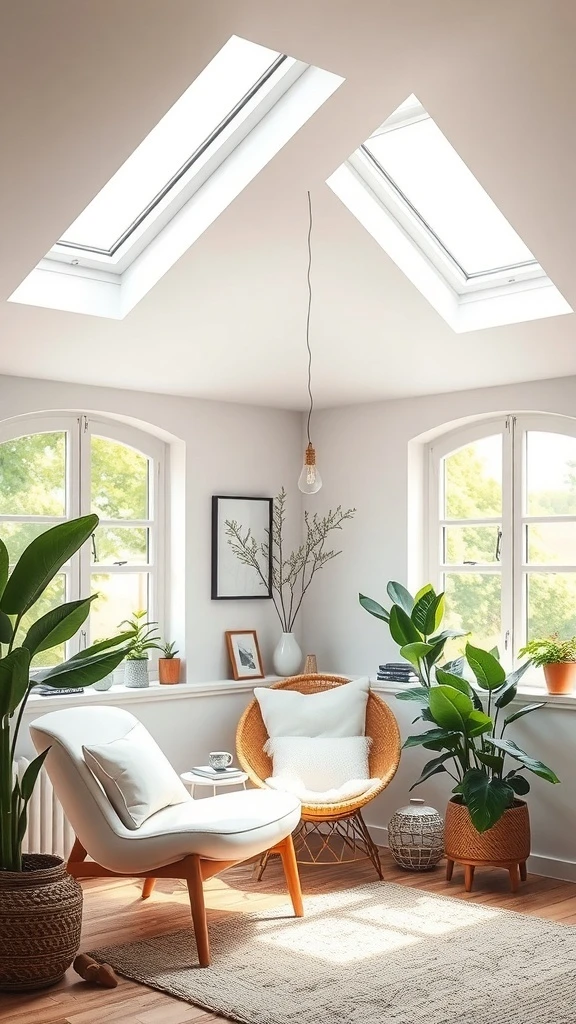
Two skylights in the ceiling pouring natural light directly onto your reading spot. The whole room glows with warmth during the day. Plants near the light thrive and the space feels bright and alive without a single lamp turned on.
Reading under a skylight feels different. The light is softer and more even. It is like being outside without the wind.
If you have skylights or the option to install them, position your reading chair directly beneath or near the light for the best natural illumination. Keep the walls and furniture light-colored to maximize the reflected glow. Place a couple of sun-loving plants near the skylight where they will flourish. Add a soft rug and a comfortable chair below for the ultimate reading position. Use a small lamp for evenings since skylights go dark at night. This overhead light source makes your reading nook feel open, airy, and perfectly lit during daytime hours.
Miniature Library with a Ladder
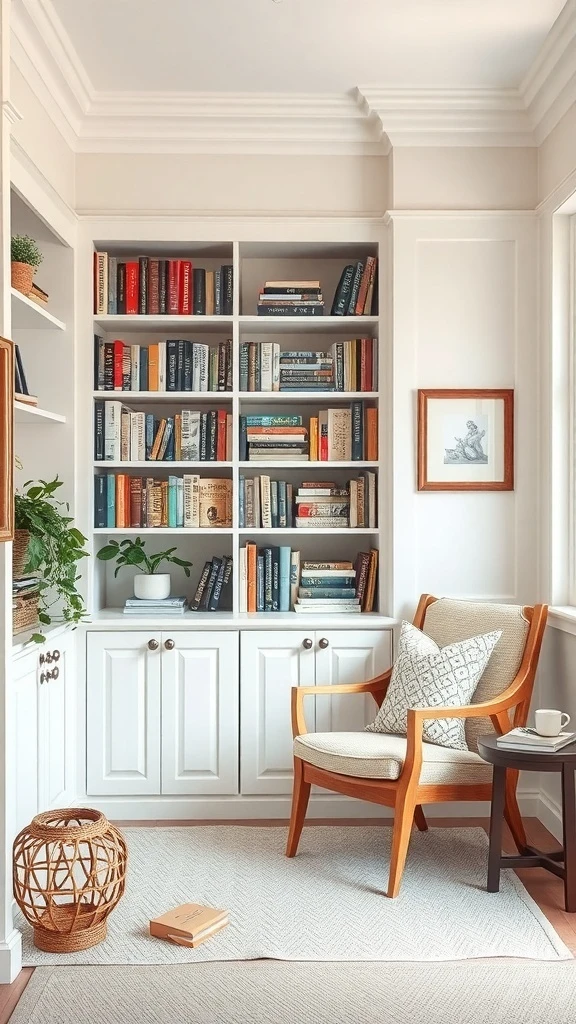
Floor-to-ceiling shelves filled with books. A small wooden ladder leaning against them for reaching the top rows. A cozy chair beside the shelves with a cup of tea on a side table. A woven basket on the floor and a plant or two adding warmth.
It feels like a tiny personal library. You climb the ladder, pull down a title, and settle in. Every book lover’s dream in a compact space.
Install tall bookshelves from floor to ceiling along one wall and fill them completely. Add a small rolling or leaning ladder so you can reach the highest shelves safely. Place a comfortable armchair right beside the shelves with a side table for your drink. Set a woven basket on the floor for magazines or books you are currently reading. Add a plant on one of the shelves for a pop of life. This miniature library setup makes even a small room feel like a proper personal reading sanctuary.
Artistic Wall Mural Nook
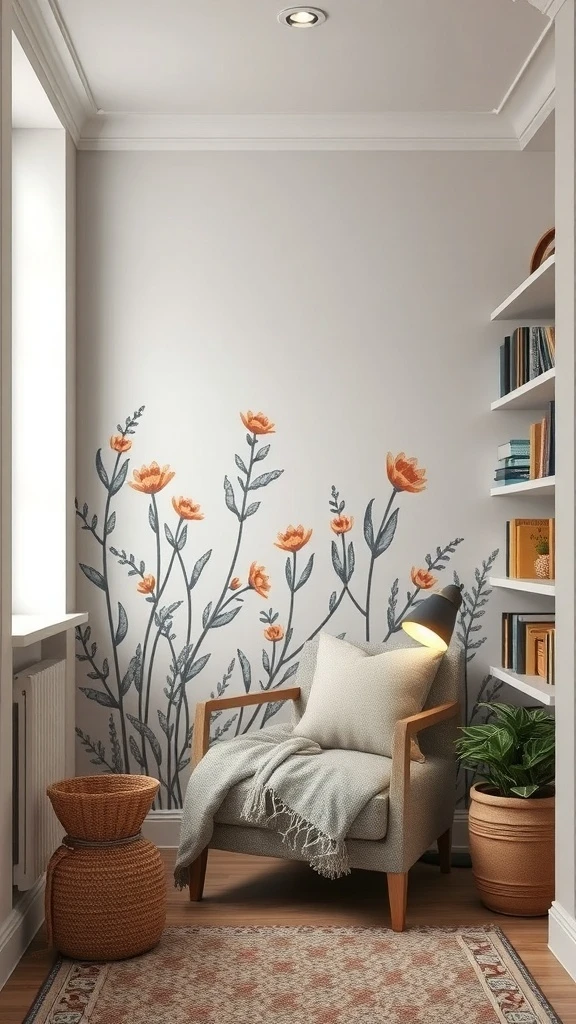
A stunning floral mural painted on the wall behind your reading chair. Orange blossoms against a soft gray background. A cozy blanket draped over the chair. A stylish lamp for late-night pages. Shelves of books nearby completing the scene.
The mural turns a plain wall into a work of art that wraps around you while you read. It is dramatic and beautiful and makes the nook feel like no other space in the house.
Choose a wall mural or a large-scale peel-and-stick wallpaper with a bold floral or nature-inspired design. Apply it to the wall directly behind your reading chair for maximum impact. Keep the rest of the nook simple with a neutral chair, a soft throw, and a warm reading lamp. Place a small bookshelf or a stack of books nearby. The mural becomes the statement and everything else supports it quietly. This artistic touch transforms a basic corner into the most visually stunning reading nook in your home.
Pet-Friendly Reading Spot
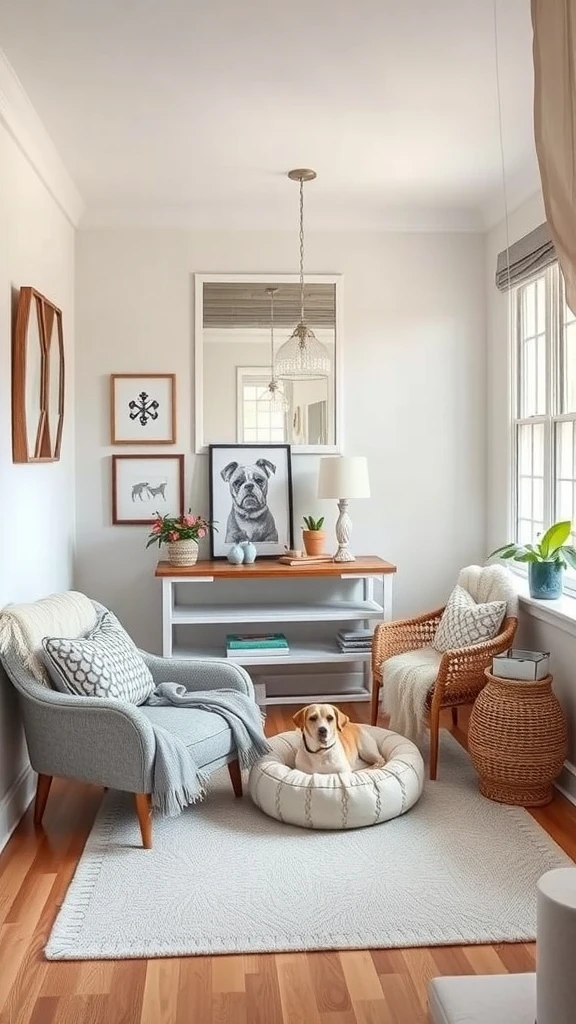
A cozy reading chair with soft blankets. Warm artwork on the walls. A cute dog curled up in a pet bed right beside you. The whole nook designed so you and your pet can relax together. Soft rugs, warm colors, and gentle light everywhere.
Reading is always better with a furry friend nearby. This nook is made for both of you and that makes it twice as special.
Place your reading chair beside a wall and set a comfortable pet bed right next to it on the floor. Use a soft washable rug underneath both so the whole area feels like one shared cozy zone. Add a blanket on the chair for yourself and one in the pet bed for your companion. Keep artwork or photos on the wall above for personality. Choose durable fabrics that handle pet hair and are easy to clean. A warm lamp nearby lights the space for reading while keeping the mood calm and gentle for your pet too.
by Clara Scott | Feb 21, 2026 | Uncategorized
Designing a small nursery is one of the most rewarding creative challenges. Every inch matters and every choice counts. But a tiny room can still feel warm, magical, and perfectly set up for your little one. Smart storage, soft textures, and thoughtful details turn even the smallest space into a dream nursery. Here are some ideas to help you make it happen.
A Reading Nook They Will Love Growing Up In
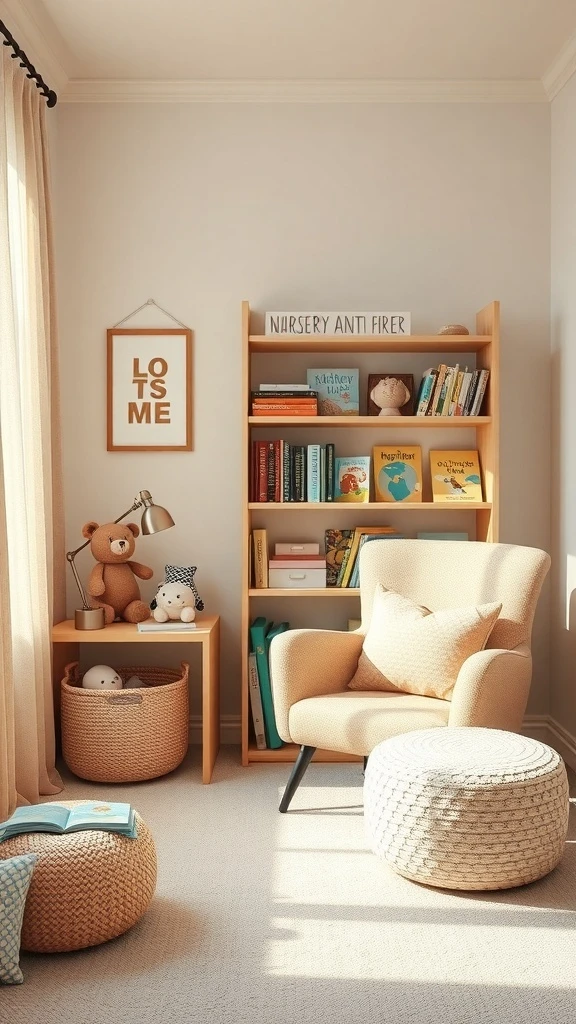
A soft chair tucked into a corner with a small bookshelf right beside it. Colorful books lined up and ready to be grabbed. Stuffed animals piled nearby. A gentle lamp casting just the right glow for bedtime stories.
This little nook becomes the place where you and your baby bond over books every single night. It takes up almost no room but it creates the sweetest memories.
Choose a compact armchair or a wide glider that fits snugly into a corner. Place a low bookshelf within arm’s reach so you can grab books without getting up. Add a soft pouf or a floor cushion for older toddlers who want to sit on their own. Keep a small basket nearby for stuffed animals and a cozy blanket draped over the arm of the chair. A warm-toned lamp on a nearby shelf completes this reading corner and makes it the most loved spot in the nursery.
Furniture That Works Twice as Hard
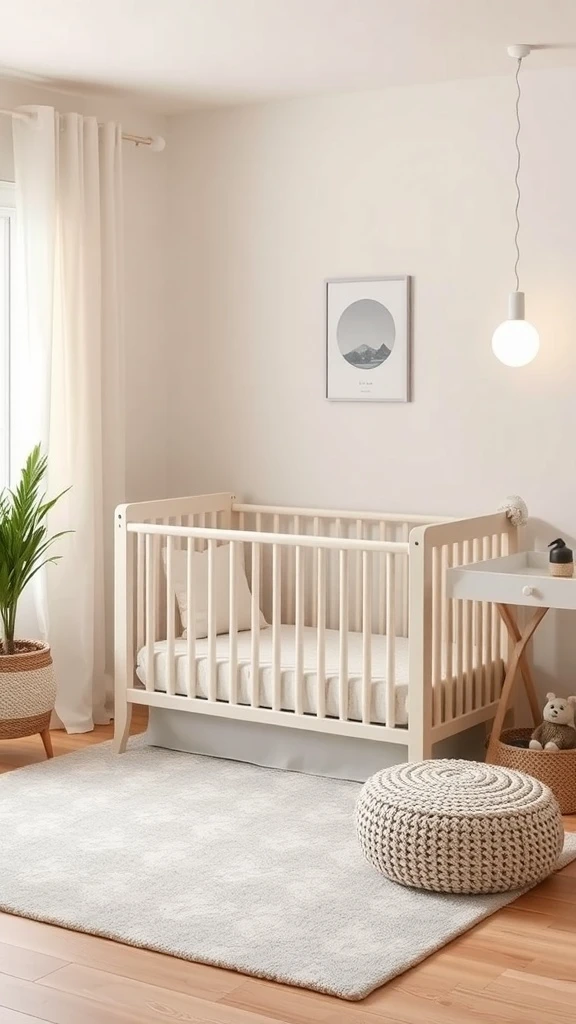
A crib that has a built-in changing area right on top. A small side table holding everything you need within reach for late-night changes. A pouf that doubles as a footrest during feedings and extra seating when guests visit.
Every piece pulls its weight. Nothing is just sitting there looking pretty without also doing something useful. That is how a small nursery stays functional and open.
Look for a crib with an attached or convertible changing table so you skip the need for a separate piece of furniture. Choose a side table with at least one shelf for diapers, wipes, and a small lamp. Add a fabric pouf in a neutral tone that works as a footrest, a seat, and a soft surface for tummy time. Place a small plant on the windowsill for freshness. This multi-purpose approach keeps the nursery spacious while giving you everything you need in arm’s reach.
Wall Shelves That Save the Floor
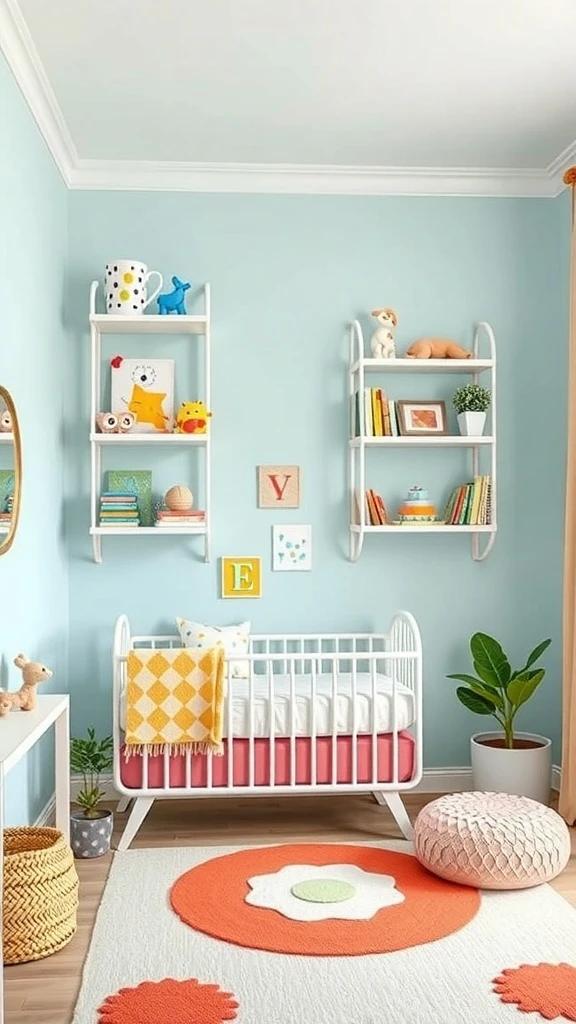
Two floating shelves on the wall holding toys, books, and a couple of cute decorative pieces. Everything at a height where you can reach it easily but the baby cannot pull it down. The floor below stays completely clear for crawling and playing.
The shelves draw the eye upward and make the room feel taller. A small nursery instantly feels more open when the walls do the storage work.
Mount two or three floating shelves on the wall above the changing area or beside the crib. Use them for books displayed with the covers facing out so they double as wall art. Add small baskets or bins on the shelves for tiny items like pacifiers, socks, and hair bows. Mix in one or two decorative pieces like a small stuffed animal or a framed print for charm. Keep the shelf color matching the wall so they blend in and never make the room feel heavy.
Soft Textures That Make Everything Cozy
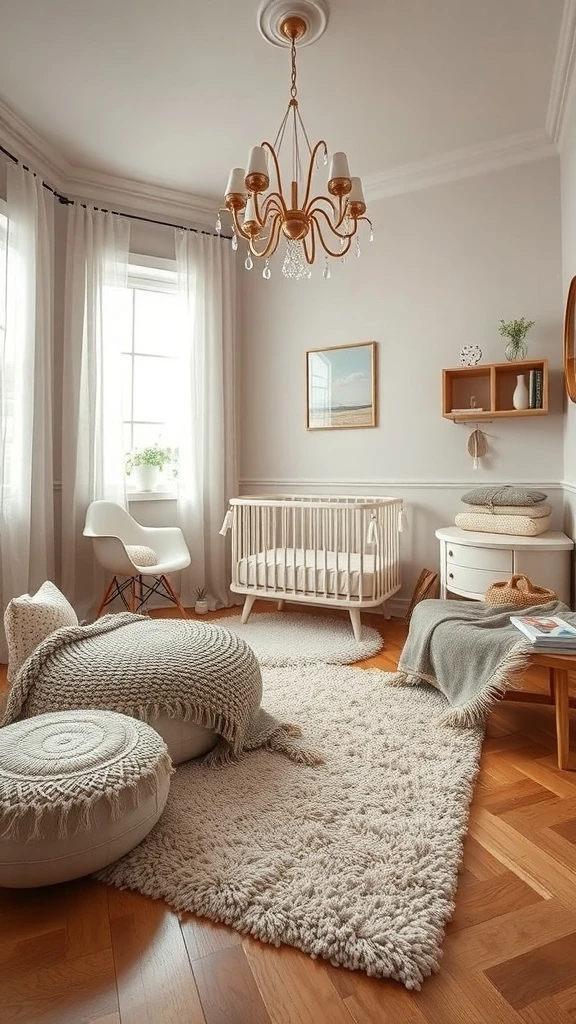
A fluffy area rug on the floor. Plush cushions on the chair. A light airy curtain letting sunshine through while softening the whole room. Every surface you touch feels gentle and warm.
Soft textiles turn a nursery from a room with baby furniture into a space that actually feels nurturing and calm. They are the secret ingredient that makes everything come together.
Lay a thick soft rug in a neutral or pastel tone under the main seating area for warmth and comfort during floor play. Add two or three cushions to your nursing chair in gentle fabrics like cotton or muslin. Hang sheer curtains that filter natural light and create a dreamy atmosphere during nap time. Drape a lightweight blanket over the arm of the chair for late-night feedings. Choose washable fabrics everywhere because tiny nurseries need textiles that are as practical as they are pretty.
Calming Colors That Set the Mood
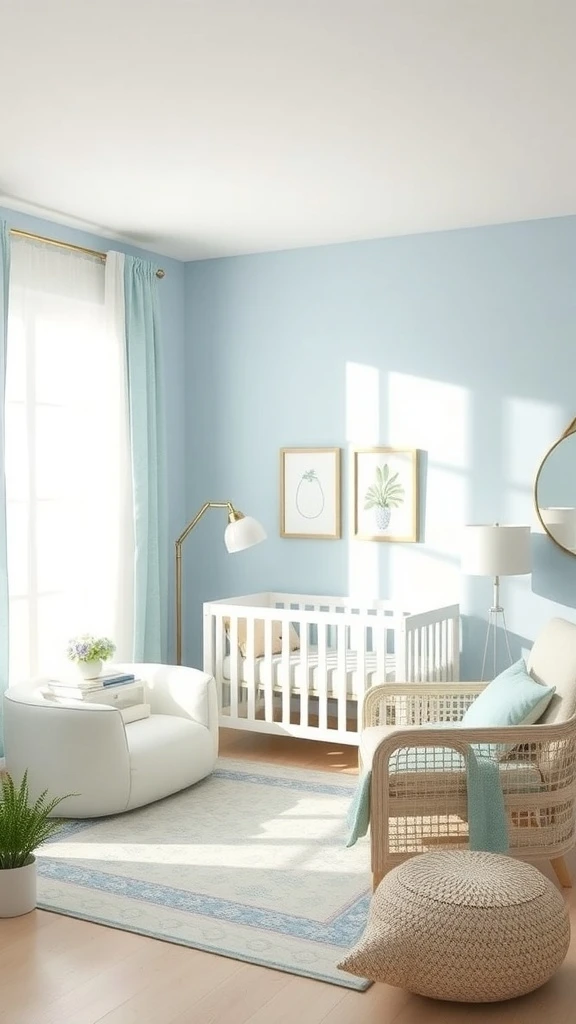
Soft blue walls. White furniture. Light wood floors. Natural light filling the room. The whole nursery feels like a deep breath. Calm and peaceful and exactly right for a baby who needs rest and a parent who needs peace.
A simple soothing palette does so much of the work. It keeps the space feeling open and serene without trying too hard.
Paint the walls in a soft muted tone like pale blue, sage green, lavender, or warm blush. Keep all furniture in white or light natural wood so it blends into the calm backdrop. Add texture through a cozy rug and soft cushions in tones that complement the walls. Let natural light do the heavy lifting during the day with sheer curtains or simple blinds. Place one or two small plants on a shelf for a natural pop of green. This simple palette creates the most peaceful nursery environment for everyone in the room.
Storage Hiding Under the Crib
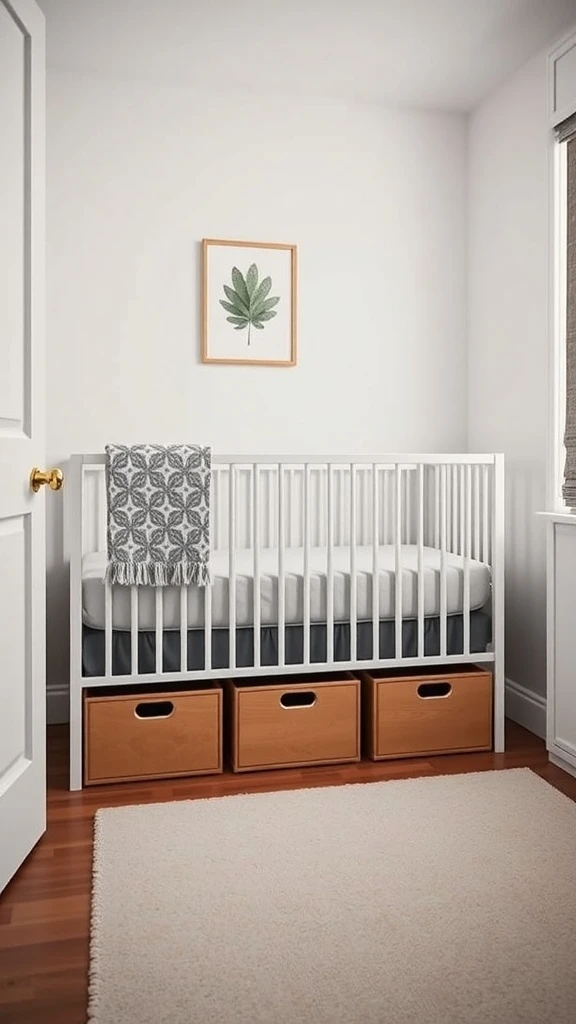
Three wooden bins tucked neatly under the crib holding diapers, blankets, and extra clothes. Out of sight but always within reach. The nursery stays clean and calm because the clutter has a hidden home.
This under-crib space is free storage just waiting to be used. It is one of the smartest hacks for a tiny nursery.
Measure the clearance under your crib and find bins or baskets that slide in and out easily. Assign each one a category like diapers and wipes in one, extra blankets in another, and spare clothes in the third. Choose containers that match the nursery’s color scheme for a polished look. Label them with small tags if it helps you stay organized during busy moments. Swap out the contents as your baby grows so you are only storing what you actually need right now.
Green Plants That Freshen the Room
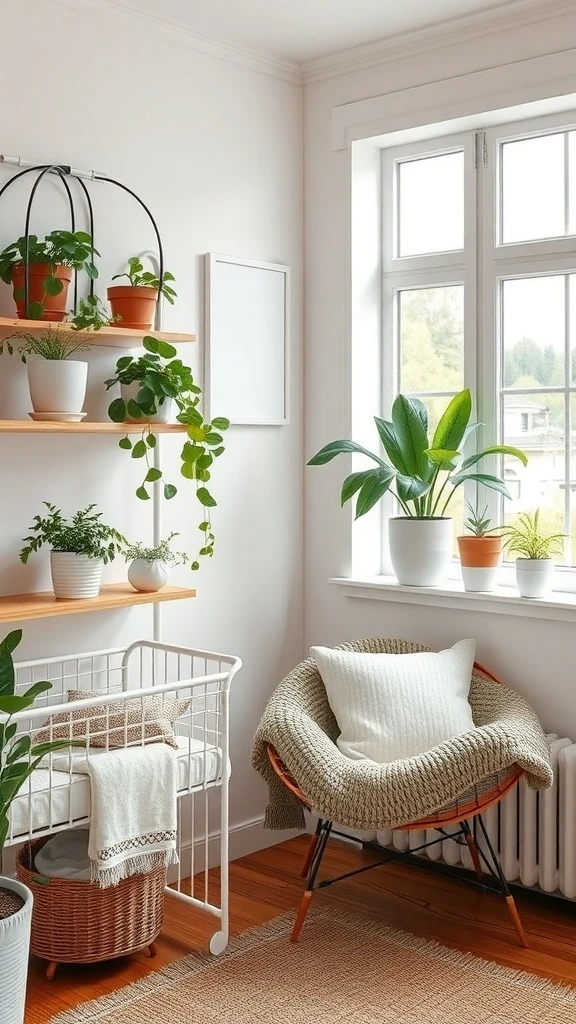
A few plants arranged on a wooden shelf in the corner. A cozy chair with a soft blanket draped over it right beside them. Natural light streaming in making the green glow. The nursery feels fresh and alive and connected to nature.
Plants bring calm to a room in a way that nothing else can. The air feels cleaner and the space feels softer.
Place plants on a high shelf or a windowsill where they are safely out of the baby’s reach. Choose non-toxic varieties like spider plants, Boston ferns, or calatheas that are safe for homes with children. Use simple pots in white, ceramic, or natural woven baskets that match the nursery decor. Keep the total to two or three so the room feels fresh without being overcrowded. Water on a simple schedule and enjoy the natural beauty they bring to your baby’s space every day.
Playful Wall Art That Sparks Wonder
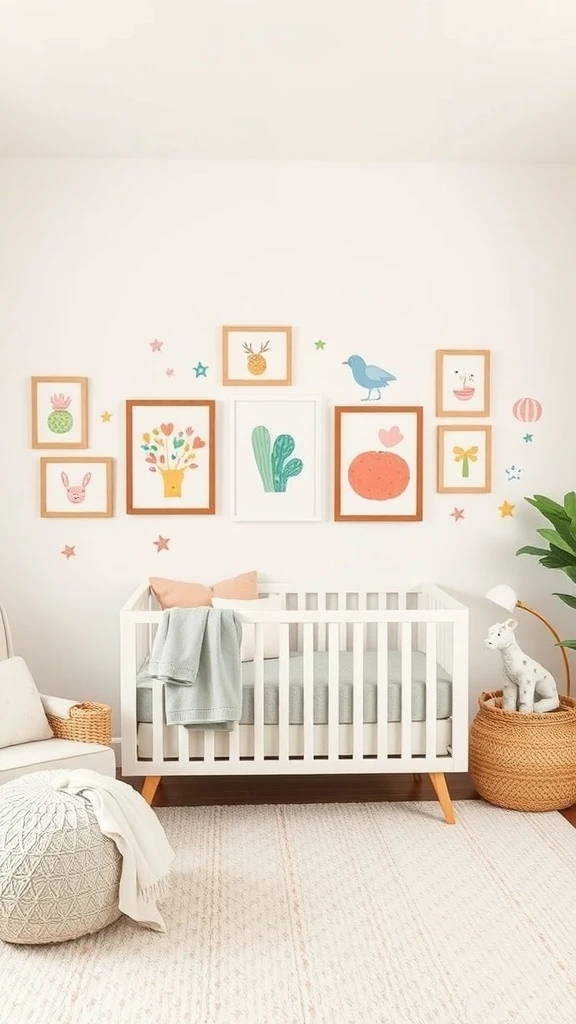
A collection of colorful prints in mismatched frames on the wall above the crib. Flowers, animals, and whimsical shapes. Little star decals scattered around the frames. The whole wall feels like a storybook page come to life.
Your baby gazes up at it from the crib and their eyes light up. It is the kind of art that grows with them and sparks curiosity from day one.
Choose four to six small prints in cheerful colors and playful themes like animals, nature, or alphabet letters. Frame them in a mix of styles and sizes for an eclectic feel. Arrange them in a loose cluster above the crib or the changing area. Add a few removable wall decals like stars or clouds around the frames for extra magic. Keep the frames lightweight and securely mounted for safety. This gallery wall adds personality and visual stimulation without taking up any floor space at all.
A Closet Organized to Perfection
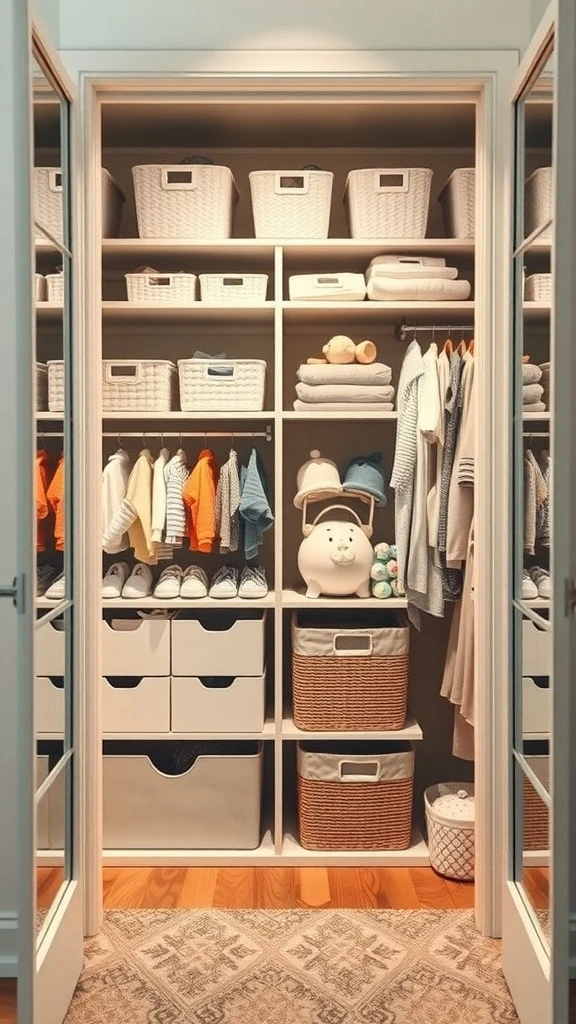
Neat shelves lined with labeled baskets. Tiny outfits hung in a row showing off the cutest clothes. Folded blankets stacked perfectly. Everything visible and easy to grab even when you are holding a baby in one arm.
A well-organized nursery closet saves you time and stress every single day. You know where everything is and getting dressed becomes the easiest part of the morning.
Install a double hanging rod in the closet with the lower rod at baby-clothes height so tiny outfits hang neatly without wasted space above. Add a small shelf unit on one side for baskets holding diapers, socks, and accessories. Use woven or fabric bins with labels so everything has a designated spot. Fold blankets and linens on a higher shelf. Keep a small basket on the floor for laundry. This system keeps the closet organized and the rest of the nursery free from overflow clutter.
Mirrors That Open Up the Room
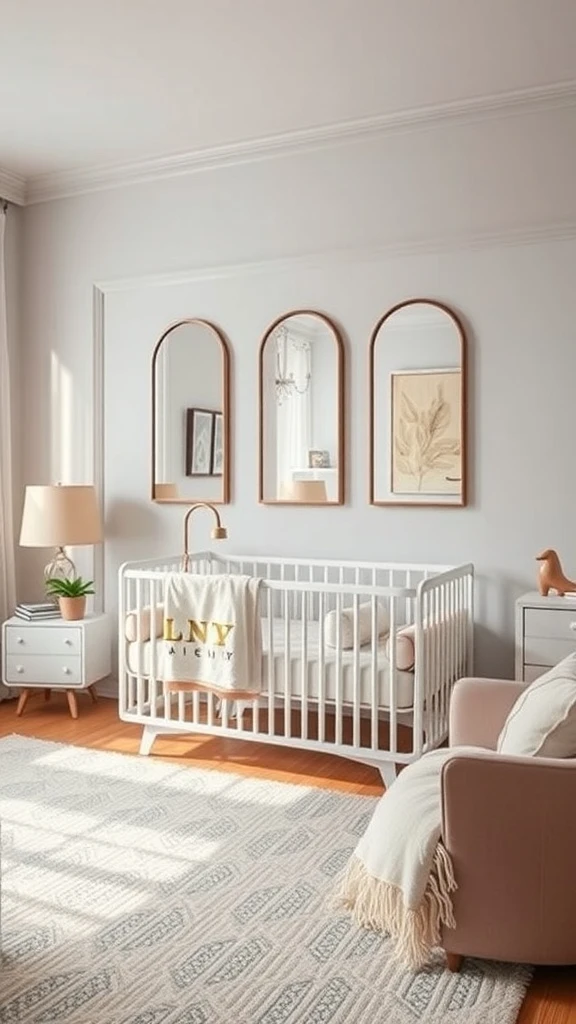
Three rounded mirrors on the wall reflecting light and making the small nursery feel so much more spacious. Soft shapes that match the gentle feel of the room. Light bouncing from the window to the mirrors and back again filling every corner with brightness.
Babies love looking at reflections too. So the mirrors are decorative, functional, and entertaining all at the same time.
Hang two or three small mirrors in soft round or organic shapes on a wall that catches natural light from a window. Position them at slightly different heights for visual interest. Use shatterproof or acrylic mirrors for safety in a nursery. Choose simple frames in natural wood, white, or gold to match your decor. Place them across from the window to maximize reflected light. These mirrors make the nursery feel brighter and bigger while giving your little one something delightful to discover as they grow.
A Name Sign That Makes It Personal
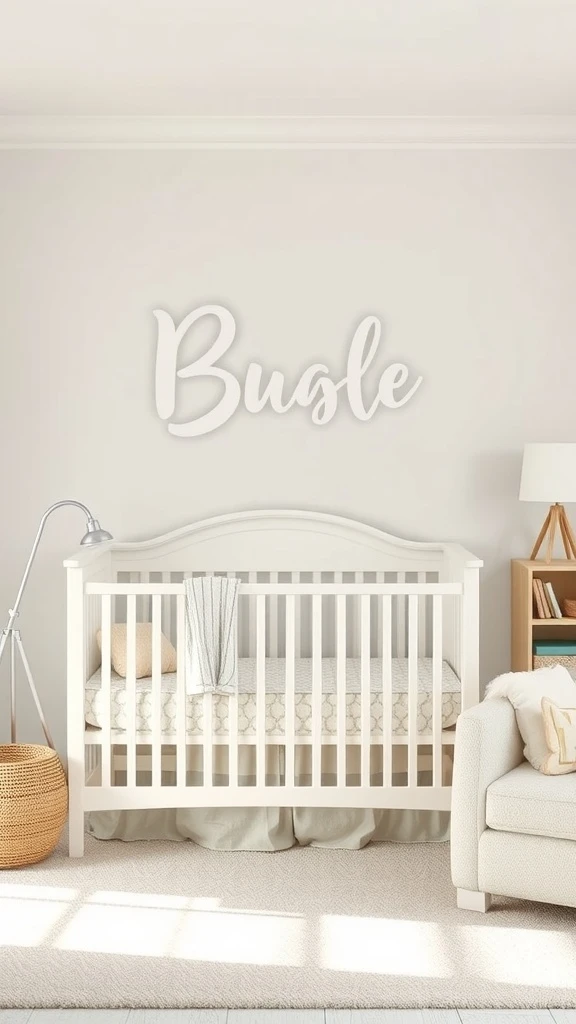
Your baby’s name spelled out in wooden letters above the crib. Soft colors and natural materials surrounding it. A cozy blanket draped over the railing. The nursery immediately feels like it was made just for them.
It is the simplest personalized touch but it makes the biggest emotional impact. This is their room and their name is right there to prove it.
Order or make a name sign in wooden letters, a cut-out script, or a framed print with your baby’s name. Mount it centered above the crib at a height that is visible when you walk into the room. Choose a material and color that matches the nursery palette whether that is natural wood, painted white, or soft gold. Pair it with a couple of small wall elements like a tiny shelf with a figurine or a single framed print beside it. This personal detail gives the nursery its identity and makes it feel truly complete.
A Bold Rug That Defines the Space
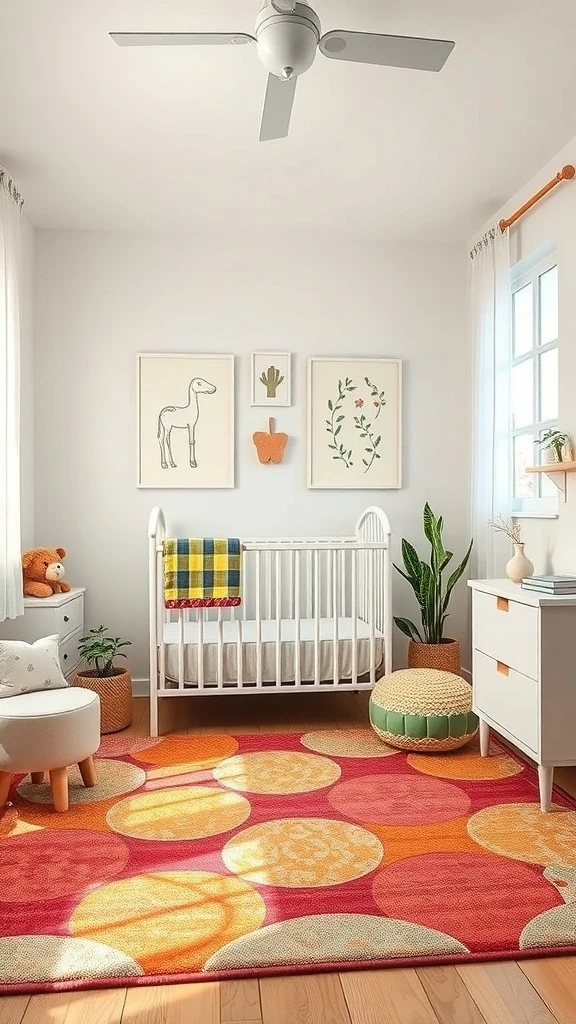
A colorful round rug with playful circles right in the center of the nursery floor. It anchors the crib area and gives the baby a soft warm place to play. Bright colors contrast with neutral walls and suddenly the room has energy and fun.
It is one piece that changes the whole feel of the nursery. Practical for tiny knees and beautiful for your eyes.
Choose a rug large enough to cover the main play area but leave a border of floor visible around the edges. Go with a bold pattern or bright colors that bring joy to the room. Make sure the material is soft, non-toxic, and machine washable because it will see a lot of use. Use a non-slip pad underneath to keep it secure on hard floors. Place the crib nearby so the rug creates a defined zone that feels like the heart of the nursery.
Baby Gear That Looks Like Real Furniture
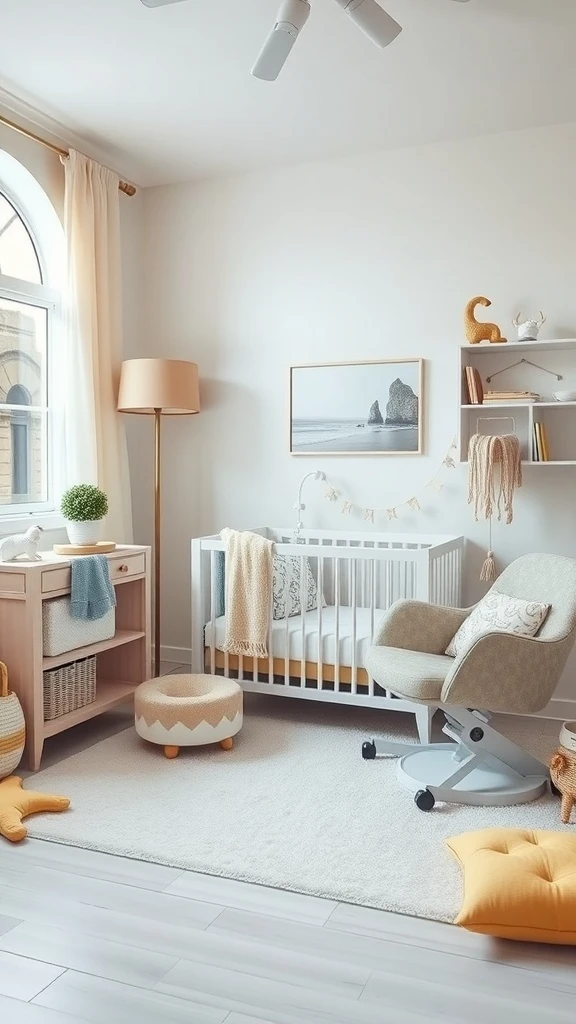
A crib with clean modern lines. A rocking chair that would look just as good in the living room. A changing table that blends right into the decor. Light wood tones and soft fabrics throughout. Everything is baby-functional but none of it screams nursery.
It is a space that feels sophisticated and calm. Designed for a baby but styled for the whole home.
Choose a crib in a simple modern design with clean lines and a neutral finish like white or natural wood. Pick a rocking chair or glider in a fabric and shape that could fit any room in the house. Select a changing table that doubles as a dresser so it stays useful long after the diaper stage. Keep accessories like poufs, cushions, and baskets in coordinating tones. Add one or two decorative items on a shelf to make the room feel styled. Baby gear that looks like real furniture keeps the nursery feeling elevated and intentional.
Adjustable Lighting for Day and Night
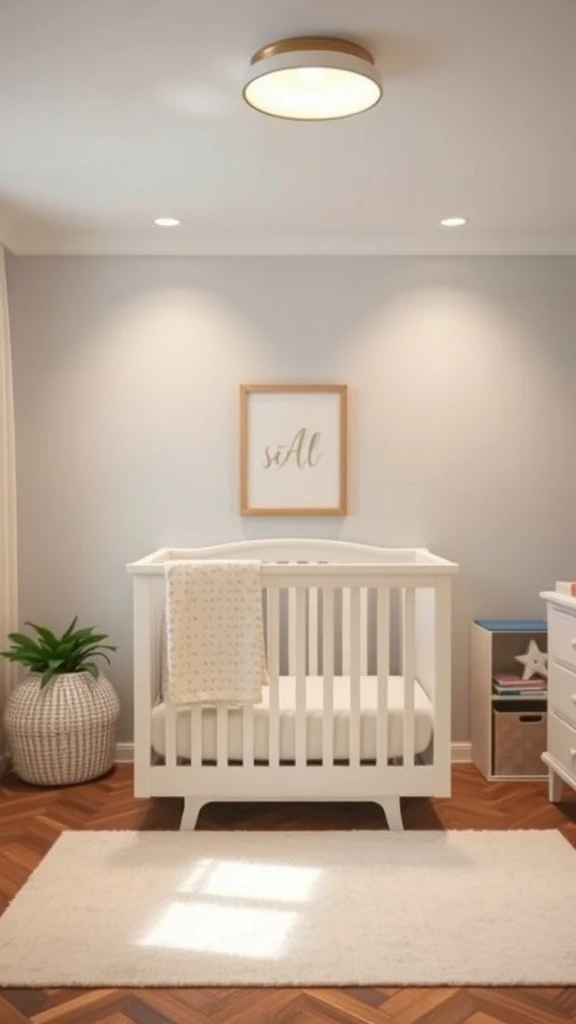
Bright light for playtime during the day. A soft dim glow for bedtime routines at night. Recessed fixtures that let you control exactly how much light fills the room at any given moment.
The nursery shifts from energized to peaceful with just a turn of the dimmer. That flexibility makes every routine easier for both you and your baby.
Install a main ceiling fixture with a dimmer switch so you can go from full brightness to near darkness in seconds. Add a small nightlight or a warm-toned lamp near the nursing chair for middle-of-the-night feedings. Use warm white bulbs in every fixture to keep the mood soft and consistent. Avoid harsh cool-toned lighting that can overstimulate before bedtime. Consider a smart bulb in the main fixture that you can control from your phone without getting up from the chair. This layered lighting setup supports every moment of your nursery routine.
A Mobile That Catches Their Eyes
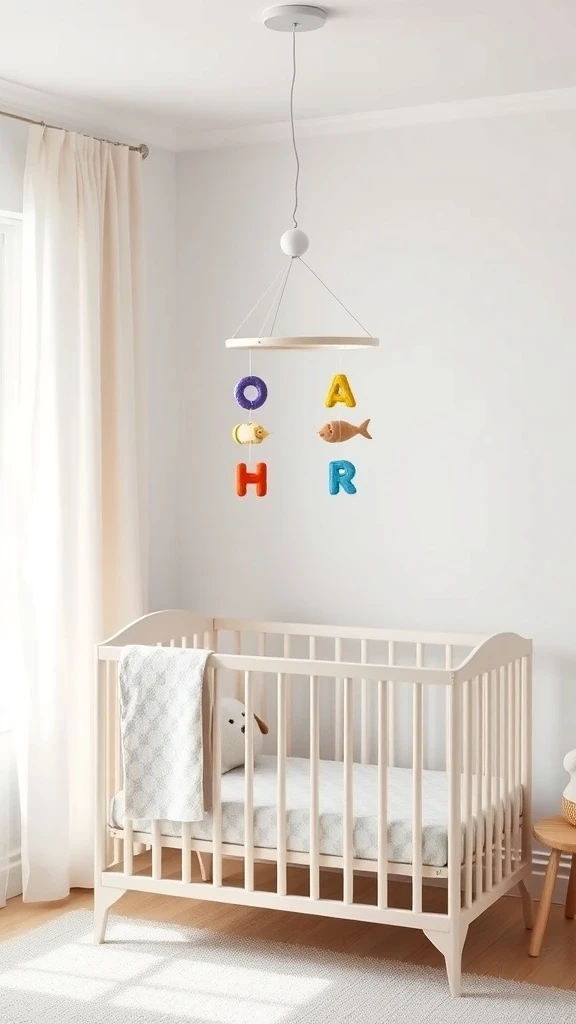
A simple mobile hanging above the crib with gentle shapes swaying in the air. Soft colors moving slowly catching the light. Your baby’s eyes following every movement with total fascination.
It is their first piece of art. Something beautiful to look at while they drift off to sleep or wake up smiling in the morning.
Choose a mobile with soft colors and simple shapes that match the nursery theme. Hang it centered above the crib at a height where the baby can see it clearly but cannot reach it. Look for one with gentle movement that sways with the air rather than a motorized version for a calmer effect. Make sure it is securely attached to the ceiling or a crib arm that can handle the weight. As the baby grows and starts reaching up, move the mobile higher or replace it with a ceiling decoration to maintain the visual interest safely.
A Play Area That Fits Right In
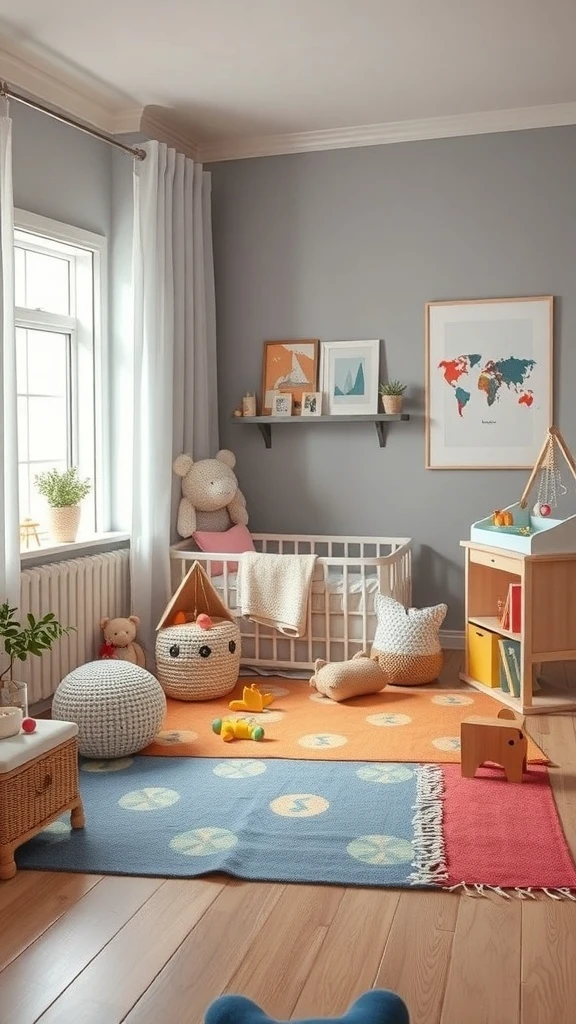
A soft rug on the floor with a couple of plush toys. A low shelf with books and blocks within reach. Bright colors and gentle textures everywhere the baby looks. The play area does not need its own room. It fits beautifully right inside the nursery.
It encourages exploration and creativity from the very beginning. And when playtime is over everything tucks neatly back into place.
Dedicate one section of the nursery floor as the play zone with a soft washable rug as the base. Place a low open shelf nearby with a few toys and books rotated weekly to keep things fresh. Use a fabric basket for quick toy cleanup at the end of the day. Keep the area near natural light if possible so the space feels bright and inviting. Add a couple of floor cushions for you to sit with the baby during play. This contained play area stays organized and keeps the rest of the nursery looking neat.
Family Photos That Fill the Room with Love
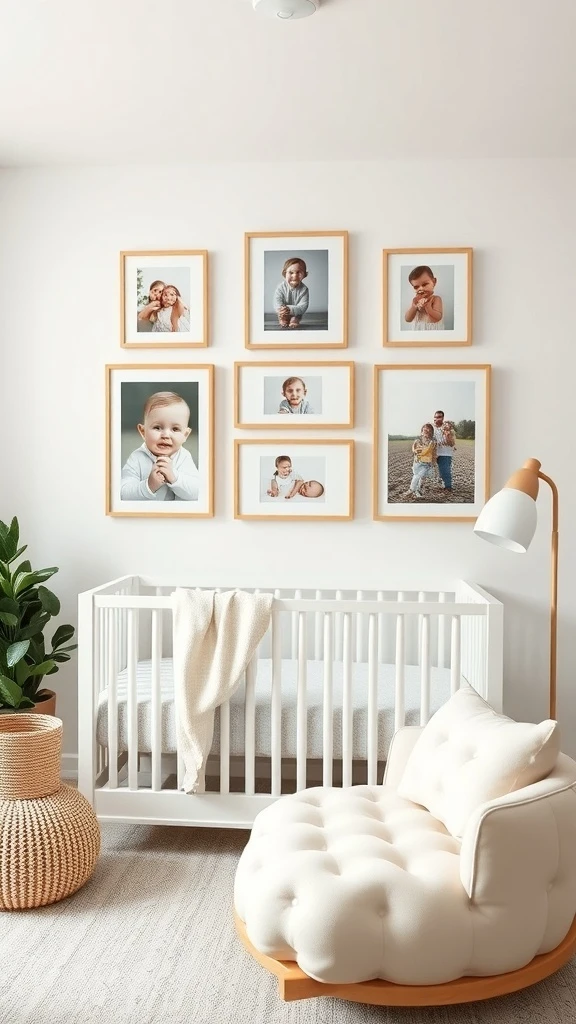
A small gallery of framed family photos on the nursery wall. Smiling faces. Happy moments. The baby surrounded by the people who love them most even when those people are not in the room.
It adds warmth that no amount of decorating can match. The nursery feels full of love before anyone even walks through the door.
Print four or five of your favorite family photos in small to medium sizes. Frame them in soft coordinating tones like white, natural wood, or light gray. Arrange them in a loose grouping on one wall near the crib or the nursing chair. Mix a couple of candid shots with one or two posed ones for a natural feel. Hang them at a height you can see from the chair so they bring comfort during late-night feedings. This personal gallery makes the nursery feel warm and connected in the most meaningful way.
A Layout That Makes Daily Life Easy
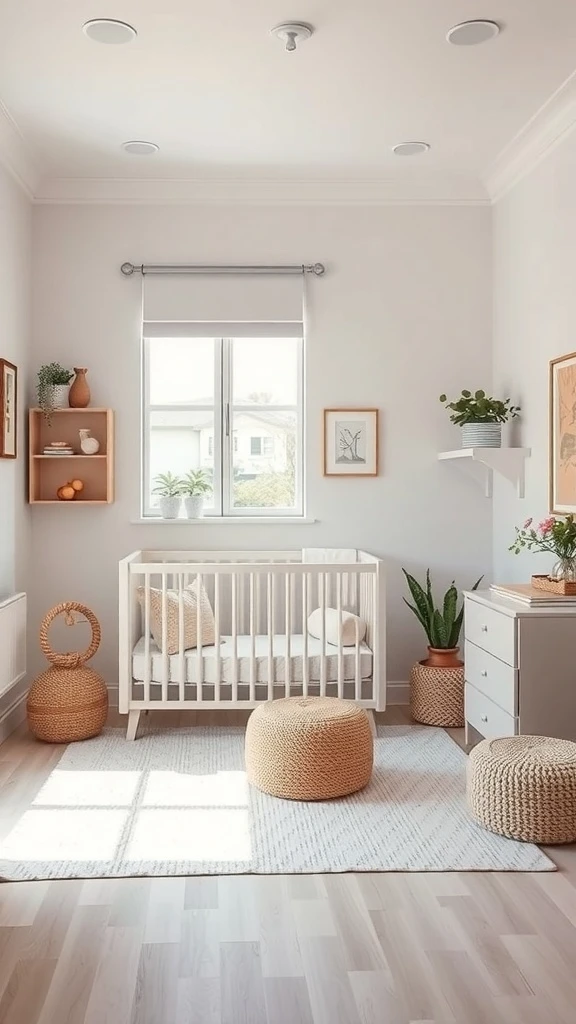
The crib near the window for natural light. The changing area right beside it for quick access. A nursing chair steps away. Shelves and baskets holding everything organized. Open floor space in the middle for movement and play.
Every zone connects to the next one naturally. You never have to cross the room with a fussy baby in your arms because everything is right where you need it.
Place the crib against the wall nearest the window for the best natural light during daytime naps. Position the changing table or dresser right beside it so you can move from crib to changing without any distance. Set the nursing chair in the corner closest to both for easy transitions during nighttime routines. Keep a small shelf or cart between the chair and the crib stocked with essentials like burp cloths, pacifiers, and a water bottle for yourself. Leave the center of the room open for a play rug. This flow-based layout saves steps and energy every single day.
A Compact Changing Station That Has It All
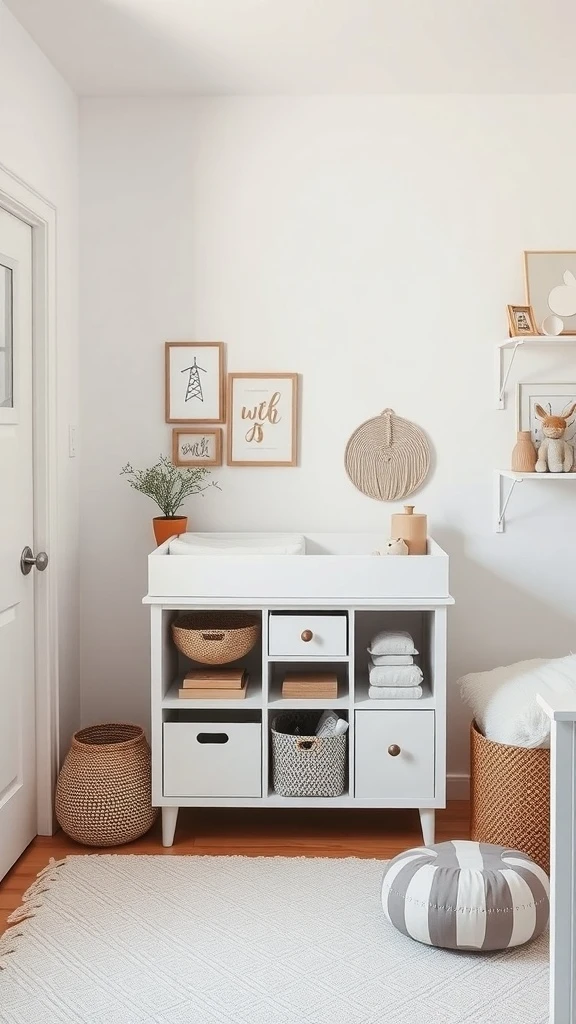
A clean white changing table with baskets and drawers holding diapers, wipes, and creams all within arm’s reach. Framed art on the wall above adding charm. A soft rug underneath. Everything you need for a quick change without ever leaving the station.
It is compact and organized and looks beautiful. No one would guess how much it holds just by looking at it.
Choose a changing table with built-in shelves and at least one or two drawers for maximum hidden storage. Assign each section a purpose like diapers on the left, wipes and creams in the middle, and spare clothes on the right. Use matching baskets for items you want accessible but visually neat. Hang one or two small framed prints above the station to make the area feel styled. Place a soft rug underneath for comfort and warmth. This all-in-one station keeps diaper changes quick and stress-free.
A Theme That Ties the Whole Room Together
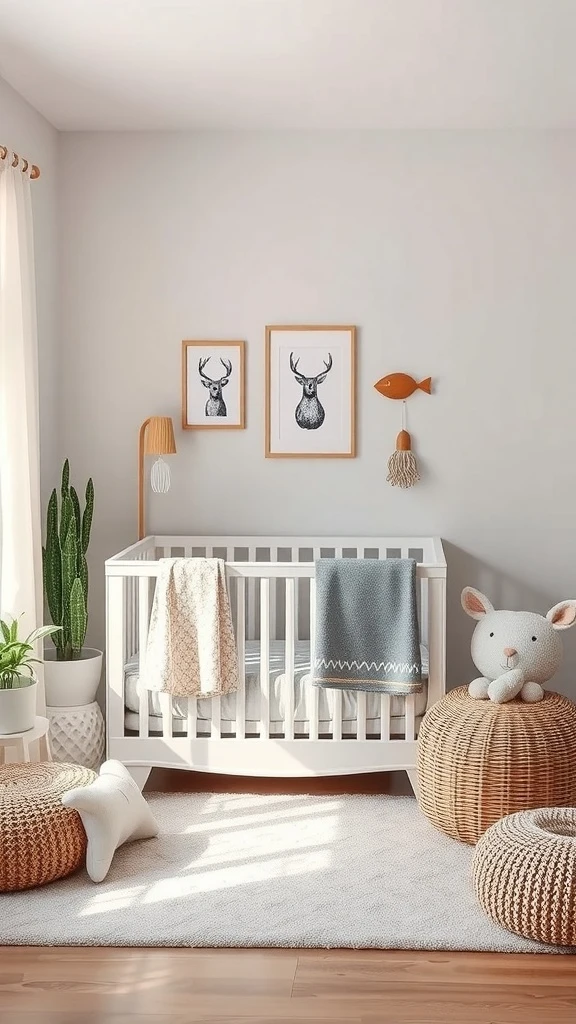
Animal-themed artwork on the wall. A potted plant adding a touch of nature. Woven poufs and soft rugs in earthy tones. A light airy color palette that makes the whole room feel like a gentle adventure. Every element connects to the theme without being over the top.
The nursery feels curated and thoughtful. Like a story that unfolds as you look around the room.
Pick a soft theme like nature, woodland animals, the sky, or botanicals and carry it through a few key pieces rather than covering every surface. Choose two or three themed prints for the wall and a coordinating mobile or stuffed animal. Keep furniture and paint colors neutral so the themed accents pop without overwhelming the space. Add natural textures through a woven basket, a jute rug, or a linen cushion to ground the theme in warmth. A themed nursery done with a light touch feels magical without ever feeling like too much.
by Clara Scott | Feb 21, 2026 | Uncategorized
A narrow staircase does not have to be boring or basic. It can actually become one of the most interesting design features in your home. With the right materials, lighting, and personal touches, even the tightest staircase becomes something people notice and remember. Here are some creative ideas to help you make your narrow staircase both beautiful and functional.
Drawers Built Right Into the Steps
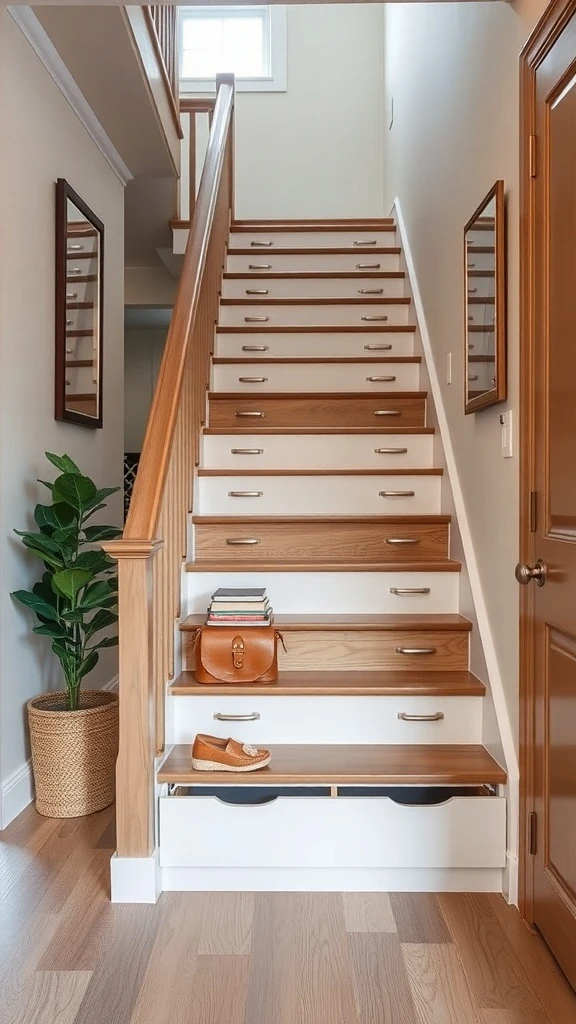
Imagine pulling open a drawer built directly into your stair step. Shoes, books, bags, all tucked away out of sight. The staircase looks clean and minimal from the outside but it is secretly hiding storage in every single step.
Light colors and sleek hardware keep the whole thing looking modern. It is one of the smartest uses of space in a small home.
Work with a carpenter or look for modular stair systems that include pull-out drawers built into the risers. Assign each drawer a category like shoes on the bottom steps and books or accessories higher up. Choose handles that sit flush with the surface so nothing catches your foot as you walk. Keep the exterior finish matching the rest of your staircase for a seamless look. This hidden storage eliminates the need for extra furniture and keeps your home clutter-free.
A Vintage Staircase with Timeless Charm
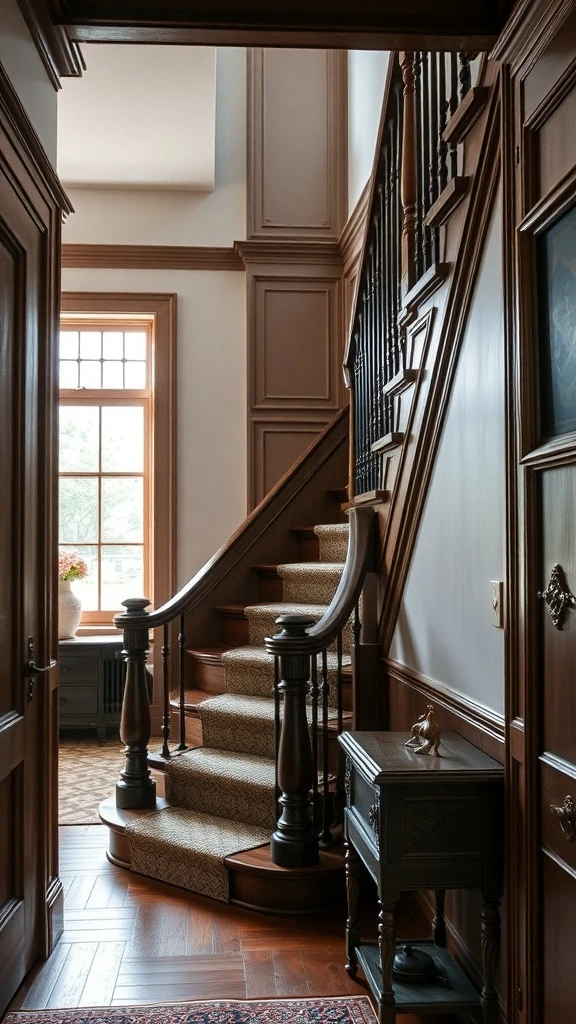
Rich warm wood spiraling upward. Elegant balusters with classic detailing. A plush runner going up the center adding comfort and luxury. Natural light pouring in through a tall window catching every beautiful grain in the wood.
This is a staircase that feels like it has been here for a hundred years. It tells a story every time you climb it.
If you have existing wooden stairs, restore the original wood finish by sanding and sealing with a warm-toned stain. Add a runner in a classic pattern like a stripe or a subtle geometric for comfort and style. Choose turned or carved balusters that reflect traditional craftsmanship. Let natural light from a nearby window highlight the wood tones. Wall paneling or wainscoting along the stairwell adds another layer of vintage character that makes the space feel rich and refined.
Floating Steps That Feel Like Air
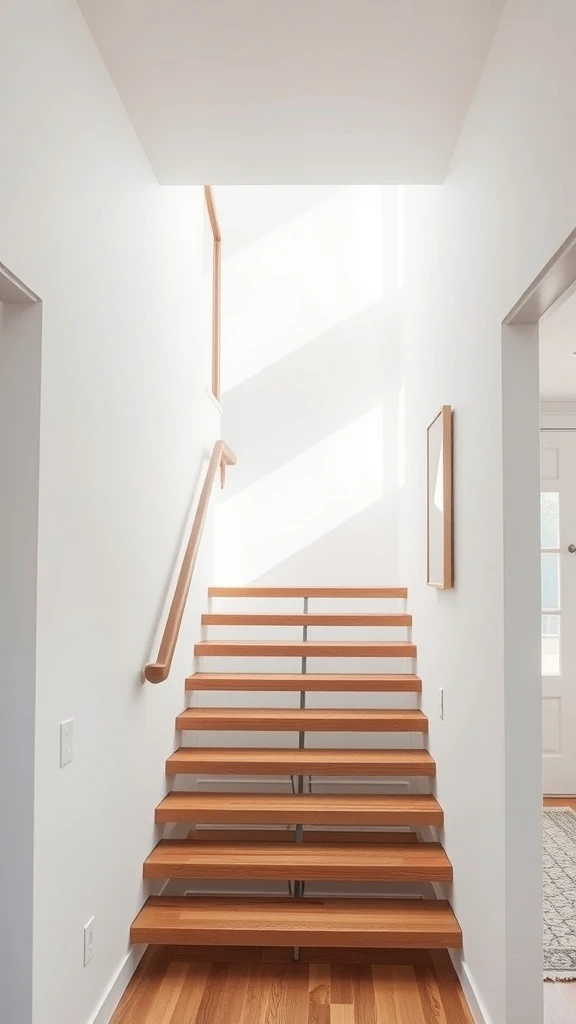
Wooden treads attached to the wall with no visible supports beneath them. Each step looks like it is hovering in midair. Light passes through the gaps between steps and fills the whole stairwell.
The effect is stunning. The staircase feels weightless and modern. A narrow space suddenly looks wide open because nothing is blocking the view.
Floating treads are mounted using hidden steel brackets embedded in the wall so the structure is completely concealed. Choose a warm hardwood like oak or walnut for a natural feel against a light-colored wall. Make sure the wall is structurally reinforced to handle the load. Add a slim glass railing or a thin cable system for safety without blocking the open look. This design maximizes both light and visual space making even the narrowest staircase feel airy and expansive.
A Spiral Staircase That Saves Every Inch
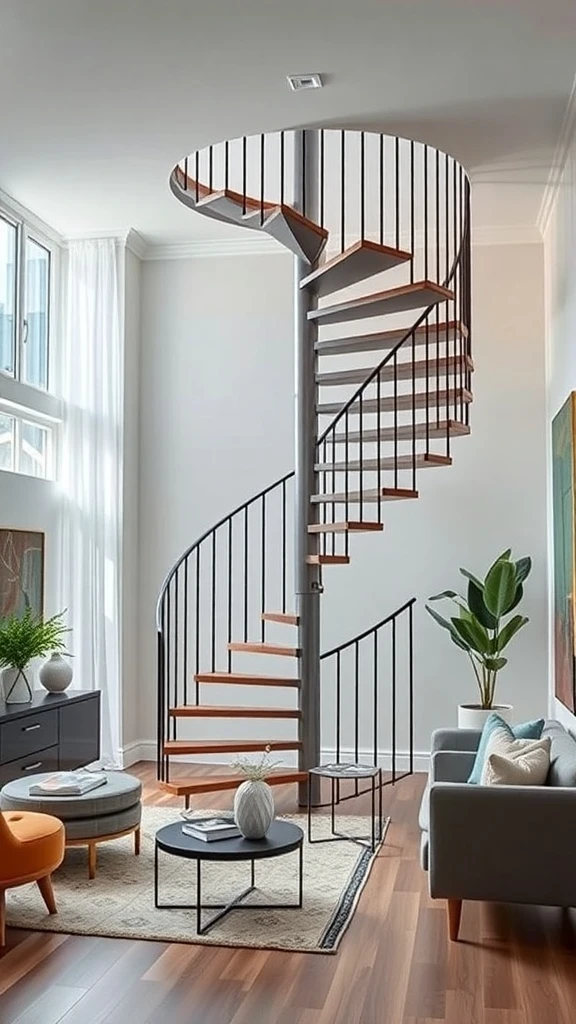
A metal and wood spiral staircase winding upward in a tight corner. It takes up almost no floor space but looks like a piece of sculpture. Light flows right through the open design making the whole room feel bigger.
It draws the eye upward and adds instant character to any room. Functional and gorgeous at the same time.
Choose a spiral staircase kit in metal with wooden treads for that perfect mix of modern and warm. Position it in a corner where it will not interrupt the main floor layout. Make sure the diameter fits your space while still meeting building codes for comfortable stepping width. Add a slim metal railing that follows the curve for safety without visual bulk. This compact vertical design connects your levels while barely touching your usable floor area.
LED Lights That Guide the Way
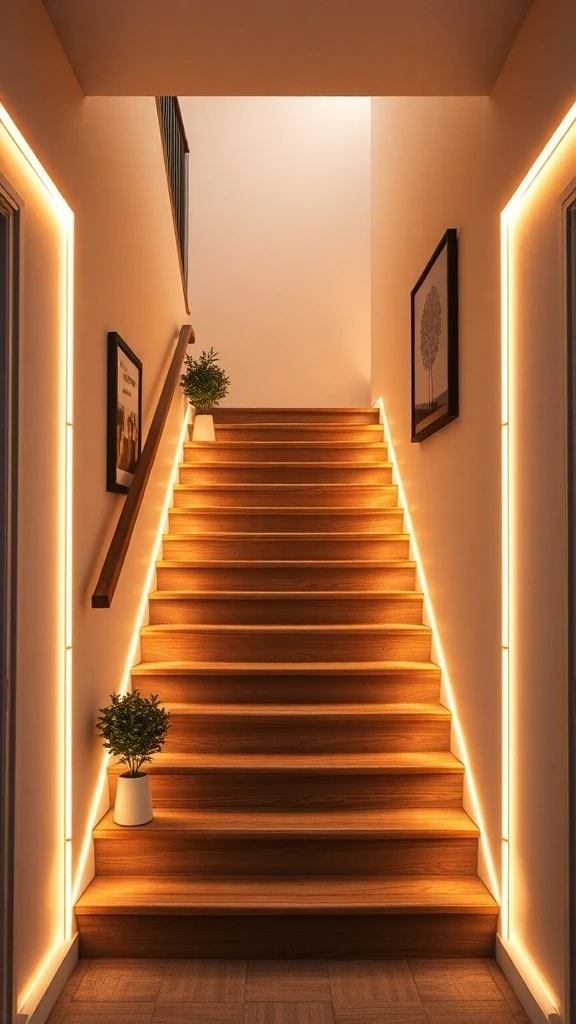
Warm LED strips running along the edges of each step. The staircase glows softly in the evening like a pathway in a boutique hotel. Every step is clearly visible and the whole space feels cozy and modern.
A few plants along the sides catching the light add freshness. It is a simple upgrade that completely transforms how the staircase looks and feels.
Install LED strip lights along the underside of each step’s nose or along the wall where the step meets it. Choose warm white for a cozy glow or go with a tunable smart strip you can adjust by mood. Use a motion sensor so the lights turn on when someone approaches the stairs at night. Add a small potted plant on one or two of the wider landings to pick up the warm light. This lighting upgrade makes the staircase safer, more inviting, and infinitely more stylish.
Warm Wood Steps with Sleek Metal Rails
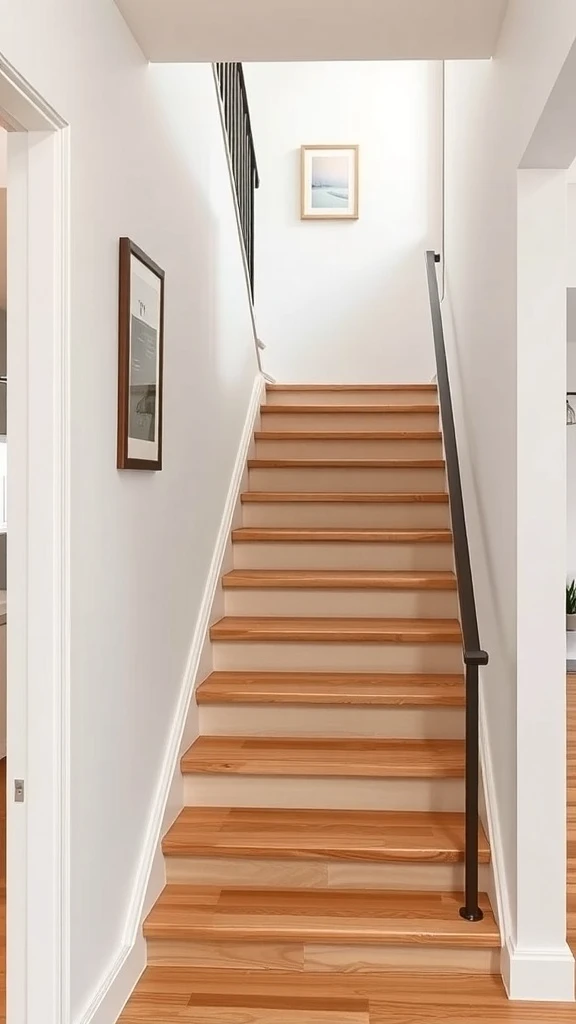
Smooth wooden steps in a rich natural tone paired with clean black metal railings. The contrast is striking. The warmth of the wood against the strength of the metal creates this beautiful balance between cozy and industrial.
The design is simple but it makes a statement. It works in modern homes and traditional ones equally well.
Choose a hardwood like oak or ash for the treads and have them sanded smooth with a matte or satin finish. Pair with a thin metal railing in matte black or brushed steel for a clean contemporary contrast. Keep the railing design simple with straight vertical bars or a minimalist horizontal cable system. Match the metal finish to other hardware in your home like door handles or light fixtures for a cohesive look. This pairing is durable, easy to maintain, and timelessly stylish.
Glass and Steel for a Modern Edge
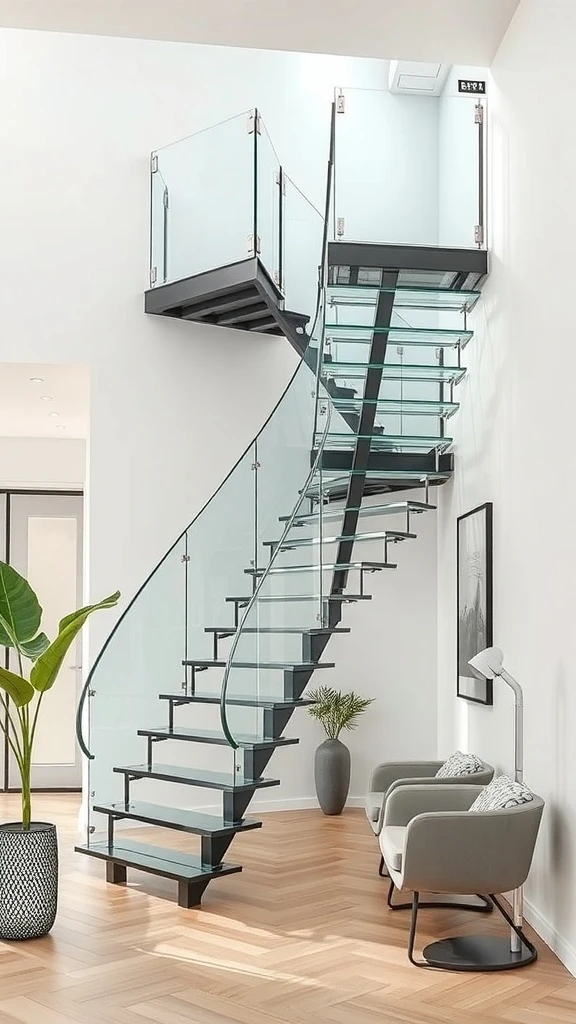
A spiral staircase with glass steps and a steel frame. Light passes through every surface. The staircase almost disappears into the room because nothing about it is heavy or opaque.
A glass railing provides safety without blocking any views. Plants nearby add softness to the hard modern materials. It is bold and elegant and completely open.
Work with a specialist fabricator who can build tempered glass treads rated for residential weight loads. Use a brushed or powder-coated steel frame for durability and a refined finish. Install a glass panel railing along the open side for unobstructed sightlines. Place a couple of green plants near the base to soften the industrial feel with natural texture. This combination is ideal for narrow spaces because the transparency makes the staircase visually weightless.
A Curved Staircase That Flows Beautifully
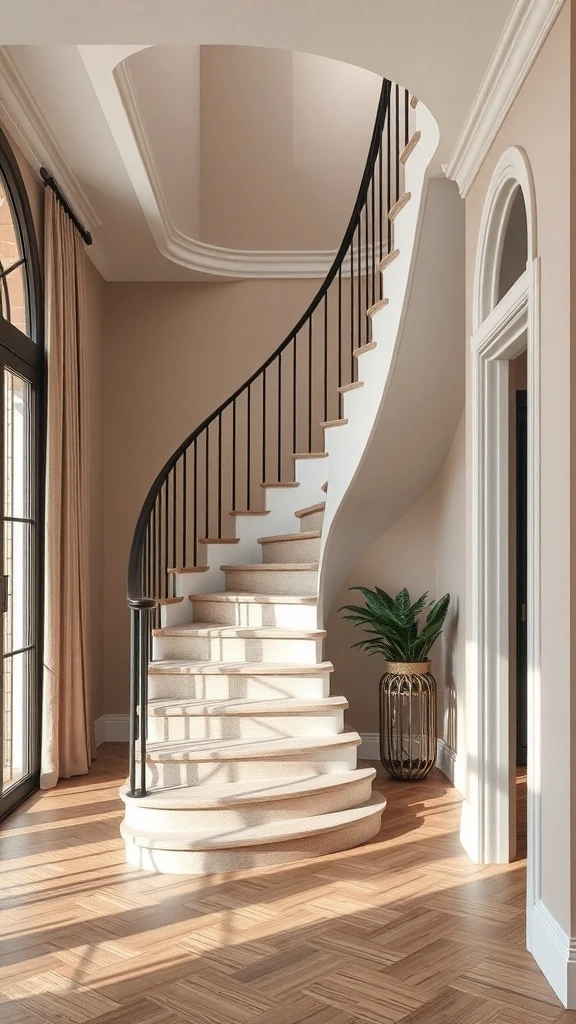
A gently curving staircase with smooth steps and a soft elegant railing. Sunlight pouring through tall windows and casting shadows that follow the curve. A potted plant on the landing adding a touch of life.
The whole design feels graceful. Like the staircase was not built but sculpted. It turns a narrow passage into the most beautiful part of the entryway.
If your space allows even a slight curve, work with a stair builder to design sweeping steps that follow the wall naturally. Choose a light-colored plaster or paint for the walls to reflect maximum light along the curve. Add a smooth wooden handrail that follows the shape without sharp angles. Place a tall window or a skylight at the top to flood the stairwell with natural light. One potted plant on the landing or at the base softens the architecture and adds warmth.
Bold Color on Every Step
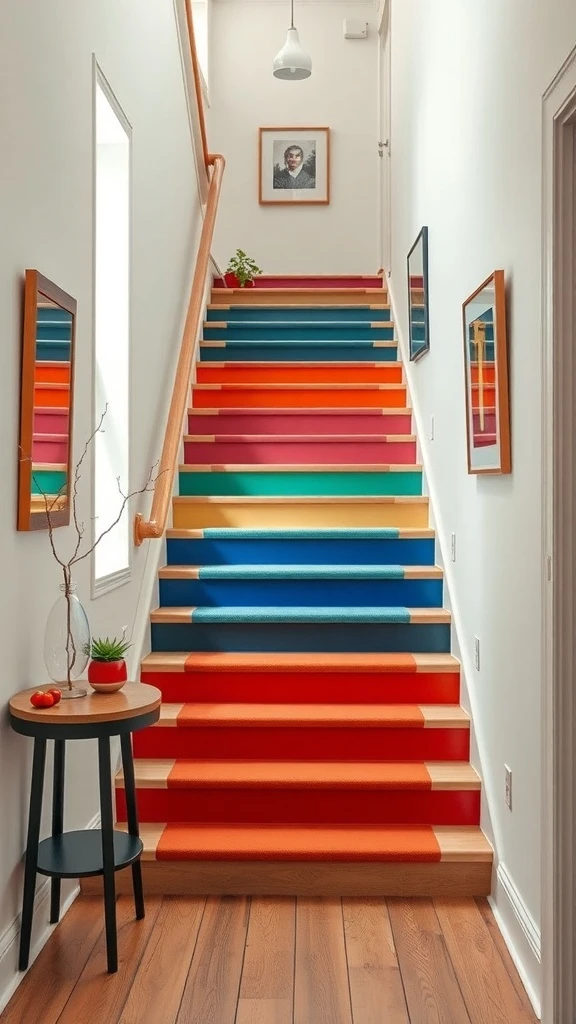
Red, blue, orange, and yellow stripes painted across the stair risers. Each step is a different color. The whole staircase pops with energy and personality.
It is playful and unexpected. A narrow staircase that might have been forgettable suddenly becomes the most talked-about feature in the house.
Choose three to five bold colors that work together and paint the vertical riser of each step in alternating shades. Keep the treads themselves in a neutral tone like natural wood or white so the colors pop without being overwhelming. Use high-quality floor paint or porch and deck enamel for durability. Add a colorful piece of art on the stairwell wall to carry the energy upward. This is a weekend project that costs almost nothing but gives your narrow staircase a personality that guests never forget.
Shelves Along the Stairwell Wall
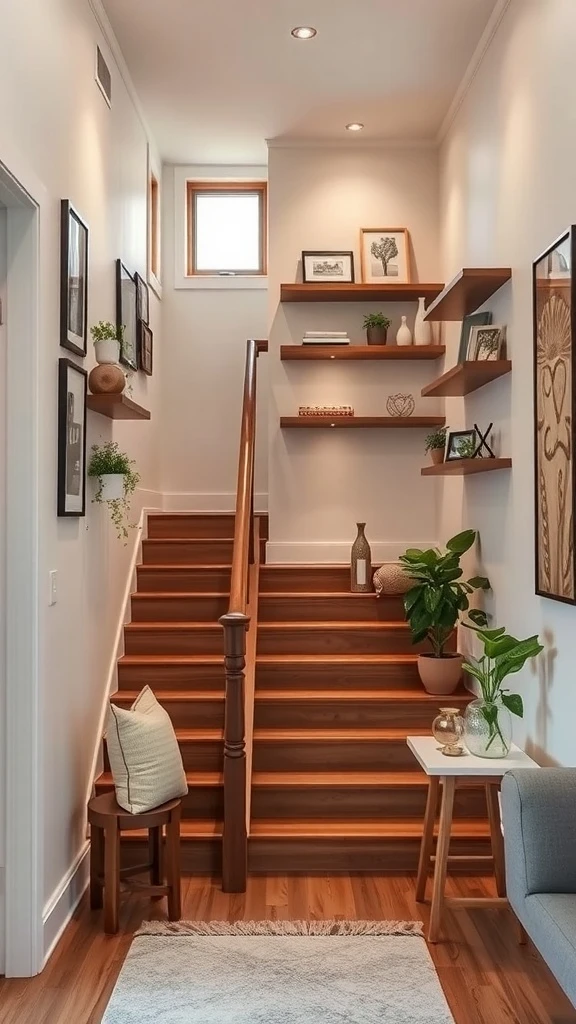
Floating shelves climbing the wall right alongside the stairs. Plants, books, small framed photos, and a candle at different heights. Soft lighting above highlighting each shelf. The staircase wall becomes a mini gallery that you enjoy every time you walk up or down.
It is functional and beautiful and turns wasted wall space into the most interesting part of the house.
Install slim floating shelves at staggered heights following the incline of the staircase. Place items that vary in height and texture on each shelf like a small plant, a framed photo, and a book standing upright. Use recessed spotlights or small puck lights above each shelf to highlight the display. Keep the shelf color matching the wall for a seamless built-in look. Limit each shelf to two or three items so the display stays curated and never feels crowded.
An L-Shaped Design That Fits Tight Corners
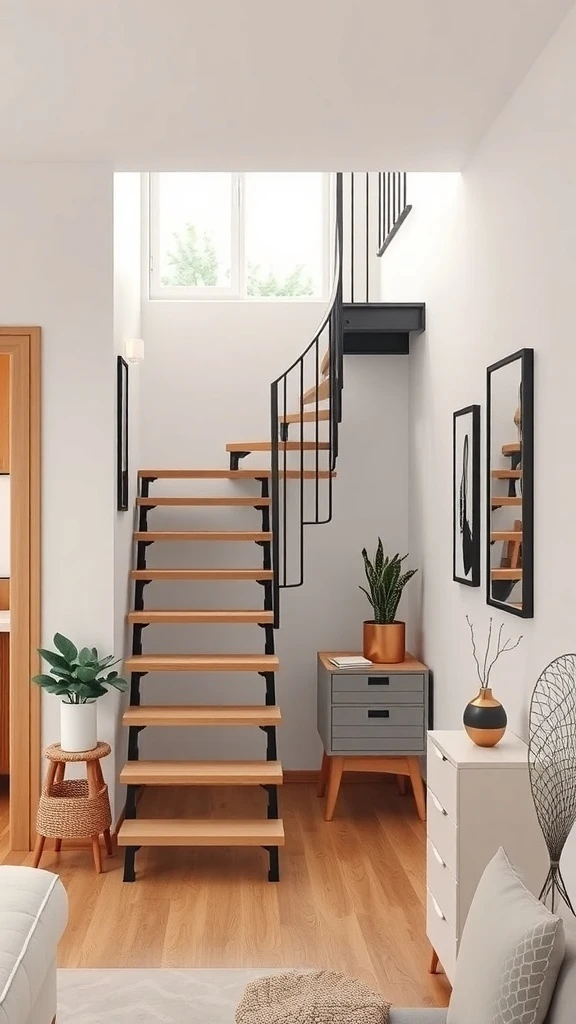
An L-shaped staircase turning neatly at a landing and tucking into the corner of a room. Wooden steps with a slim black railing. A small plant and a side table on the landing adding a touch of style.
It fits where a straight staircase would not. The turn creates a landing that doubles as a tiny display area. Compact and clever.
Measure your corner carefully and work with a builder to design an L-shape that uses a landing or winder steps at the turn. Choose warm-toned wood treads with a slim metal railing in matte black for contrast. Use the landing as a small styled moment with a plant or a decorative object. Keep the walls light to maintain an open feel around the turn. An L-shaped staircase fits naturally into corners and leaves the center of the room completely open.
A Decorative Railing That Steals the Show
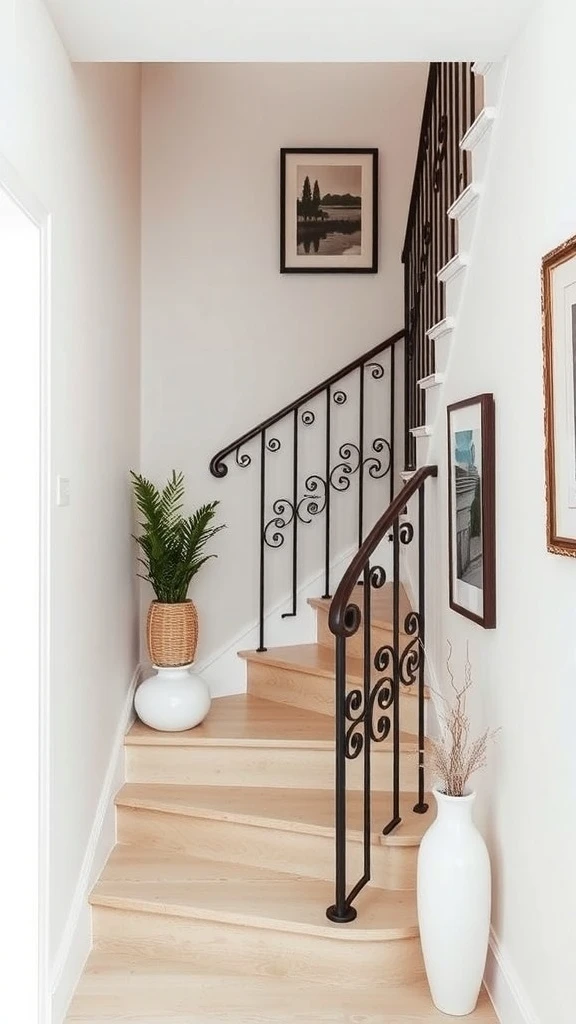
A black metal railing with elegant curves and scroll details running alongside light wooden steps. A potted plant on the landing. Framed artwork on the walls. The railing is not just a safety feature. It is the design centerpiece of the entire staircase.
It adds character and charm to a narrow space without taking up any extra room.
Choose a metal railing with a design that reflects your home’s style whether that is classic scrollwork, geometric patterns, or simple clean curves. Finish it in matte black or dark bronze for a timeless look against light wood steps. Add a potted plant on the landing and one or two framed pieces on the stairwell wall to build on the railing’s personality. Keep the steps light and simple so the railing stays the star. A decorative railing transforms a basic staircase into a stunning architectural feature.
Soft Glow Beneath Every Step
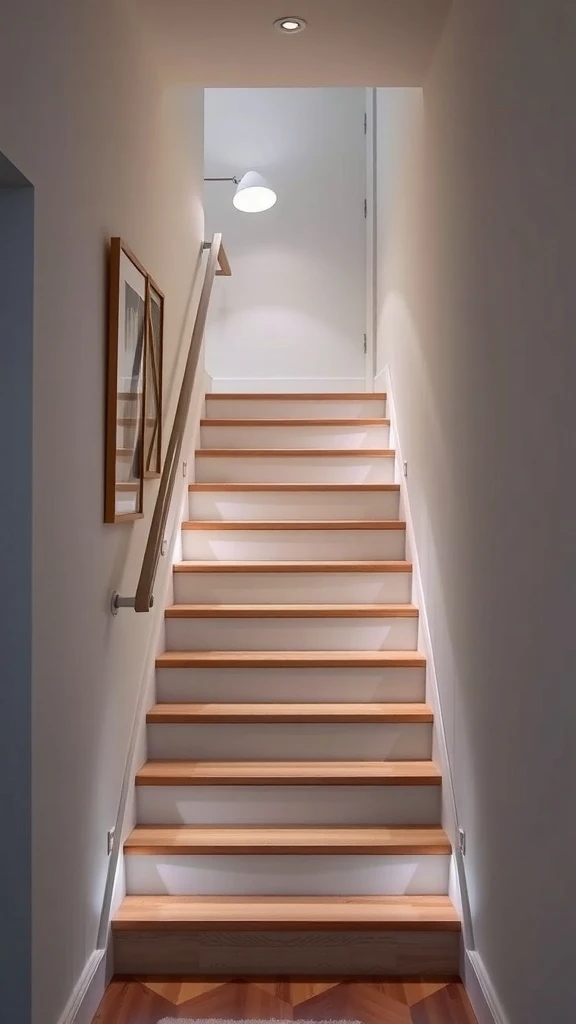
Warm light glowing from underneath each step creating a soft halo effect on the wall and floor. The staircase looks like it is floating in light. Wood tones catch the glow and the whole stairwell feels warm and inviting even in the darkest hours.
It is practical for nighttime safety and absolutely gorgeous as a design feature.
Install recessed LED strips under the lip of each tread angled downward toward the wall or floor. Choose a warm white color temperature around 2700K for that cozy golden glow. Wire them to a dimmer switch so you can control the intensity from bright for evening use to barely-there for nighttime navigation. Pair with warm wood treads that reflect the light beautifully. This under-step lighting creates a dramatic effect that makes your narrow staircase feel like a luxury hotel feature.
Clean Concrete for a Minimalist Look
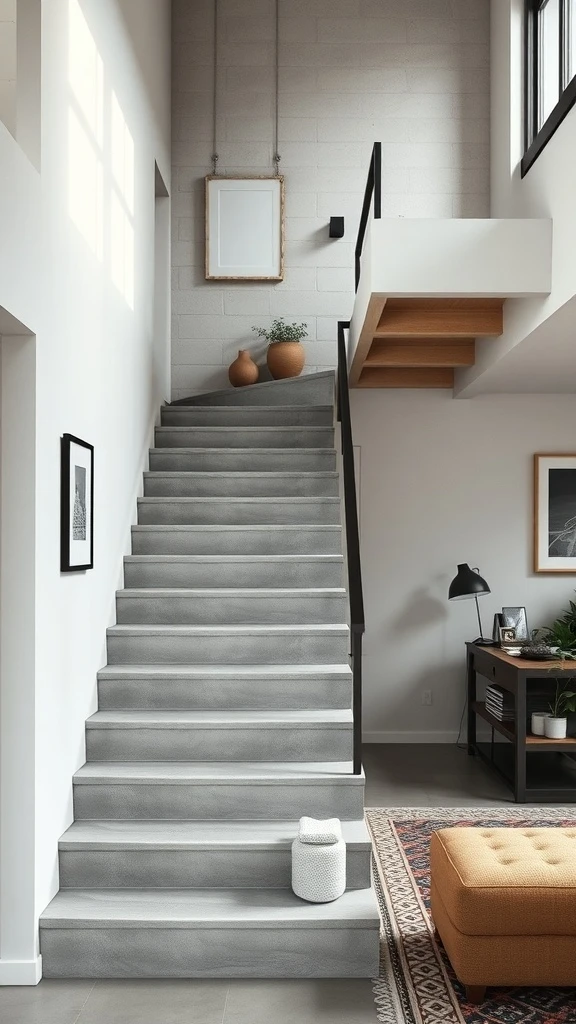
Smooth gray concrete steps with no fuss and no extra detail. Natural light from above hitting the surface and showing off the subtle texture. A couple of small plants and a storage container on the landing adding just enough warmth.
It is bold and industrial but somehow still feels calm. The simplicity is the whole point and it works beautifully in modern homes.
Opt for poured or precast concrete stairs with a smooth sealed finish for a clean contemporary look. Keep the walls white or very light to contrast with the gray and prevent the space from feeling heavy. Add one or two small plants in simple pots on the landing for softness. Use wooden accents like a timber handrail or a small wooden shelf to break up the concrete with warmth. This minimalist approach works best when everything is intentionally simple so let the material and the light do the talking.
An Art Gallery Going Up the Stairs
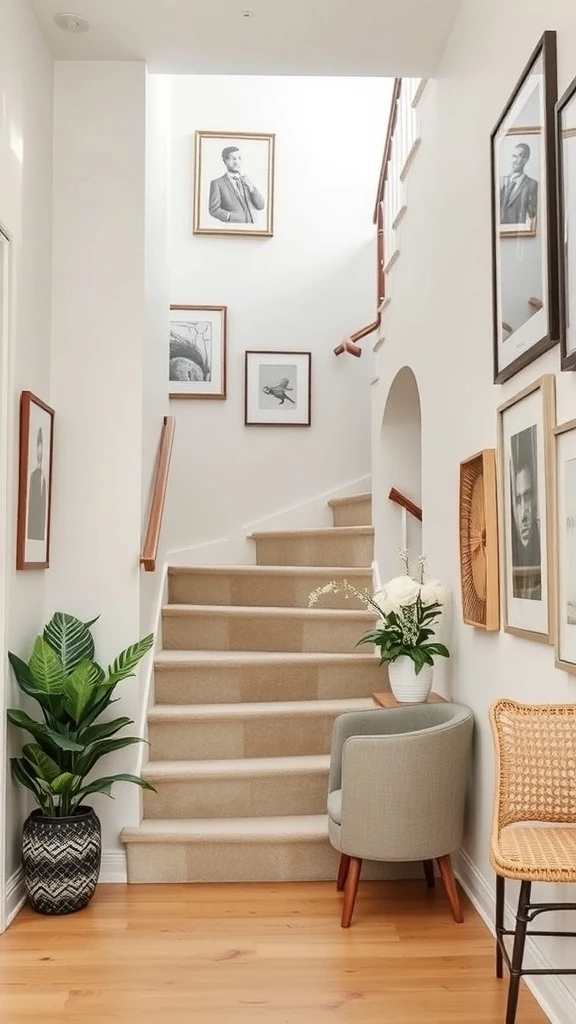
Framed artwork covering the stairwell wall from bottom to top. Black-and-white photos mixed with colorful prints. A plant at the base and a cozy chair for pausing to admire the display. Natural light washing over every frame.
Walking up these stairs feels like walking through a personal museum. Every step reveals something new to look at.
Collect a mix of art prints, personal photos, and one or two statement pieces in coordinating frame styles. Arrange them following the angle of the staircase so the display climbs with you as you go up. Hang the lowest piece at eye level from the bottom step and build upward. Mix sizes and orientations for a dynamic gallery feel. Add one green plant at the base of the staircase and use the natural light from a nearby window or skylight to illuminate the display. This gallery wall turns a plain narrow staircase into the most interesting walk in your home.
Rustic Wood That Feels Like Home
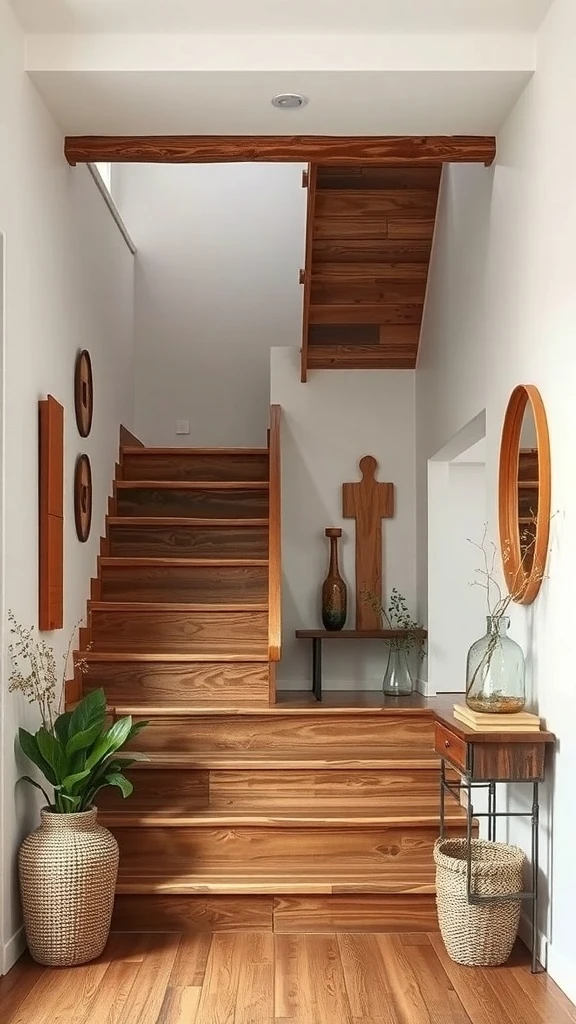
Rich reclaimed wood steps with visible grain and character. Open risers letting light pass through. A matching wooden railing that feels solid and handcrafted. A potted plant and a small lamp on a nearby table completing the scene.
The whole staircase feels warm and grounded. Like it was built by hand and has stories to tell. Rustic design at its most beautiful.
Source reclaimed or rough-sawn wood for treads with natural character marks and grain variation. Seal with a matte finish to protect the wood while keeping its raw beauty visible. Use open risers to let light through and keep the staircase feeling airy. Match the handrail to the tread wood for a cohesive rustic feel. Place a small table or a plant stand at the base with a lamp and a green plant to create a welcoming moment at the foot of the stairs.
A Textured Runner That Adds Softness
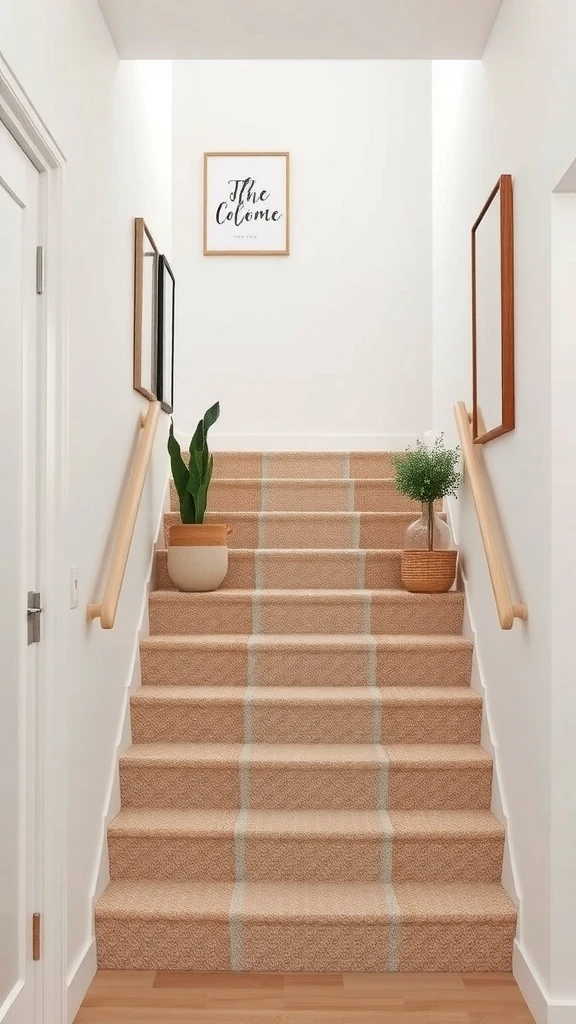
A striped carpet runner going right up the center of the stairs. The texture adds warmth underfoot and visually draws the eye upward. Bright walls and framed art alongside the runner keep the stairwell interesting.
It softens the hard surface of the steps and muffles sound. The staircase feels quieter, warmer, and more finished.
Choose a durable low-pile runner in a stripe or simple pattern that fits the width of your stairs with a few inches of wood visible on each side. Secure it with stair rods or a professional install so it stays firmly in place. Go with a neutral tone for timeless appeal or a bold pattern for personality. Add framed art on the stairwell wall to play off the runner’s color. Vacuum the runner weekly to keep it looking fresh. This one addition transforms hard wooden stairs into something soft, styled, and inviting.
A Modular Staircase You Can Customize
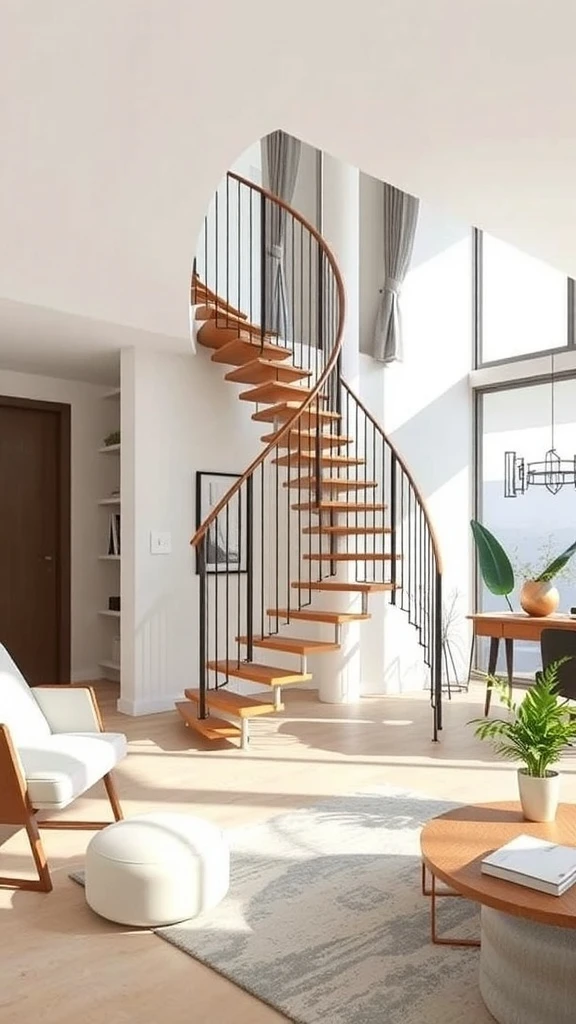
A modular spiral staircase with wooden steps and black railings that was assembled piece by piece. It fits the space perfectly because it was designed to be adjusted. The open design lets light flow through and the whole thing feels modern and intentional.
It can be taken apart and reconfigured if your space changes. That kind of flexibility is everything in a small home.
Look for modular staircase systems that come in kits with adjustable heights and angles. Choose a combination of warm wood treads and black metal framing for a modern industrial look. Assemble it yourself following the manufacturer’s guide or hire a professional for the final install. Add a plant near the base and keep the surrounding area minimal so the staircase stands out as a design piece. This modular approach gives you a custom-looking staircase at a fraction of the cost of a fully custom build.
Planters Built Right Into the Stairwell
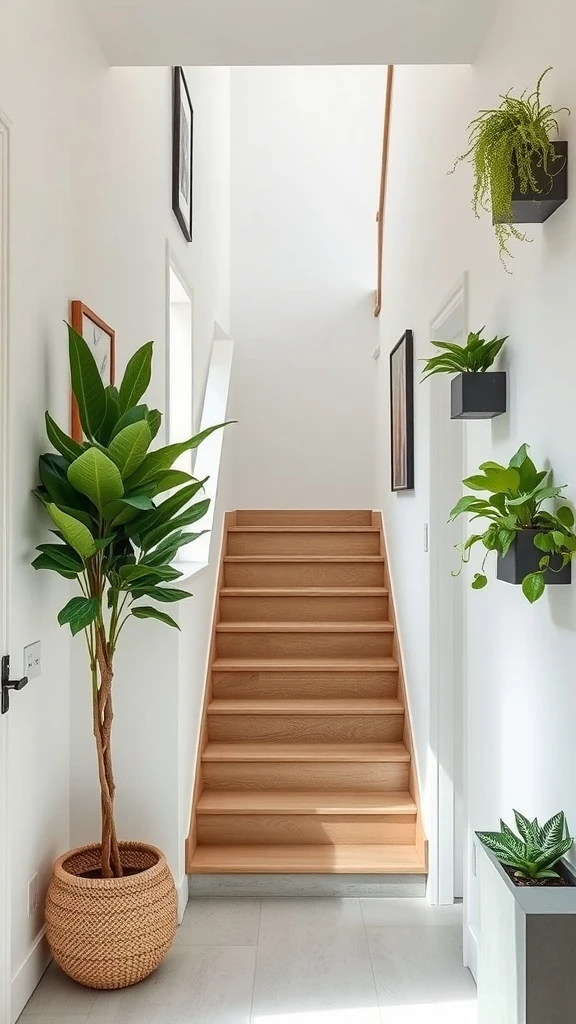
Green plants climbing alongside the staircase in wall-mounted planters and floor pots. Different varieties at different heights creating layers of lush greenery. The wooden steps and the living plants together feel like walking through a garden path inside your own home.
It brings nature right into the heart of the house and makes a narrow staircase feel alive.
Mount small wall planters at staggered heights along the stairwell wall following the incline. Use a mix of trailing and upright plants for visual variety. Place one or two floor pots on wider landings or at the base of the stairs. Choose humidity-tolerant plants since stairwells can have different air conditions than main rooms. Water on a regular schedule and rotate plants toward light when needed. This integrated green approach turns a plain narrow staircase into a living breathing feature of your home.
An Outdoor Staircase Surrounded by Nature
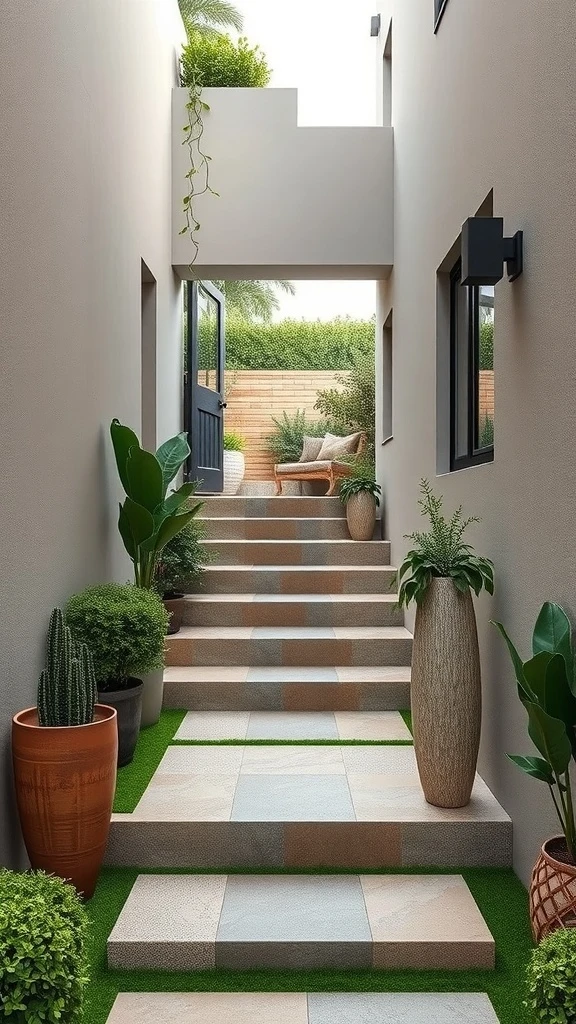
Stone steps leading upward with potted plants lining both sides. Grass or ground cover filling in around the edges softening every hard surface. The whole staircase blends into the landscape like it grew there naturally.
It feels like walking into a garden. Every step takes you deeper into green and calm. It is functional and absolutely beautiful.
Use natural stone or concrete pavers for outdoor steps that handle weather and foot traffic. Line both sides with potted plants in matching containers for a clean symmetrical look. Fill gaps between steps with low ground cover or ornamental grasses for a natural soft transition. Add outdoor solar lights along the edges for safe nighttime use. Choose plants that thrive in your local climate so the staircase stays lush year-round. This outdoor design makes arriving at your door feel like an experience not just a walk up the steps.