A small kitchen island can completely change how your kitchen works and feels. It gives you extra counter space, more storage, and a spot where people naturally gather. You do not need a huge kitchen to have one. Even a compact island makes cooking easier and the whole room more enjoyable. Here are some ideas to help you find the perfect island for your space.
Lighting Ideas for Small Kitchen Islands
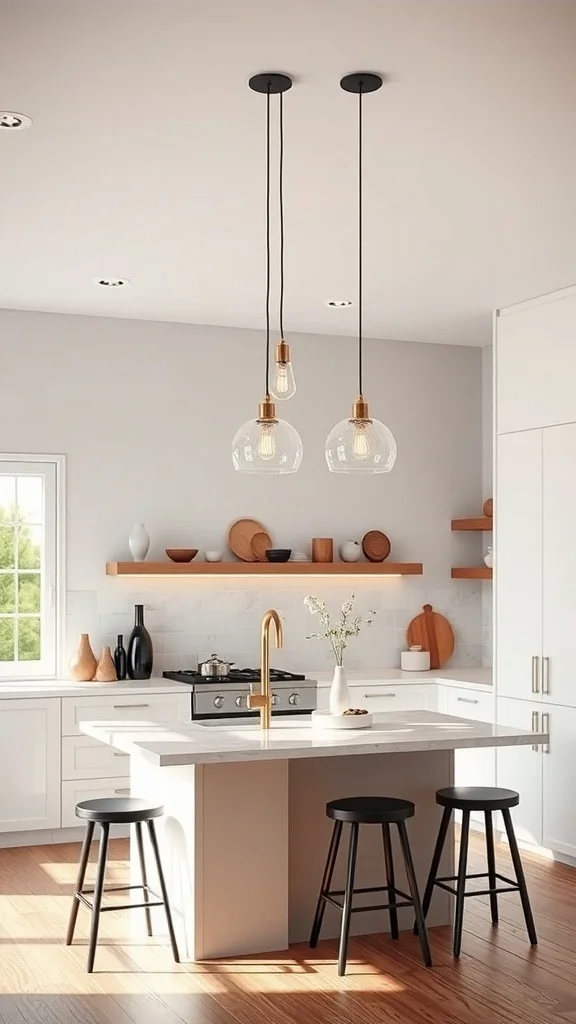
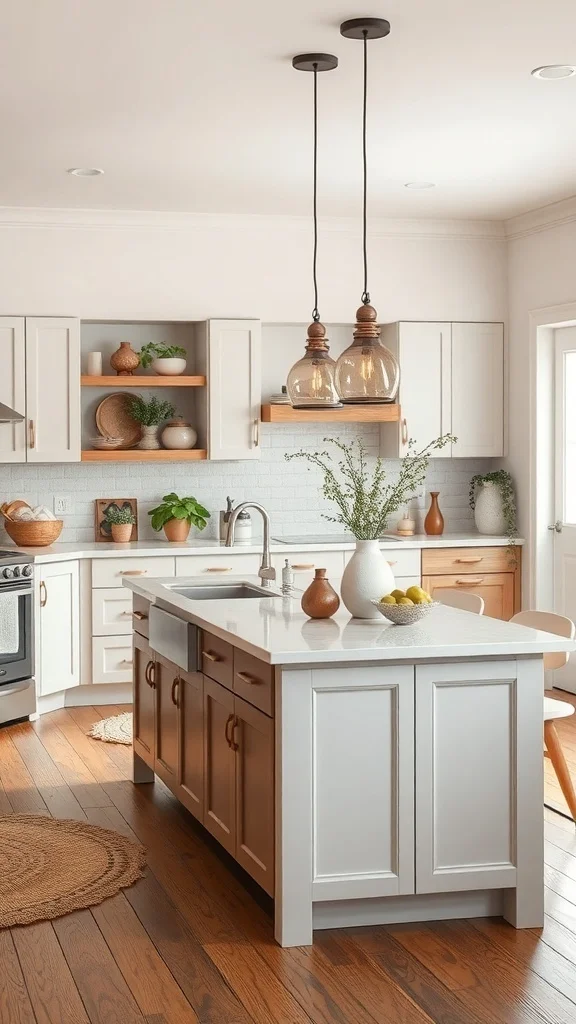
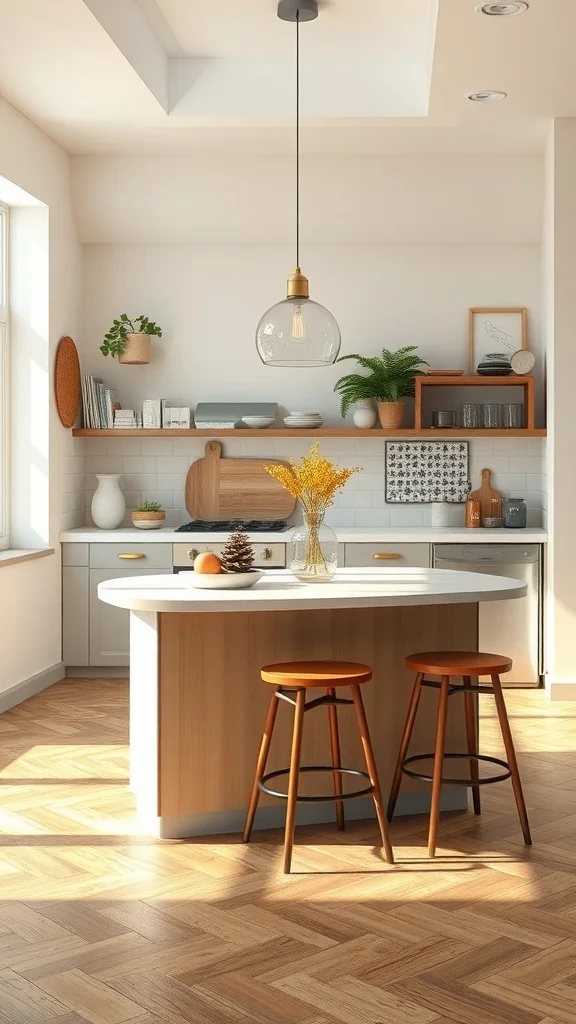
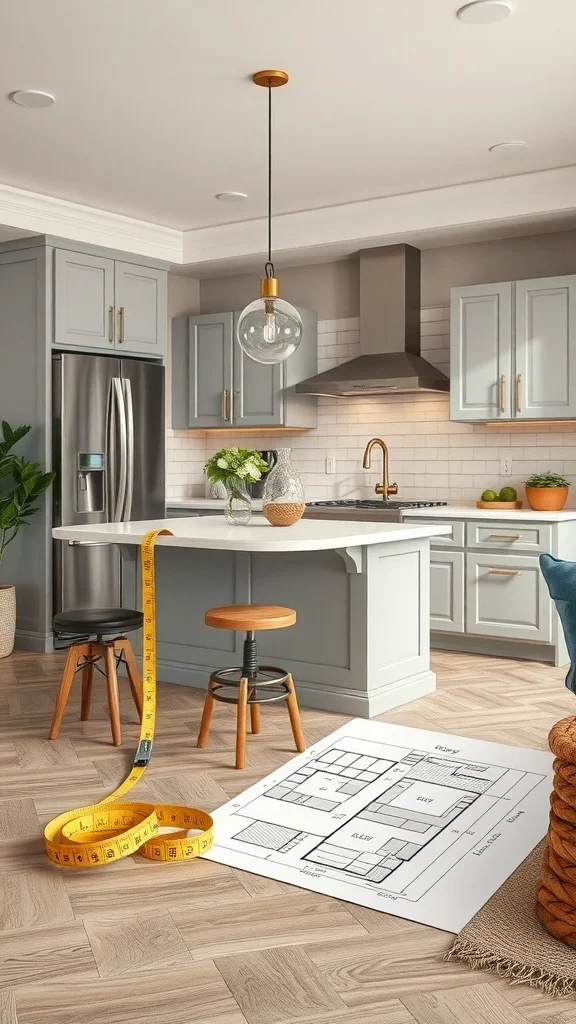
Three pendant lights hanging above the island in a perfect row. Clear glass shades letting the light pour down onto the counter. Black and gold hardware giving the fixtures a modern edge. The island glows and the whole kitchen feels warm and focused.
Good lighting turns a small island from just a surface into the centerpiece of the room. It is one of those upgrades that changes everything.
Hang two or three pendant lights evenly spaced above your island at about 30 to 36 inches from the countertop. Choose clear or open shades so the light spreads fully across the workspace. Match the fixture finish to your cabinet hardware for a pulled-together look. Add under-cabinet lighting along the main counters to brighten the surrounding area and make the whole kitchen feel larger. If you cook a lot consider adjustable pendants so you can direct the light exactly where you need it.
Maximizing Space with a Compact Island
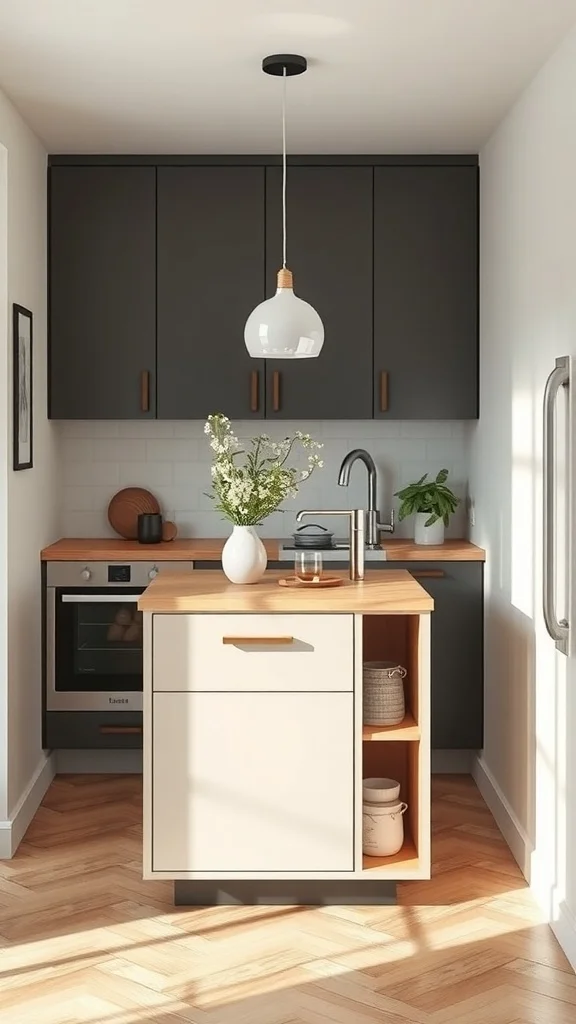
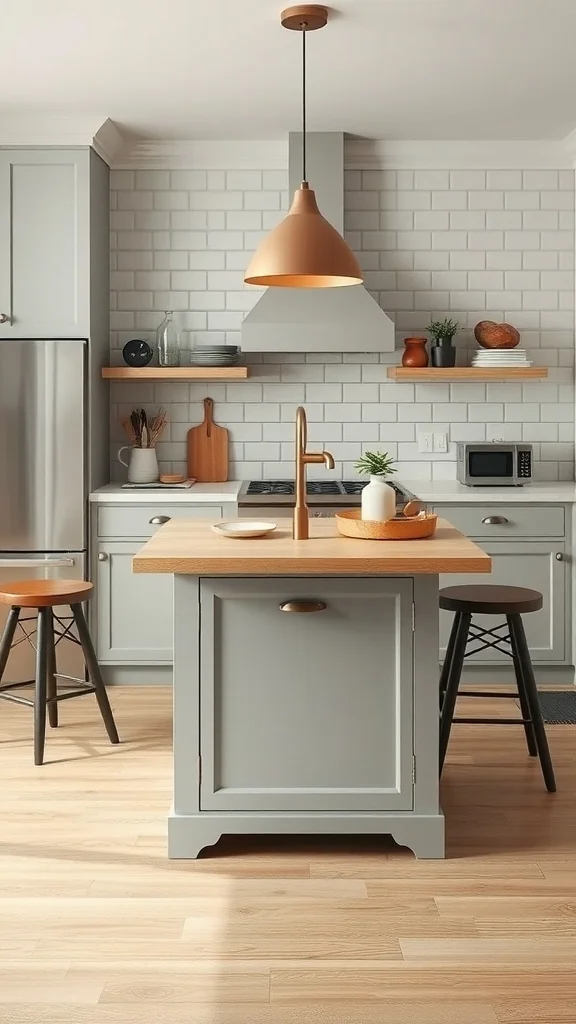
A slim island with clean lines fitting perfectly into a cozy kitchen. Shelves on the side holding dishes and everyday items. A drawer tucked in for hidden storage. A warm wood countertop catching the natural light and a small vase of flowers adding softness.
It takes up so little room but adds so much function. The kitchen feels more complete the moment this island is in place.
Measure your kitchen carefully and choose an island that leaves at least 36 inches of clearance on all sides for comfortable movement. Look for a design with both open shelves and a closed drawer so you get display and hidden storage in one piece. Choose a countertop material that contrasts slightly with your main counters for visual interest. Keep the top clear except for one or two items like a plant or a cutting board. A compact island like this gives you prep space, storage, and a casual dining spot without crowding the kitchen.
Color Schemes to Enhance Your Kitchen Island

A bold pink island standing in the middle of a warm neutral kitchen. Light wood tones and white walls framing it perfectly. The island is the star and every other color in the room supports it.
A colorful island turns your kitchen into something exciting and personal. It is one piece with one color that changes the mood of the entire room.
Choose a color for your island that contrasts with the rest of your kitchen without clashing. Bold options like deep blue, sage green, warm terracotta, or soft pink work beautifully against neutral walls and light cabinetry. Keep the countertop in a neutral tone like white or natural wood so the base color stays the focal point. Match one small accessory like a vase or a towel to the island color to tie the room together. A glossy finish makes the color pop while a matte finish gives it a softer more relaxed feel.
Choosing the Right Materials for Small Islands
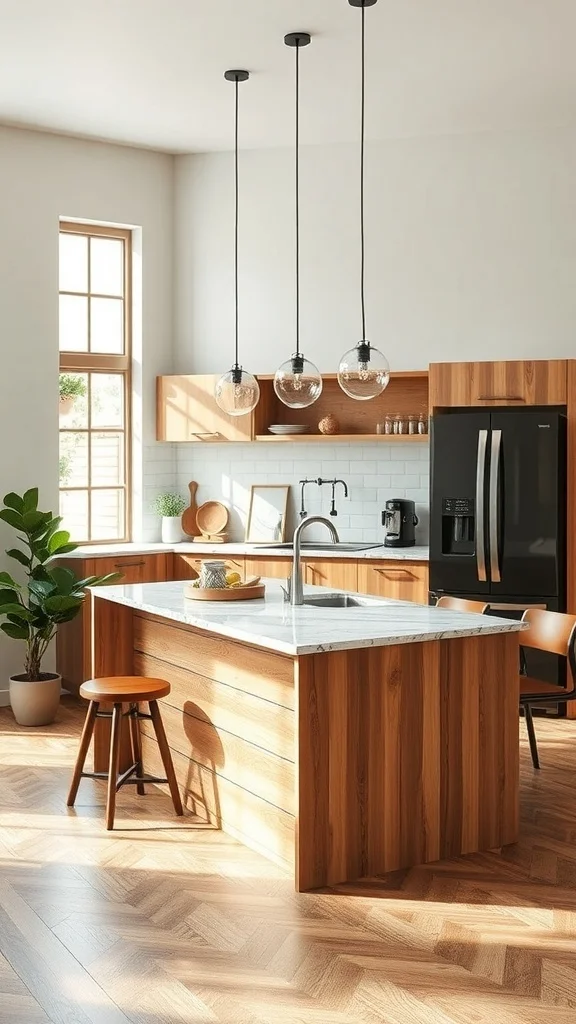
A sleek marble top sitting on warm wooden cabinetry. The veining in the marble catching the light. A herringbone floor tying the whole space together. Pendant lights above finishing the look with style.
The materials you choose define how the island looks and how long it lasts. The right combination of durability and beauty makes all the difference.
Pair a warm wood base with a stone or quartz countertop for a classic combination that balances warmth and durability. Choose a wood species that can handle daily kitchen use like oak, walnut, or maple. For the top go with marble for elegance or quartz for low-maintenance toughness. Make sure the countertop overhang is at least 10 to 12 inches if you plan to add stools for seating. Consider how the island materials work with your flooring and cabinets so the whole kitchen reads as one cohesive design.
Incorporating Seating into Your Island Design
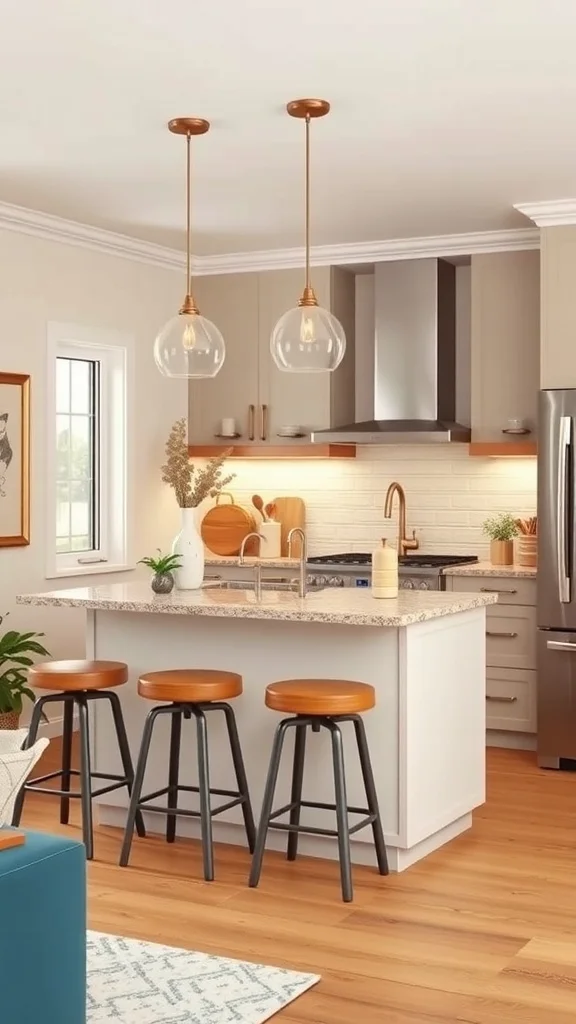
Three stools tucked under the island overhang. Warm wood seats matching the kitchen tones. Enough room for everyone to sit comfortably and chat while dinner is being made. The island becomes the social center of the kitchen.
Seating turns your island into more than a prep surface. It becomes the place where people actually want to hang out.
Choose stools that match the height of your island counter which is typically 36 inches for standard or 42 inches for bar height. Pick stools with a slim profile so they tuck completely under the overhang when not in use. Go with backless designs for tight spaces or low-back stools for added comfort. Leave about 24 inches of width per seat so everyone has enough elbow room. Stools in warm wood or metal with clean lines keep the seating looking integrated rather than added on as an afterthought.
Multi-Functional Kitchen Islands
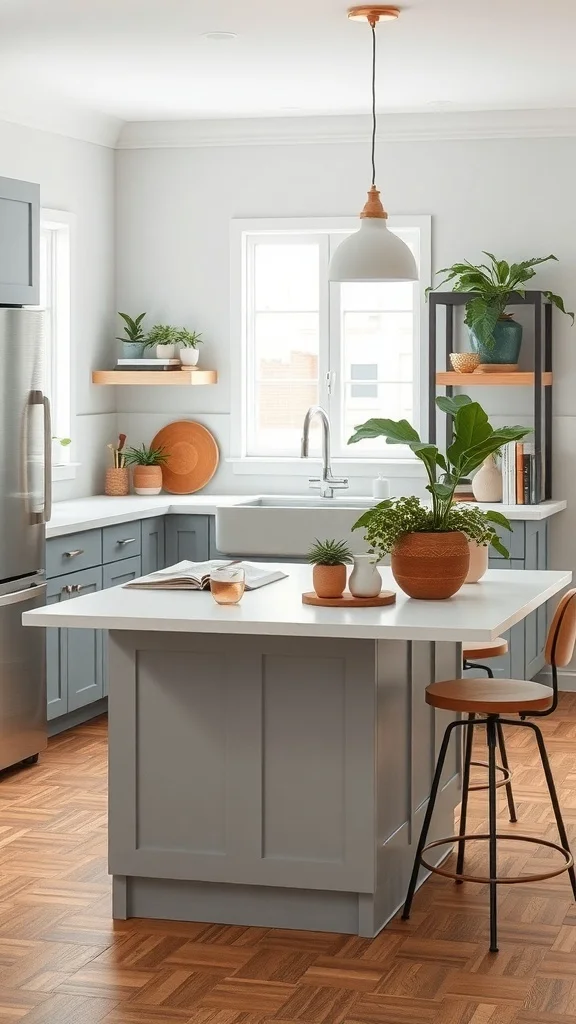
A white countertop ready for rolling dough or setting up a spread. Warm wood cabinetry with plenty of storage underneath. Open shelving above displaying plants and beautiful objects. A sink built right into the island. Pendant lights making the whole area glow.
This island does everything. Prep, cooking, storage, display, and gathering all in one piece of furniture. It is the true heart of the kitchen.
Look for an island with a combination of drawers, cabinets, and open shelving to handle different storage needs. If possible add a small prep sink so you can wash and chop in the same spot. Use the countertop for meal prep during cooking and as a serving surface when guests arrive. Mount a shelf or a small rack above for decorative items or frequently used ingredients. Pendant lights above ensure the workspace is well-lit and visually anchored. A multi-functional island replaces the need for several separate pieces and keeps the kitchen feeling open.
Integrating Appliances into Your Kitchen Island
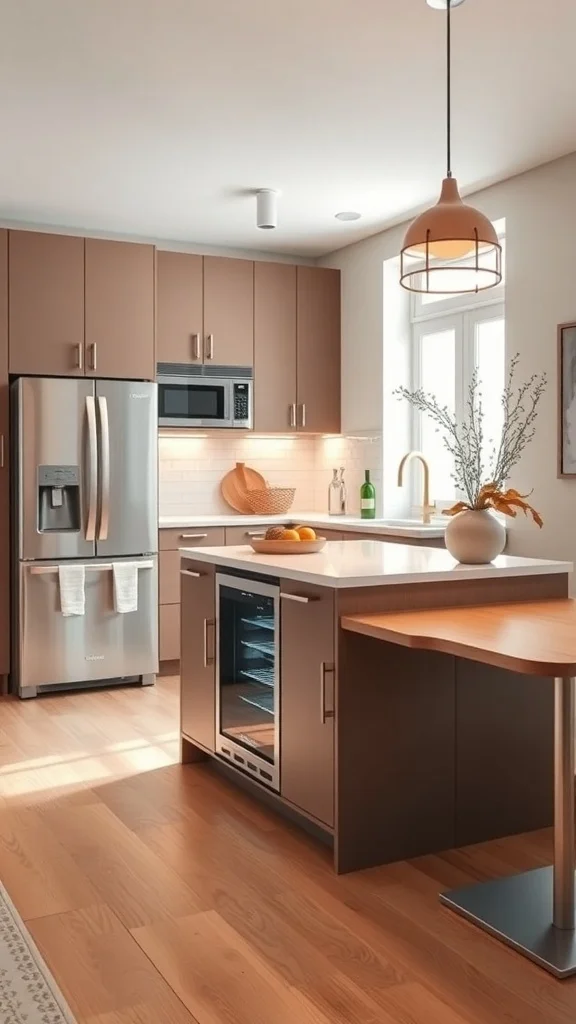
A wine cooler built right into the side of the island. Seamlessly integrated so it looks like it was always part of the design. The countertop stays clear for cooking while the appliance hides below doing its job.
Built-in appliances save counter space and give the island a custom high-end feel. Everything stays within reach without creating clutter.
Decide which appliances you use most and plan the island around them. A small wine cooler, a compact dishwasher, or a microwave drawer can all be built into the base of the island. Make sure the appliance dimensions fit the island cabinetry and that there is proper ventilation for anything that produces heat. Match the appliance panels to the cabinetry for a seamless look. Keep the countertop completely free of appliances so you have maximum workspace above while everything functional lives below.
Creative Storage Solutions for Small Islands
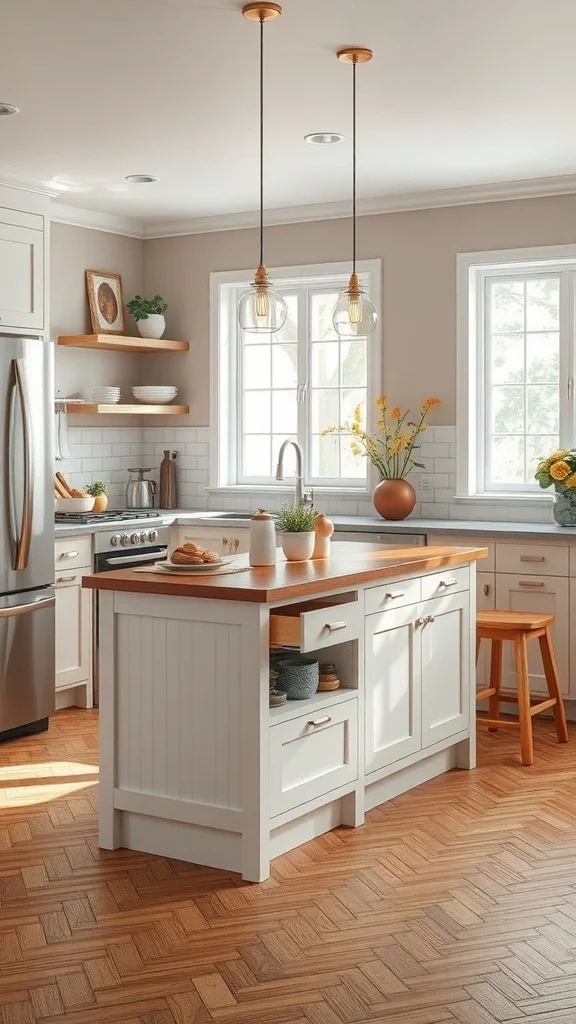
Drawers holding utensils and linens. Open shelves displaying cookbooks and baskets. A light wood top contrasting with white cabinetry below. A stool tucked underneath for casual seating. Every inch of the island working hard.
Smart storage in a small island keeps the kitchen clutter-free and makes everything easy to find during the busiest cooking moments.
Choose an island with a mix of deep drawers for pots and pans, shallow drawers for utensils, and at least one open shelf for items you reach for every day. Use decorative baskets on the open shelves to keep smaller items organized and visually neat. Keep the countertop minimal with just a cutting board or a small plant. Add hooks on the side of the island for towels or oven mitts. This layered storage approach turns a small island into the most organized piece of furniture in your kitchen.
Using an Island as a Room Divider
The island standing between the kitchen and the living area creating a natural boundary without a wall. Two wooden stools on the living side inviting people to sit and chat. A clean countertop on the kitchen side ready for prep work. The open floor plan stays open but each zone feels defined.
An island as a divider gives you separation without isolation. You cook on one side and everyone else is right there on the other.
Position the island perpendicular to the main kitchen counter so it creates a clear line between the cooking area and the living space. Add stools on the living room side so guests naturally face you while you cook. Keep the kitchen-facing side clear for prep with storage below. Choose a countertop that matches or complements both spaces so the island feels like a bridge rather than a barrier. This layout works beautifully in open floor plans where you want defined zones without closing anything off.
Using Color and Texture to Define Your Island
A light wood finish on the island base giving it warmth and character. A white countertop on top keeping things clean and bright. Sleek bar stools that complement without competing. A vase with flowers and a small decorative object finishing the scene.
The contrast between the wood grain and the smooth white surface creates visual interest that makes the island stand out. Texture and color working together quietly but powerfully.
Choose an island base in a natural wood finish with visible grain for texture and warmth. Top it with a smooth solid surface in white, light quartz, or marble for contrast. Pick stools in a material that bridges both tones like metal with wood seats or all-wood in a complementary shade. Add one decorative item on the counter like a small vase or a bowl of fruit to give the island personality. This combination of warm base and cool top makes the island feel designed and intentional.
Incorporating a Wine Rack into Your Island
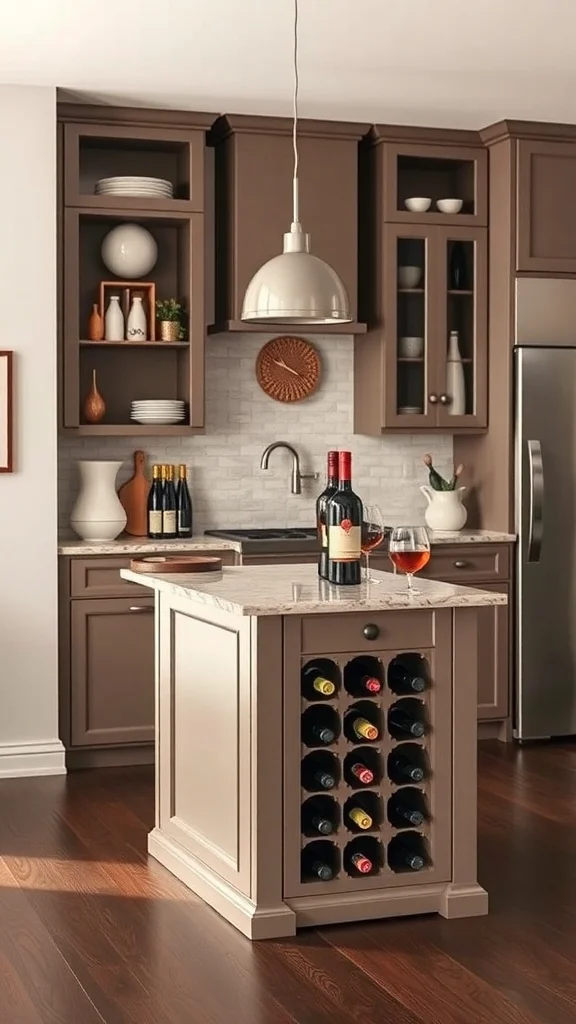
A built-in wine rack on one side of the island holding bottles in neat rows. Warm cabinetry surrounding it. An elegant marble top above. The wine is stored perfectly and always within reach when you are cooking or entertaining.
A wine rack built into the island saves space, looks beautiful, and turns your kitchen into the kind of place where people want to gather.
Choose an island design with a built-in wine rack section on one end that holds six to twelve bottles. Position the rack on the side facing the dining or living area so it doubles as a display feature. Keep the rest of the island base for standard drawers and cabinets. Use a stone or marble countertop above the wine rack for an elevated look. Make sure the rack slots are sized for standard bottles and keep the area away from heat sources like the stove. This addition gives your island a sophisticated feature that wine lovers will appreciate every day.
Incorporating a Breakfast Bar into Your Island
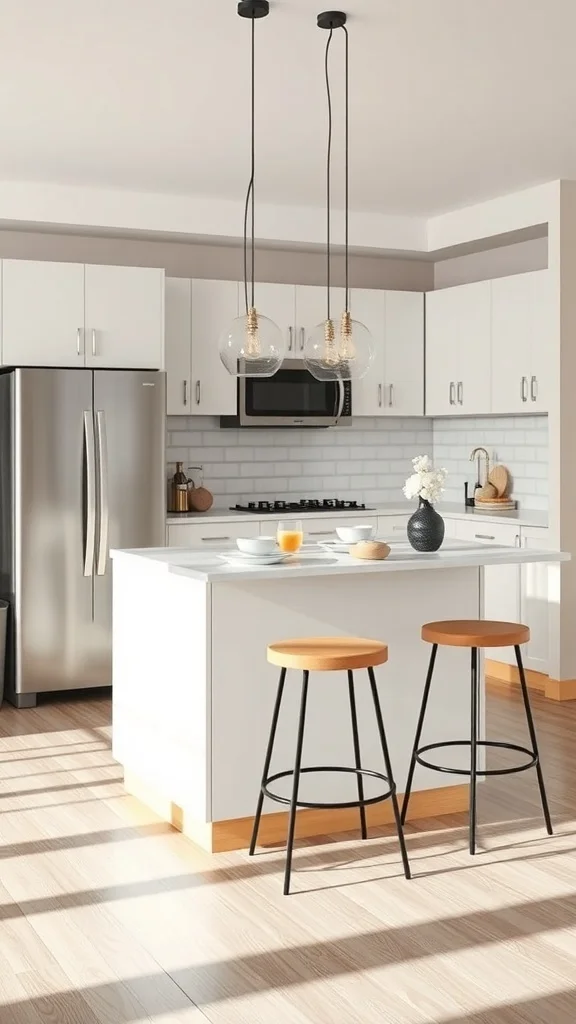
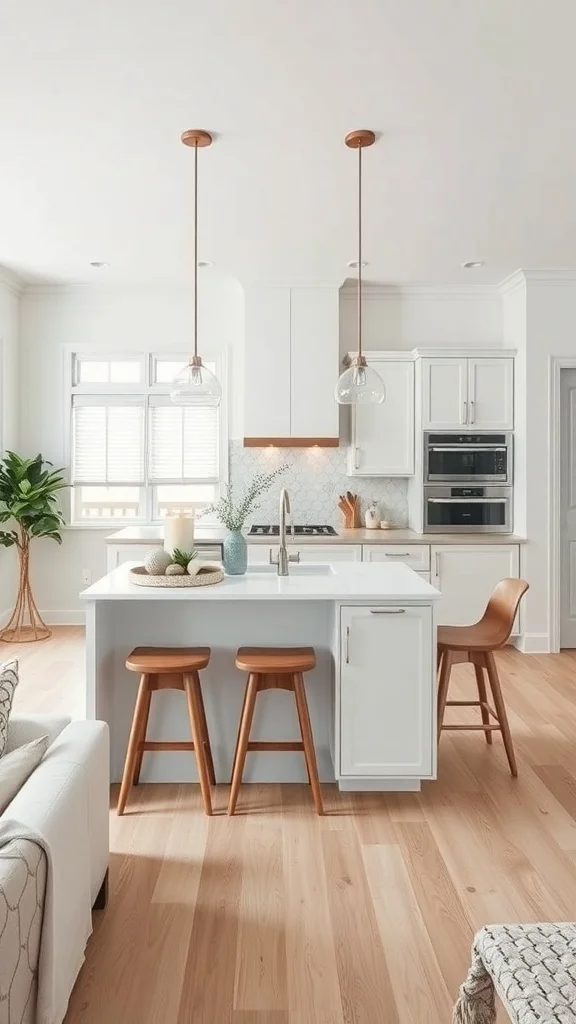
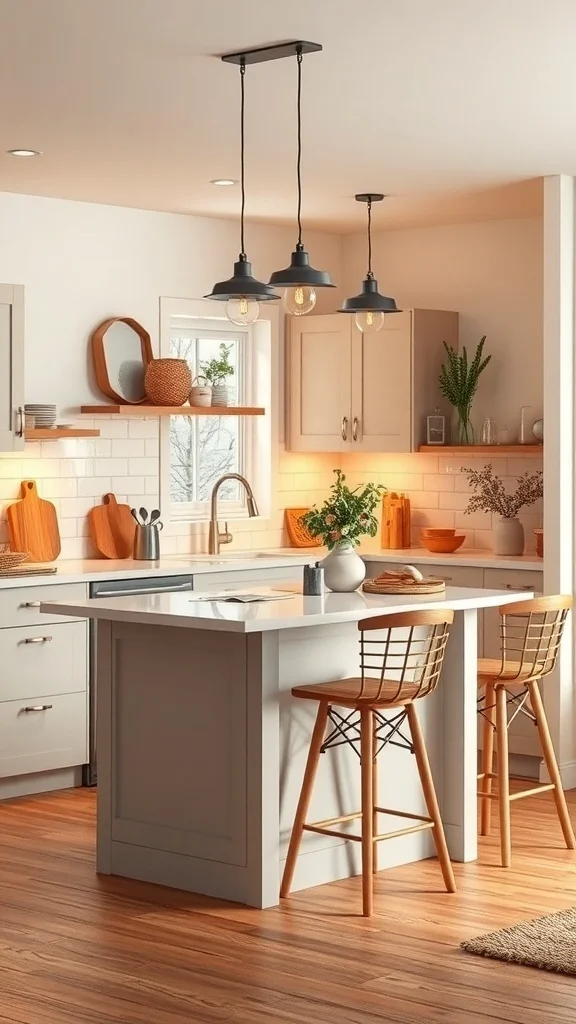
A clean white countertop with an overhang on one side. Two stylish stools with warm wooden seats pulled up. Pendant lights glowing above. This is where morning coffee happens, where quick lunches feel special, and where everyone ends up sitting during a dinner party.
A breakfast bar built into your island replaces the need for a separate dining table. It is casual, social, and perfectly practical.
Extend the countertop on one side of the island by 10 to 15 inches to create a comfortable overhang for seating. Choose counter-height stools that tuck underneath when not in use. Keep the bar side facing the living area or the window so sitting there feels pleasant. Place a small bowl of fruit or a single plant on the counter for warmth. Hang a pendant light or two directly above the bar seating to define the zone. This breakfast bar makes your kitchen island the favorite eating spot in the house.
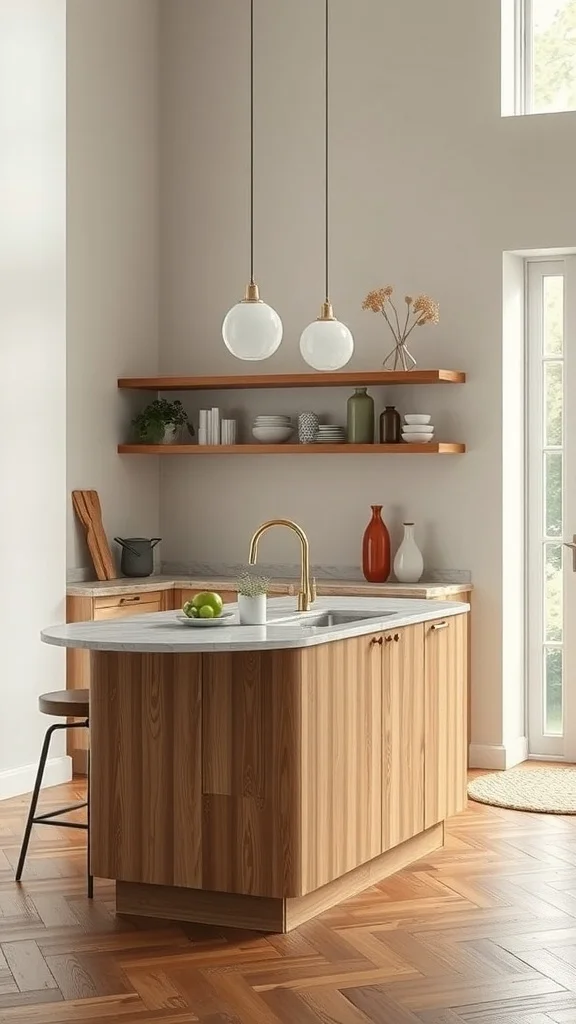
Designing an Island with a Sink
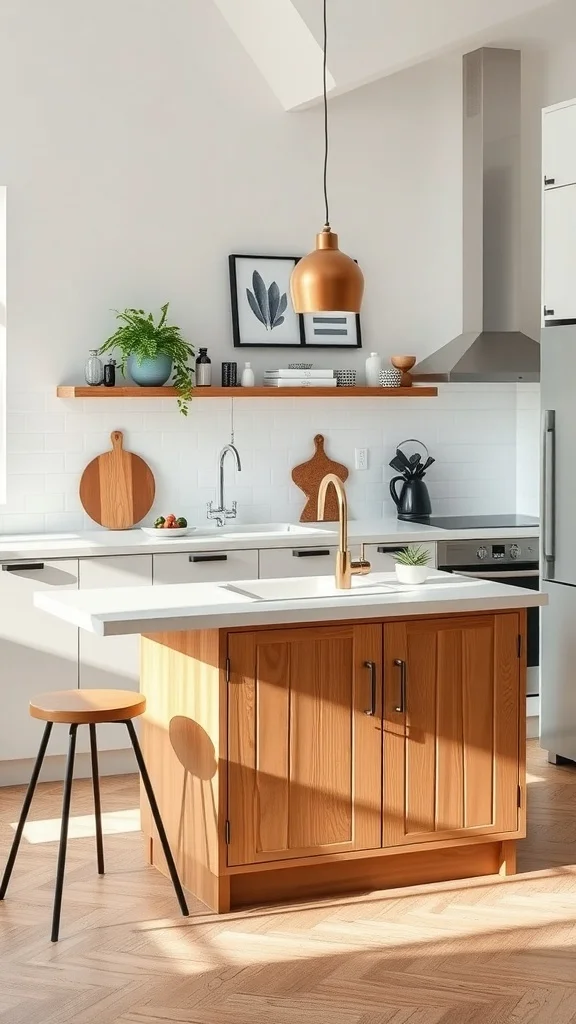
A modern sink set into the island countertop with a sleek high-arc faucet. Warm wood tones on the base. A clean white surface surrounding the basin. A pendant light above illuminating the whole workspace. Cabinets below holding everything you need.
A sink in the island changes the way you cook. You wash, chop, and prep all in the same spot without turning around. Everything flows.
Work with a plumber to run water and drainage to the island before installation. Choose a sink size that fits the countertop without overwhelming it. A single basin works best for small islands. Pick a faucet with a high arc and a pull-down sprayer for maximum function. Keep the area around the sink clear with just a small dish soap dispenser and a towel nearby. Use the cabinets below the sink for cleaning supplies. This built-in sink makes the island a true cooking workstation.
Choosing the Right Size for Your Space
A sleek island that fits perfectly into the kitchen without crowding anything. Stools tucked underneath. Enough counter space for real cooking. Enough room around it for easy movement. The proportions feel just right.
The right size island makes the kitchen work better. Too big and the room feels cramped. Too small and it does not do enough. Measuring first saves everything.
Start by measuring your kitchen floor space and leave at least 36 inches of clearance on all walkable sides of the island. For a small kitchen aim for an island between 24 and 48 inches long and 24 to 30 inches deep. If you want seating on one side add extra depth for the overhang and make sure the stools do not block the walkway when pulled out. Consider the height carefully. Standard counter height is 36 inches and bar height is 42 inches. Choose based on how you plan to use the island most. A perfectly sized island makes a small kitchen feel twice as functional.
DIY Ideas for Custom Kitchen Islands
A custom island with light gray cabinetry and a warm wood countertop. Open shelving below for cookbooks and baskets. A pendant light above pulling the look together. Everything about it feels personal and one of a kind.
Building your own island means it fits your kitchen perfectly and costs a fraction of a custom-built piece. It is a weekend project that changes your kitchen for good.
Start with a base cabinet or a sturdy table and add a wood countertop cut to size. Use reclaimed wood, butcher block, or a live-edge slab for a unique surface. Paint or stain the base in a color that complements your kitchen like soft gray, white, or a bold accent tone. Add open shelving on one side for display and closed storage on the other. Install casters if you want the island to be mobile. Finish with a pendant light above and a couple of stools. This DIY approach gives you a custom island with character and purpose.
Personalizing Your Kitchen Island with Decor
A couple of potted herbs on the counter adding green and fragrance. A pendant light that matches the style of the room. Stylish bar stools inviting people to sit. A clean countertop with just enough on it to feel warm without looking cluttered.
Personal touches turn an island from a generic kitchen feature into something that feels like yours. A few small choices make a big impact.
Place one or two small potted plants or herbs on the countertop for life and color. Add a decorative tray to corral items like salt, pepper, and olive oil. Choose a pendant light that reflects your personal style whether that is industrial, modern, or farmhouse. Pick stools that are comfortable enough for lingering and styled to match the kitchen aesthetic. Keep the surface mostly clear so it stays functional. These personal details make your island the most inviting part of the kitchen.
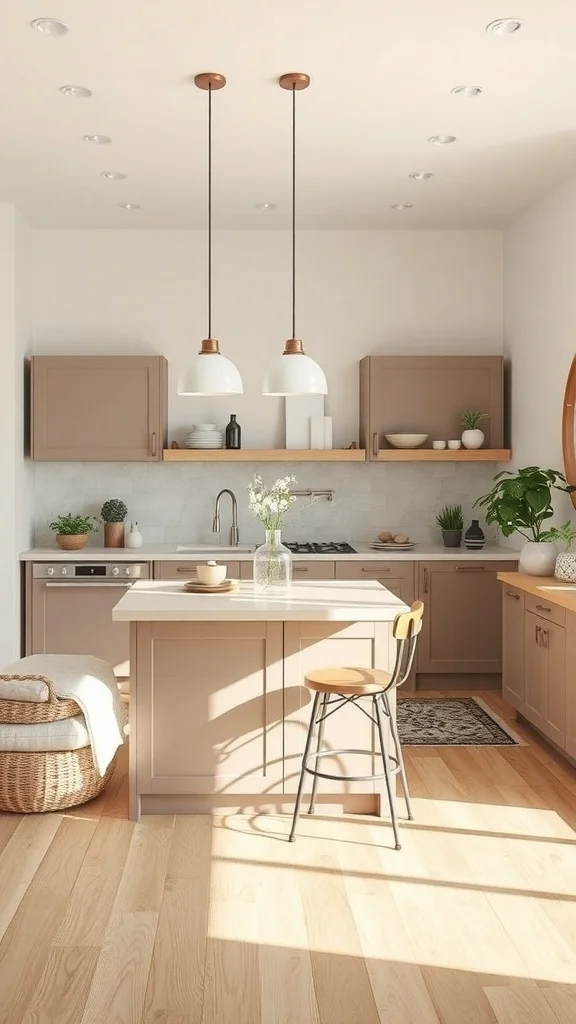
Creating a Cozy Atmosphere with Your Island
Warm wood floors. Soft lighting from above. A light-colored island with clean lines. Bar stools pulled up and ready for someone to sit. A plant on the counter. The kitchen feels like a gathering place not just a cooking space.
A cozy island invites people in. It is the reason friends drift into the kitchen during a party and never leave.
Choose warm-toned materials for the island like natural wood or a creamy painted finish. Use warm white pendant lights above instead of cool-toned fluorescents. Add a small plant or a vase of fresh flowers on the counter for life. Keep stools comfortable with cushioned seats or contoured wood. Place the island close enough to the main work area that the cook can chat with anyone sitting there. This warmth-focused approach makes the island the emotional center of the kitchen where everyone wants to be.
Sustainable Materials for Eco-Friendly Islands
A beautiful island built from natural wood with a durable stone top. Clean finishes that are safe for the home. Materials chosen for their longevity so they last for years without replacement. It looks elegant and it is kind to the planet.
Eco-friendly choices in your kitchen do not mean giving up style. Sustainable materials often look the most beautiful because they come from nature.
Choose a base made from FSC-certified wood or reclaimed lumber for an eco-conscious foundation. Top it with sustainably sourced stone, recycled glass composite, or bamboo for a durable surface. Use low-VOC paints and finishes to keep indoor air quality healthy. Look for locally made cabinetry to reduce the environmental footprint of shipping. Add a couple of plants to the countertop to echo the natural ethos. These sustainable choices create an island that feels good to use and good to live with.
Designing for Accessibility in Small Islands
An island at a comfortable height for everyone. Clear space all around for easy movement. A lightweight stool that slides in and out without effort. Good lighting above so the whole workspace is visible and safe.
Accessible design makes the kitchen work for everyone who uses it. It is thoughtful and practical and it looks just as beautiful as any other layout.
Make sure there is at least 42 inches of clearance around the island if someone uses a wheelchair or mobility aid. Choose a counter height that works for the primary users and consider a multi-level surface if different heights are needed. Use pull-out drawers instead of deep cabinets for easier access to contents. Select lightweight stools that are easy to move and tuck away. Install bright even lighting above the workspace so everything is clearly visible. Smooth countertop surfaces are easier to clean and maintain for all users. Accessible design creates a kitchen that works beautifully for every member of the family.
Incorporating Technology into Your Island
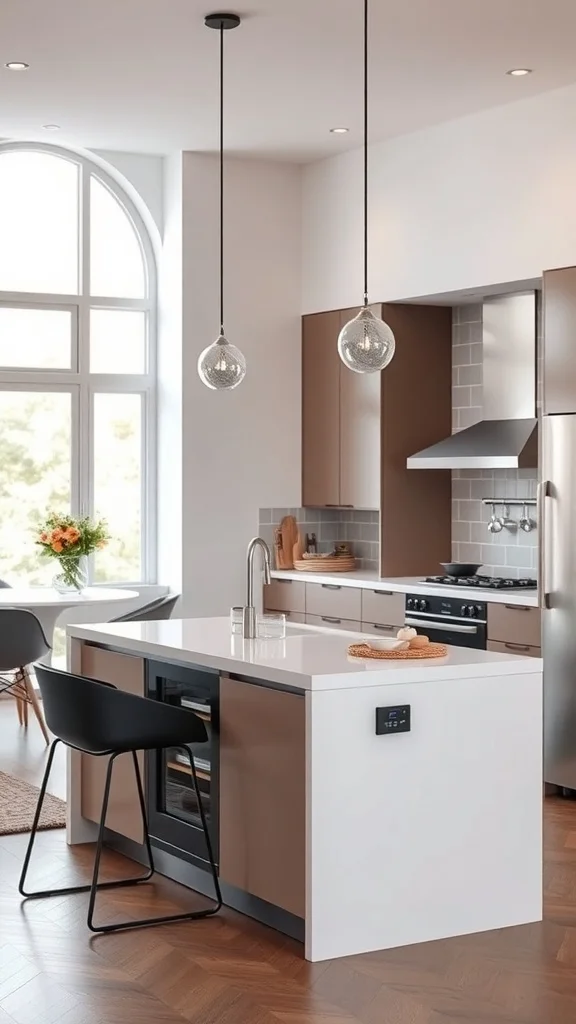
A built-in wine cooler humming quietly below the countertop. Smart pendant lights that adjust to your mood. A clean surface with no cords or clutter. The island looks simple but it is packed with modern features underneath.
Technology built into the island keeps the surface clean and the kitchen running smoothly. It is modern living hidden inside beautiful design.
Add a built-in charging station with USB ports on the side of the island so devices charge without cluttering the counter. Install a touchless faucet if your island has a sink for hands-free convenience while cooking. Consider a built-in wine cooler or a compact beverage fridge below the counter. Use smart bulbs in your pendant lights so you can adjust brightness and color temperature from your phone. Route all cords and wires through the interior of the island for a completely clean look. These tech additions make your small kitchen island feel like the smartest piece of furniture in the house.